🧢 Beautiful ✨ Detailed πŸ’ Adorable

Adorable Cat Pillow Crochet Pattern

Adorable Cat Pillow Crochet Pattern
4.0β˜… Rating
6-8 Hours Time Needed
2.8K Made This
βœ‚οΈ

Intermediate Level

Ideal for those with basic knitting experience, featuring slightly more advanced stitches and techniques to expand your skills.

⏱️

Weekend Treat

Takes 5-7 hours, making it an enjoyable project to finish over a couple of days.

🏑

Cozy Accent

A warm touch for your space that transforms ordinary corners into inviting nooks filled with handmade charm.

About This Adorable Cat Pillow Crochet Pattern

This charming cat pillow pattern combines practicality with personality, creating a functional decorative piece that doubles as the perfect cuddle companion. The striped design in light gray and gray creates visual interest while maintaining a modern, versatile aesthetic that fits any dΓ©cor style. The pattern includes detailed instructions for creating all the adorable features including triangular ears, a dimensional nose with pink accent, tiny arms and legs, and expressive black bead eyes.

Adorable Cat Pillow Crochet Pattern crochet pattern - detailed view of completed project

Using Himalaya Dolphin Baby yarn ensures the finished pillow is incredibly soft and durable, making it safe and comfortable for children while being sophisticated enough for adult spaces. The construction method creates a sturdy pillow that maintains its shape beautifully over time.

Why You'll Love This Adorable Cat Pillow Crochet Pattern

I absolutely love how this pattern brings together functionality and cuteness in the most perfect way! The satisfaction of watching those simple gray stripes transform into an adorable cat face is truly magical. What I find most rewarding is how the dimensional features like the ears and nose really bring this little guy to life - every time I see the finished pillow, it makes me smile. The versatility is incredible too; whether it's brightening up a child's room or adding a whimsical touch to grown-up spaces, this cat pillow never fails to be a conversation starter and comfort provider.

Adorable Cat Pillow Crochet Pattern step 1 - construction progress Adorable Cat Pillow Crochet Pattern step 2 - assembly progress Adorable Cat Pillow Crochet Pattern step 3 - details and accessories Adorable Cat Pillow Crochet Pattern step 4 - final assembly and finishing

Switch Things Up

I love how versatile this cat pillow pattern can be with just a few creative tweaks! Sometimes I switch up the color scheme entirely - imagine this little guy in soft pastels like baby pink and cream for a nursery, or go bold with navy and white stripes for a nautical theme. I've even made versions using variegated yarn for a more dynamic striped effect that creates beautiful color transitions.

For special occasions, I like to add seasonal touches - a tiny crocheted bow tie for the holidays, or small flower appliquΓ©s in spring colors. You could easily adapt the ears to be more pointed for a different cat breed look, or even round them out slightly for a more bear-like appearance. I've experimented with different eye placements too - slightly closer together gives a sweeter expression, while wider apart creates a more alert look.

The beauty of this pattern is that once you master the basic construction, you can let your imagination run wild with colors, textures, and little personalized details that make each pillow truly unique!

Common Mistakes & How to Fix Them

βœ— Forgetting to mark round beginnings with pins can lead to uneven stripe patterns and misaligned features βœ— Stuffing too loosely results in a floppy pillow that loses its shape and doesn't provide proper support βœ— Placing ears incorrectly by not ensuring the pillow corner sits properly inside the ear during attachment βœ— Rushing the color changes between gray and light gray can create uneven transitions and messy stripe lines

Adorable Cat Pillow Crochet Pattern

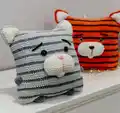
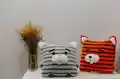
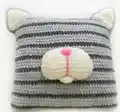
Create this irresistibly cute and cuddly cat pillow that brings comfort and charm to any space! This striped design features adorable details like triangular ears, a sweet pink nose, and tiny paws that make it perfect for children and adults alike. The finished pillow measures approximately 30x33 centimeters and uses soft plush yarn for ultimate snuggle-ability. Whether you're decorating a nursery, adding personality to a living room, or making a heartfelt gift, this cat pillow pattern combines simple techniques with delightful results that will capture hearts and bring smiles to faces.

Intermediate 6-8 Hours

Materials Needed for Adorable Cat Pillow Crochet Pattern

β€” Main Fabric

  • 01
    Himalaya Dolphin Baby plush yarn (120m/100g) in light gray (2 skeins), gray (1 skein), white (1 skein)
  • 02
    Small amounts of pink yarn for nose accent
  • 03
    Small amounts of black yarn for eyebrow details
  • 04
    Alternative: YarnArt Dolce or similar plush yarn in equivalent colors

β€” Tools Required

  • 01
    Crochet hook size 3.5-4.5mm
  • 02
    Hollowfiber stuffing or polyester fill
  • 03
    Black beads or buttons for eyes (22mm)
  • 04
    Tapestry needle for sewing
  • 05
    Stitch markers or pins
  • 06
    Scissors
  • 07
    Pink embroidery thread or yarn for nose details

Progress Tracker

0% Complete

β€” Pillow Body :

Round 1 :

90 ch, connect with the first loop

Round 2-3 :

90 sc

Round 4 :

gray: 90 sc {90}

Round 5-7 (3 rounds) :

light gray: 90 sc {90}

Round 8 :

gray: 90 sc {90}

Round 9-11 (3 rounds) :

light gray: 90 sc {90}

Round 12 :

gray: 90 sc {90}

Round 13-15 (3 rounds) :

light gray: 90 sc {90}

Round 16 :

gray: 90 sc {90}

Round 17-19 (3 rounds) :

light gray: 90 sc {90}

Round 20 :

gray: 90 sc {90}

Round 21-23 (3 rounds) :

light gray: 90 sc {90}

Round 24 :

gray: 90 sc {90}

Round 25-27 (3 rounds) :

light gray: 90 sc {90}

Round 28 :

gray: 90 sc {90}

Round 29-31 (3 rounds) :

light gray: 90 sc {90}

Round 32 :

gray: 90 sc {90}

Round 33-35 (3 rounds) :

light gray: 90 sc {90}

Round 36 :

gray: 90 sc {90}

Round 37-39 (3 rounds) :

light gray: 90 sc {90}

Info :

Leave a long thread and sew the top of the pillow. Fill tightly and evenly. Fill the angles well. Sew the bottom and hide thread inside.

β€” Ears (2 pieces) :

White ear piece :

Use white plush yarn

Row 1 :

Make 11 ch

Row 2 :

Begin from second loop from hook: 10 sc, 1 ch, turn

Row 3 :

Begin from second loop from hook: dec, 6 sc, dec, 1 ch, turn

Row 4 :

Begin from second loop from hook: dec, 4 sc, dec, 1 ch, turn

Row 5 :

Begin from second loop from hook: dec, 2 sc, dec, 1 ch, turn

Row 6 :

Begin from second loop from hook: dec, dec, 1 ch, turn

Row 7 :

Begin from second loop from hook: dec

Info :

Crochet around the ear: Make 7 sc, inc in left bottom angle, 8 sc, inc in right bottom angle, 8 sc, sl st

Gray ear piece :

Use light gray yarn and repeat rows 1-7 as above, then crochet around

Assembly :

Put white and gray pieces together, crochet with gray yarn: 10 sc, inc (upper corner), inc, 10 sc. Leave long thread for sewing.

β€” Nose :

Round 1 :

Make 14 ch

Round 2 :

Begin from second loop from hook: 12 sc, 3 sc in 1 loop, 12 sc {27}

Round 3 :

3 in 1 loop, 12 sc, inc, inc, inc, 12 sc {33}

Round 4 :

inc, inc, inc, 13 sc, inc, sc, inc, sc, inc, 12 sc {39}

Round 5 :

sc, inc, sc, inc, sc, inc, 13 sc, inc, 2 sc, inc, 2 sc, inc, 13 sc {45}

Round 6 :

8 sc, hdc, (dc) – repeat 5 times, hdc, sc, hdc, (dc) – repeat 5 times, hdc, 22 sc {45}

Round 7 :

10 sc, inc, 10 sc, inc, 23 sc {45}

β€” Lip :

Round 1 :

6 sc in magic ring {6}

Round 2 :

(inc) – repeat 6 times {12}

Info :

Sew 2 halves with 6 sc. Leave long thread for sewing.

β€” Legs (2 pieces) :

Round 1 :

6 sc in magic ring {6}

Round 2 :

(inc) – repeat 6 times {12}

Round 3 :

(1 sc, inc) – repeat 6 times {18}

Round 4 :

18 sc

Info :

Leave long thread for sewing

β€” Arms (2 pieces) :

Round 1 :

6 sc in magic ring {6}

Round 2 :

(inc) – repeat 6 times {12}

Round 3 :

12 sc

Info :

Leave long thread for sewing

Assembly Instructions

  • Sew ears to the top corners of the pillow, ensuring pillow corners sit inside the ear pieces for proper shaping
  • Attach nose between rounds 12-22, stuff firmly, and add pink yarn accent for the center nose detail
  • Sew the lip piece below the nose and secure thread inside the pillow
  • Fill arms lightly and attach between rounds 11-15 on the sides of the pillow
  • Attach legs to the bottom portion of the pillow and secure all threads inside
  • Sew black bead eyes between rounds 24-25 with 11 single crochet spaces between them
  • Embroider black eyebrows above the eyes using black yarn for facial expression

Important Notes

  • πŸ’‘Use stitch markers to keep track of round beginnings, especially during color changes between gray stripes
  • πŸ’‘Stuff the pillow firmly but not too tightly to maintain shape while keeping it comfortable for use
  • πŸ’‘Ensure all thread ends are properly secured and hidden inside the pillow for a clean finish
  • πŸ’‘Pin all pieces in place before sewing to ensure proper positioning and symmetry
  • πŸ’‘When changing colors, carry the unused yarn along the inside to avoid cutting and weaving in multiple ends

This delightful Cat Pillow pattern brings together comfort and cuteness in the most wonderful way! The striped design creates a modern yet timeless look that works beautifully in any room, while the sweet facial features and tiny paws add personality that makes everyone smile. Whether you're creating a special gift for a cat lover or adding a touch of whimsy to your own space, this pillow is sure to become a cherished favorite. The soft plush yarn makes it perfect for snuggling, and the sturdy construction ensures it will bring joy for years to come. Happy crocheting! 🧢✨

You ask,

we answer.

FAQs

Can I use different yarn than Himalaya Dolphin Baby?

Yes! You can substitute with YarnArt Dolce or any similar plush/velvet yarn. Just ensure your gauge matches by adjusting hook size if needed, and the finished size may vary slightly.

How do I keep my stripes even and aligned?

Use stitch markers at the beginning of each round and count carefully. Don't pull too tight when changing colors, and keep consistent tension throughout the project.

Can I make this pillow larger or smaller?

Absolutely! To make it larger, increase your starting chain length (try 120 ch instead of 90) and add proportionally more rounds. For smaller, start with 60-70 ch and reduce rounds accordingly.

What's the best way to attach the facial features securely?

Use strong thread and sew through multiple layers, knotting securely inside the pillow. For safety with young children, consider embroidering eyes instead of using beads.

How should I care for the finished pillow?

Hand wash gently in cool water with mild detergent, squeeze out excess water (don't wring), and lay flat to dry. The plush yarn maintains its softness best with gentle care.