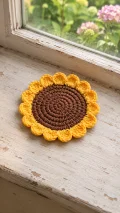
About This Crochet Sunflower Coaster Pattern
This original sunflower coaster pattern is inspired by the pictured flower, with a dark brown circular center surrounded by rounded golden petals. The center grows in continuous single crochet rounds, creating a dense surface for a mug, while groups of double crochet stitches form the scalloped edge. Each petal is worked directly into the final center round, so there are no separate pieces to sew together. Smooth cotton helps show the stitches and can absorb small drips; beginners will practice a magic ring, increases, color changes, and working several stitches into one stitch.
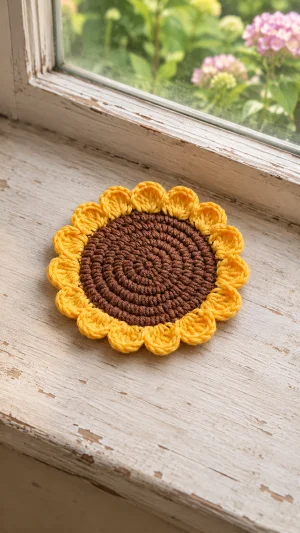
The center should be wide enough to support your cup before you add the decorative petals, so check it against the base of your favorite mug. Yarn thickness, hook size, and tension affect the finished dimensions, and a gentle damp blocking can help the petals lie neatly.
Why You'll Love This Crochet Sunflower Coaster Pattern
I love how this sunflower turns a small amount of brown and yellow yarn into something useful for a coffee break. The center gives you a soothing rhythm of single crochet stitches, and its increasing rounds offer a manageable way to practice counting without keeping track of a complicated repeat. Once the circle is finished, the yellow shells bring the flower to life in one satisfying round. I also like that the petals are attached as you crochet, leaving only a few yarn ends to secure when the hook work is done. Make a single coaster for your desk, coordinate a set for a breakfast table, or pair one with a favorite mug for a thoughtful handmade gift. A little time spent shaping the petals helps the finished flower sit neatly.
Switch Things Up
I would start by playing with the center color: deep chocolate gives the petals a strong contrast, while warm tan creates a softer sunflower for a neutral table. For the petals, I could choose mustard for an autumn look or a lighter yellow for a spring setting, keeping the same stitch sequence so the scallops retain their shape. A coordinated set could use one brown center shade throughout and a different yellow for each coaster, making individual drinks easy to identify. I would keep both colors in a similar yarn weight and fiber, because a much thicker petal yarn can crowd the edge or change how the coaster lies. Variegated cotton is another option for subtle color shifts, although short color changes may make the individual stitches harder to see.
For a larger or smaller coaster, I would first try a different yarn weight with a suitable hook and make the pattern exactly as written, then check the center against the intended cup. A firmer fabric can be useful under a mug, so I would choose a hook that gives close, even stitches without making the work difficult to handle. For a gift set, I could tie several finished flowers together with a reusable ribbon and add care instructions based on the yarn label. If I wanted a more relaxed shape, I would dampen the finished coaster and arrange the petals gently before letting it dry flat; pulling hard could distort the center. Whatever colors or yarn I choose, I would preserve the 48-stitch final center and the four-stitch repeat around its edge, which keeps all 12 petals evenly spaced.
Common Mistakes & How to Fix Them
✗ A hole in the middle can appear if the magic ring is left loose. Pull the starting tail firmly after the first round, then check that the center closes without puckering.✗ A cupped brown center often means increases were missed or tension is too tight. Count each round, undo any errors, and check that the circle rests reasonably flat before continuing.✗ A wavy center can result from adding too many increases. Recount the stitches against the round total, correct any extras, and lay the circle flat to check its edge.✗ Uneven petals can occur when a skipped stitch or shell is overlooked. Count four center stitches for each repeat and check that 12 petals fit around the complete edge.✗ A gap at the color change can show if the yellow yarn is joined loosely. Secure the first slip stitch, leave a tail for weaving, and inspect the join after completing the petals.✗ Curling petals may come from tight slip stitches or uneven tension. Loosen the anchoring stitches as you work, then gently shape the finished petals and check whether they lie flat.✗ Loose ends can work free with washing and use. Weave each tail through several stitches on the back in more than one direction, then lightly tug the fabric to check that it holds.