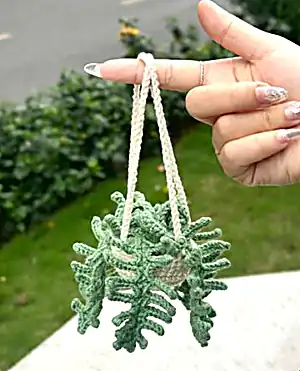
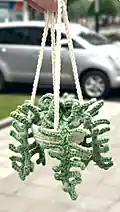
Create your own adorable hanging fern plant with this charming crochet pattern! This delightful project features a beautifully crafted beige pot filled with realistic fern leaves and delicate fiddleheads, complete with hanging cords for display. Perfect for adding a touch of greenery to any space, this pattern combines simple techniques with stunning results that will bring natural beauty to your home decor.
Progress Tracker
0% Complete
— Pots (beige) :
Row 1 :
Magic ring, chain 1, 10SC
Row 2 :
chain 1, (1 single crochet, 1 increase) 5 times (15sts)
Row 3 :
chain 1, (2 single crochet, 1 increase) 5 times (20sts)
Row 4 :
chain 1, (3 single crochet, 1 increase) 5 times (25sts)
Row 5 :
chain 1, (4 single crochet, 1 increase) 5 times (30sts)
Row 6 :
chain 1, (5 single crochet, 1 increase) 5 times (35sts)
Row 7-10 :
chain 1, 35 single crochet (35sts)
— Circle (in green) :
Row 1 :
Magic Ring, chain 2, 10 double crochet (10sts)
Row 2 :
chain 2 10 double crochet inc (20sts)
Row 3 :
chain 2 (1 double crochet, 1 increase) 10 times (30sts)
Row 4 :
chain 1 (5 single crochet, 1 increase) 5 times
— Hanging (make 2) :
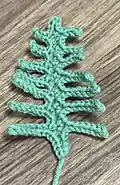
— Leaf (in green) (make 5) :
Instructions :
make a slip knot, 27ch
Step 1 :
hook in 2rd sts, 4 sl st
Step 2 :
1SC, 8ch. hook in 2rd, 7sl st, 1SC
Step 3 :
1sl st, 1SC, 8ch. hook in 2rd, 7sl st, 1SC
Step 4 :
1sl st, 1SC, 8ch. hook in 2rd, 7sl st, 1SC
Step 5 :
1sl st, 1SC, 7ch. hook in 2rd, 6sl st, 1SC
Step 6 :
1sl st, 1SC, 7ch. hook in 2rd, 6sl st, 1SC
Step 7 :
1sl st, 1SC, 6ch. hook in 2rd, 5sl st, 1SC
Step 8 :
1sl st, 1SC, 5ch. hook in 2rd, 4sl st, 1SC
Step 9 :
1sl st, 1SC, 4ch. hook in 2rd, 3sl st, 1SC
Step 10 :
2sl st 1ch 2 sl st
Step 11 :
1SC 4ch. hook in 2rd, 3sl st, 1SC
Step 12 :
1sl st, 1SC, 5ch. hook in 2rd, 4sl st, 1SC
Step 13 :
1sl st, 1SC, 6ch. hook in 2rd, 5sl st, 1SC
Step 14 :
1sl st, 1SC, 7ch. hook in 2rd, 6sl st, 1SC
Step 15 :
1sl st, 1SC, 7ch. hook in 2rd, 6sl st, 1SC
Step 16 :
1sl st, 1SC, 8ch. hook in 2rd, 7sl st, 1SC
Step 17 :
1sl st, 1SC, 8ch. hook in 2rd, 7sl st, 1SC
Step 18 :
4sl st, (do not cut off this tail just yet)
— Fiddlehead :
Instructions :
slip knot, 21ch. hook in 2rd sts
Step 1 :
12SC, 8HDC, (do not cut off this tail just yet)
This delightful fern plant car pattern brings the peaceful beauty of nature into your home without any maintenance required! The combination of realistic fern fronds and curled fiddleheads creates a stunning hanging display that adds life to any corner. I love how this pattern transforms simple yarn into something so lifelike and charming. Whether you're decorating your own space or creating a thoughtful gift, this hanging fern will bring joy for years to come. 🌿 Happy crocheting! 🧶✨