๐Ÿงถ Beautiful โœจ Detailed ๐Ÿ’ Adorable

Link from Zelda Crochet Amigurumi Pattern

Link from Zelda Crochet Amigurumi Pattern
4.5โ˜… Rating
8-10 Hours Time Needed
4.1K Made This
โœ‚๏ธ

Advanced Level

Designed for experienced knitters, these patterns involve intricate designs and complex techniques to challenge and inspire.

โฑ๏ธ

All-Day Adventure

Requires 8-10 hours, ideal for a full day of immersive knitting.

๐Ÿงธ

Whimsical Buddy

Playful characters full of personality, designed to spark imagination and become cherished playtime favorites.

About This Link from Zelda Crochet Amigurumi Pattern

This remarkable Link amigurumi pattern is a tribute to Nintendo's beloved Legend of Zelda series, featuring meticulous attention to every detail that makes Link instantly recognizable. The pattern includes his classic green tunic with brown leather belt system, iconic pointed cap that sits perfectly on his golden hair, and his essential adventuring gear. The construction involves sophisticated color work and shaping techniques to achieve Link's heroic proportions and authentic costume elements, including textured sleeves, detailed boots with decorative stitching, and carefully crafted facial features.

Link from Zelda Crochet Amigurumi Pattern crochet pattern - detailed view of completed project

What sets this pattern apart is the inclusion of Link's legendary equipment - a functional Master Sword created with innovative wire-hammering techniques for a realistic blade, and the distinctive Hylian Shield with its iconic blue and grey design. The pattern uses advanced construction methods and includes detailed photo tutorials for the most challenging sections.

Why You'll Love This Link from Zelda Crochet Amigurumi Pattern

I'm absolutely thrilled by how this pattern captures the essence of one of gaming's most beloved characters! What excites me most is the incredible attention to detail - from the way Link's hair cascades naturally from under his cap to the authentic leather belt system that crosses his chest. The innovative sword-making technique using hammered wire is pure genius and creates such a realistic weapon that Link can actually hold. I love how this pattern challenges advanced crocheters with techniques like the intricate shield construction and the complex hair styling that gives Link his signature adventurous look. Every element works together to create a truly heroic figure that any Zelda fan would treasure.

Link from Zelda Crochet Amigurumi Pattern step 1 - construction progress Link from Zelda Crochet Amigurumi Pattern step 2 - assembly progress Link from Zelda Crochet Amigurumi Pattern step 3 - details and accessories Link from Zelda Crochet Amigurumi Pattern step 4 - final assembly and finishing

Switch Things Up

I absolutely love customizing this Link pattern to represent different versions from throughout the Zelda series! For Breath of the Wild Link, I've experimented with a more weathered blue tunic using variegated yarn, and added tiny crocheted pouches to his belt for that survival aesthetic. The Twilight Princess version looks amazing with darker, more muted greens and a slightly longer tunic silhouette.

For seasonal variations, I've created a winter Link with a white and blue color scheme, complete with tiny snowflake embroidery on his tunic. A steampunk Link using bronze and copper metallic threads creates a fascinating alternate universe version, while a modern Link in casual clothes - jeans and a green hoodie - makes for a fun contemporary twist.

The accessories are endlessly adaptable too - I've made versions with different shields inspired by various Zelda games, multiple swords from throughout the series, and even tiny bottles and heart containers as additional props. The hair can be styled differently to match various game interpretations, and adding small LED lights inside the shield creates a magical glowing effect that's absolutely stunning in dim lighting!

Common Mistakes & How to Fix Them

โœ— Not maintaining proper stitch tension when switching between colors, which can create gaps in Link's tunic and affect the overall appearance โœ— Forgetting to stuff the legs firmly before joining to the body, resulting in a wobbly figure that won't stand properly โœ— Misaligning the arms during attachment, which affects Link's proportions and his ability to hold his weapons correctly โœ— Rushing the hair construction without following the detailed strand placement guide, leading to an unrecognizable hairstyle that doesn't match Link's iconic look

Link from Zelda Crochet Amigurumi Pattern

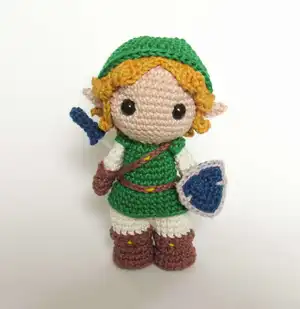
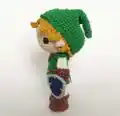
Bring the legendary Hero of Hyrule to life with this incredible Link amigurumi pattern! This detailed design captures Link's iconic appearance with his signature green tunic, pointed hat, blonde hair, and heroic accessories including his Master Sword and Hylian Shield. Standing approximately 5.9 inches tall, this pattern features advanced techniques for creating realistic proportions, authentic costume details, and poseable accessories that make Link ready for any adventure.

Advanced 8-10 Hours

Materials Needed for Link from Zelda Crochet Amigurumi Pattern

โ€” Main Fabric

  • 01
    Beige yarn (3mm crochet hook compatible) for skin tone
  • 02
    Green yarn for tunic, hat, and sleeves
  • 03
    Off white yarn for tunic undergarments and leg wrappings
  • 04
    Brown yarn for boots, belt, and leather accessories
  • 05
    Mustard/golden yellow yarn for Link's signature blonde hair
  • 06
    Royal blue yarn for shield and sword handle
  • 07
    Grey yarn for shield details

โ€” Tools Required

  • 01
    3mm crochet hook
  • 02
    Tapestry needle
  • 03
    Craft glue
  • 04
    Stuffing
  • 05
    9mm safety eyes
  • 06
    Pins
  • 07
    Two 2cm buttons for boot details
  • 08
    Thick craft wire (6cm - 2.3 inches) for sword
  • 09
    Hammer for wire work
  • 10
    Adhesive tape

Progress Tracker

0% Complete

โ€” Arms (Make 2) :

Round 1 :

With brown yarn, 6 sc in magic ring

Round 2 :

(1 sc, inc) around [9]

Rounds 3-4 :

Sc around [9]

Round 5 :

Change to off white, sc around in back loops only [9]

Round 6 :

(1 sc, dec) around [6]

Rounds 7-8 :

Sc around [6]

Round 9 :

Fold and close opening with 2 sc, fasten off

Info :

Work round of slip stitches on loops of round 5

โ€” Legs (Make 2) :

Round 1 :

With brown yarn, 6 sc in magic ring (leave tail to sew button)

Round 2 :

Inc around [12]

Round 3 :

(1 sc, inc) around [18]

Round 4 :

Sc around in back loops only [18]

Round 5 :

Sc around [18]

Info :

Sew button inside shoe

Round 6 :

6 sc, 3 dec, 6 sc [15]

Rounds 7-8 :

Sc around [15]

Round 9 :

Change to off white, sc around in back loops only [15]

Rounds 10-12 :

Sc around [15]

Info :

Make boot border: chain 3, 13 sc, chain 2, slst 1. Embroider yellow line on front

โ€” Body :

Round 13 :

Join both legs with slip stitch, sc around both legs [30]

Round 14 :

6 sc, dec, 6 sc, dec, 6 sc, dec, 6 sc [27]

Round 15 :

Sc around [27], stuff legs

Round 16 :

Change to green, 6 sc, dec, 5 sc, dec, 5 sc, dec, 5 sc [24]

Round 17 :

Sc around in back loops only [24]

Round 18 :

Sc around [24]

Round 19 :

5 sc, dec, 4 sc, dec, 4 sc, dec, 5 sc [21]

Rounds 20-21 :

Sc around [21]

Round 22 :

4 sc, dec, 4 sc, dec, 4 sc, dec, 3 sc [18]

Round 23 :

4 sc, 2 sc joining arm, 7 sc, 2 sc joining arm, 3 sc [18]

โ€” Shirt Border :

Round 1 :

Join yarn in front loops of round 17, (5 sc, inc) around [28]

Round 2 :

Sc around [28]

Round 3 :

(6 sc, inc) around [32]

Round 4 :

Sc around [32], fasten off

โ€” Head :

Round 1 :

With beige yarn, 6 sc in magic ring

Round 2 :

Inc around [12]

Round 3 :

(1 sc, inc) around [18]

Round 4 :

(2 sc, inc) around [24]

Round 5 :

(3 sc, inc) around [30]

Round 6 :

(4 sc, inc) around [36]

Round 7 :

(5 sc, inc) around [42]

Rounds 8-14 :

Sc around [42]

Info :

Insert 9mm safety eyes between rounds 11-12, eight stitches apart

Round 15 :

(5 sc, dec) around [36]

Round 16 :

(4 sc, dec) around [30]

Round 17 :

(3 sc, dec) around [24]

Round 18 :

(2 sc, dec) around [18], stuff and sew to body

โ€” Ears (Make 2) :

Foundation :

Chain 6, skip 1 chain

Row 1 :

Slst 1, 1 sc, 2 hdc, slst 1, fasten off

Info :

Attach between rounds 12-13, five stitches apart from eyes
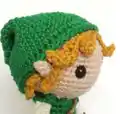
โ€” Hair :

Rounds 1-7 :

With mustard yarn, create base same as head through round 7

Rounds 8-11 :

Sc around [42]

Hair Strands :

Create various chain lengths and stitch combinations for realistic hair texture following detailed photo guide

Info :

Position 4-sc spaces over ears, 10-chain strands in front, curve front strands to sides
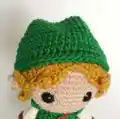
โ€” Hat :

Round 1 :

With green yarn, 4 sc in magic ring

Rounds 2-14 :

Follow specific increase pattern creating pointed shape

Round 15 :

3 inc, 24 sc, 3 inc [36]

Round 16 :

(5 sc, inc) around [42]

Round 17 :

(6 sc, inc) around [48]

Rounds 18-21 :

Sc around [48]

Rounds 22-23 :

12 sc, 24 hdc, 12 sc [48]

โ€” Belt :

Main Belt :

With brown yarn, make 25 chains, wrap around waist and sew under right arm

Shoulder Belt :

Make second 25-chain belt, wrap over shoulder and attach to waist belt

Details :

Embroider yellow line in center of each belt

โ€” Sword :

Handle :

With blue yarn, 4 sc in magic ring, sc around for 4 rounds

Guard :

1 sc, ch 2, slst 1, 2 sc, ch 1, slst 1, 1 sc

Blade :

Hammer craft wire flat leaving 1cm for handle, glue to crocheted handle

โ€” Shield :

Round 1 :

With blue yarn in magic ring: 1 sc, ch 2, 2 sc, ch 2, 2 sc, ch 2, 1 sc

Round 2 :

Work increases in chain spaces to create shield shape

Round 3 :

Continue shaping with hdc sections and chain spaces

Round 4 :

Change to grey, add decorative border with slip stitches and chains

Handle :

Create loop handle sized to fit Link's wrist

โ€” Sleeves (Make 2) :

Foundation :

With green yarn, chain 7, skip 1 chain

Row 1 :

1 sc, 3 hdc, 1 sc, slst 1

Info :

Sew over Link's arms with wrong side showing, one stitch on each end

Assembly Instructions

  • Begin by completing both legs with boots, ensuring buttons are sewn inside and yellow decorative stitching is added
  • Join legs to create body, maintaining proper foot positioning with heels facing you during connection
  • Attach arms at correct alignment points, checking that they sit properly on sides of body for weapon holding
  • Construct and attach head with safety eyes positioned between rounds 11-12, eight stitches apart
  • Create and position pointed ears between rounds 12-13, five stitches from eyes with proper curve orientation
  • Build intricate hair system following strand placement guide, ensuring front pieces curve to sides naturally
  • Fit and attach pointed hat, ensuring it ends behind ears and aligns with hair construction
  • Apply belt system with main waist belt and shoulder strap, adding yellow embroidered details
  • Construct Master Sword using wire-hammering technique and attach blue crocheted handle and guard
  • Create Hylian Shield with blue and grey color scheme, including functional wrist strap for Link to wear
  • Add final sleeve details over arms and perform final positioning and secure all accessories

Important Notes

  • ๐Ÿ’กWork in continuous rounds using stitch markers to track round beginnings throughout construction
  • ๐Ÿ’กPay careful attention to color changes and back loop techniques for authentic costume details
  • ๐Ÿ’กUse proper safety precautions when hammering wire for sword blade construction
  • ๐Ÿ’กMaintain firm stuffing in legs and body to ensure Link can stand properly without support
  • ๐Ÿ’กFollow photo guides carefully for complex sections like hair strand placement and shield construction
  • ๐Ÿ’กCheck arm alignment before final attachment to ensure proper weapon holding capability

This incredible Link amigurumi pattern brings the legendary Hero of Hyrule into your hands with stunning detail and authentic charm! From his iconic green outfit and pointed cap to his legendary Master Sword and Hylian Shield, every element captures the spirit of adventure that makes Link so beloved. The advanced techniques and innovative construction methods create a truly heroic figure that stands as both an impressive display piece and a treasured companion for any Zelda fan. Ready your hook and embark on this epic crafting quest! โš”๏ธ Happy crocheting! ๐Ÿงถ

You ask,

we answer.

FAQs

Is this pattern suitable for beginners?

This is an advanced pattern requiring experience with amigurumi techniques, color changes, and complex construction. It's best suited for experienced crocheters comfortable with detailed assembly.

Can I make the sword without using wire?

The wire creates the realistic flat blade effect, but you could crochet a simple sword shape instead. However, it won't have the same authentic appearance as the hammered wire technique.

How do I ensure Link can stand properly?

Firm stuffing in the legs and body is crucial. Make sure to stuff the legs before joining them to the body, and maintain consistent stuffing density throughout.

What if my Link's proportions don't look right?

Check that arms are properly aligned on the sides of the body and that the head is positioned correctly. The detailed photo guides show proper proportions at each stage.

Can I modify the colors to match different Link versions?

Yes! You can adapt the color scheme for different Link incarnations from various Zelda games while maintaining the same construction techniques.