🧢 Beautiful ✨ Detailed πŸ’ Adorable

Penguin Chilly Amigurumi Pattern

Penguin Chilly Amigurumi Pattern
4.7β˜… Rating
8-10 Hours Time Needed
2.1K Made This
βœ‚οΈ

Intermediate Level

Ideal for those with basic knitting experience, featuring slightly more advanced stitches and techniques to expand your skills.

⏱️

All-Day Adventure

Requires 8-10 hours, ideal for a full day of immersive knitting.

🐧

Whimsical Buddy

Playful characters full of personality, designed to spark imagination and become cherished playtime favorites.

About This Penguin Chilly Amigurumi Pattern

This charming Penguin Chilly pattern combines multiple techniques to create a delightful character that's both huggable and full of personality. The pattern includes detailed instructions for the main penguin body with its distinctive black hood and white belly, plus optional accessories like knitted or crocheted hats and scarves. You'll also create a cute fish companion to complete the scene, making this perfect for imaginative play or display.

Penguin Chilly Amigurumi Pattern crochet pattern - detailed view of completed project

With clear round-by-round instructions and helpful assembly photos, this pattern guides you through creating wings, tail, paws, and all the adorable details that bring Penguin Chilly to life.

Why You'll Love This Penguin Chilly Amigurumi Pattern

I absolutely love this pattern because it offers creative flexibility with two different accessory optionsβ€”you can choose between knitting or crocheting the hat and scarf! The combination of textures using different yarn types creates wonderful dimension, and the finished penguin has such a sweet, huggable quality. Plus, the included fish companion adds an extra touch of charm that makes this project feel complete and special.

Penguin Chilly Amigurumi Pattern step 1 - construction progress Penguin Chilly Amigurumi Pattern step 2 - assembly progress Penguin Chilly Amigurumi Pattern step 3 - details and accessories Penguin Chilly Amigurumi Pattern step 4 - final assembly and finishing

Switch Things Up

I absolutely love customizing this Penguin Chilly pattern to make each one unique! One of my favorite modifications is playing with the color scheme - instead of classic black and white, try making a chocolate brown penguin with cream belly, or even a fantasy version in soft pastels or bright rainbow colors.

The accessories are perfect for personalization too. I've added tiny embroidered snowflakes to the scarf, used variegated yarn for a color-changing effect, or even crocheted a tiny bow tie instead of a scarf for a dapper gentleman penguin. You could also make multiple fish in different colors to create a whole school of friends.

For seasonal variations, consider adding holiday elements like a Santa hat for Christmas, bunny ears for Easter, or a tiny graduation cap for celebrations. I've even experimented with different eye placements to create various expressions - closer eyes make a surprised look, while wider spacing creates a calm, peaceful expression.

The size is easily adjustable too - use thinner yarn and smaller hooks for a miniature keychain version, or go bigger with bulky yarn for an extra-cuddly companion. Each modification brings new personality to this already charming design!

Common Mistakes & How to Fix Them

βœ— Forgetting to insert safety eyes between rounds 16-17 before closing the head completelyβ€”always add eyes early to avoid frustration later βœ— Over-stuffing the body and head which can distort the shape and stretch stitchesβ€”stuff firmly but gently for best results βœ— Not using stitch markers when working the hood increases that change stitch count, causing the black hood to not fit properly over the head βœ— Skipping the tightening process for facial features shown in assembly photos results in a flat appearance instead of dimensional character

Penguin Chilly Amigurumi Pattern

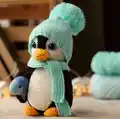
Create your own adorable Penguin Chilly with this delightful amigurumi pattern! Standing at 9.05 inches tall, this charming penguin features a classic black and white design with a cozy milk-colored belly. Complete with optional knitted or crocheted hat and scarf accessories, plus a cute fish companion, this pattern brings warmth to any collection. Perfect for gift-giving or adding personality to your handmade toy collection, Penguin Chilly combines simple techniques with delightful details.

Intermediate 8-10 Hours

Materials Needed for Penguin Chilly Amigurumi Pattern

β€” Main Fabric

  • 01
    Yarn Art Jeans 160m/50gr - Color #03 Milk (half a skein)
  • 02
    Yarn Art Jeans 160m/50gr - Color #35 Yellow (small amount for beak and paws)
  • 03
    Alize Softy 115m/50gr - Color #60 Black (slightly more than half a skein)
  • 04
    Alize Lana Cotton 160m/50gr - Color #15 Mint (half skein for crocheted hat and scarf)
  • 05
    Acrylic yarn 200m/50gr (half skein for knitted hat, pompom, scarf, and fish)

β€” Tools Required

  • 01
    Crochet hook size 2mm
  • 02
    Knitting needles size 2mm
  • 03
    Safety eyes 12mm diameter with secure mounting
  • 04
    Two half-beads 6mm diameter for fish eyes
  • 05
    Matching faux fur pompom
  • 06
    Polyester fiberfill stuffing
  • 07
    Yarn needle for sewing
  • 08
    Scissors
  • 09
    Stitch markers
  • 10
    Pins for assembly
  • 11
    Craft glue for fish eyes

Progress Tracker

0% Complete

β€” Head :

Round 1 :

6 sc in MR (6)

Round 2 :

6 inc (12)

Round 3 :

(sc, inc) x 6 (18)

Round 4 :

(2 sc, inc) x 6 (24)

Round 5 :

(3 sc, inc) x 6 (30)

Round 6 :

(4 sc, inc) x 6 (36)

Round 7 :

(5 sc, inc) x 6 (42)

Round 8 :

(6 sc, inc) x 6 (48)

Round 9 :

(7 sc, inc) x 6 (54)

Round 10-17 :

54 sc (8 rounds)

Info :

Insert safety eyes between rounds 16 and 17, at a distance of 7-8 loops apart

Round 18 :

9 sc, (sc, inc) x 6, 12 sc, (inc, sc) x 6, 9 sc (66)

Round 19-24 :

66 sc (5 rounds)

Round 25 :

9 sc, (sc, dec) x 6, 12 sc, (dec, sc) x 6, 9 sc (54)

Round 26 :

(7 sc, dec) x 6 (48)

Info :

Start filling the part with stuffing

Round 27 :

(6 sc, dec) x 6 (42)

Round 28 :

(5 sc, dec) x 6 (36)

Round 29 :

(4 sc, dec) x 6 (30)

Round 30 :

(3 sc, dec) x 6 (24)

Round 31 :

(2 sc, dec) x 6 (18)

Info :

Fasten thread, secure and trim

β€” Beak :

Info :

Crochet with yellow yarn. Make two identical parts in turning rows

Row 1 :

3 ch, turn

Row 2 :

Begin in 2nd st from hook, 2 inc, ch, turn

Row 3 :

4 sc, ch, turn

Row 4 :

inc, 2 sc, inc, ch, turn

Row 5 :

inc, 4 sc, inc, ch, turn

Row 6 :

inc, 6 sc, inc, ch

Info :

Tie the first part with sc around edges, trim thread. On second part, don't cut thread. Put two parts together and crochet sc around, leaving opening where beak attaches to head

β€” Hood :

Info :

Crochet with Alize Softy black yarn

Round 1 :

6 sc in MR (6)

Round 2 :

6 inc (12)

Round 3 :

(sc, inc) x 6 (18)

Round 4 :

(2 sc, inc) x 6 (24)

Round 5 :

(3 sc, inc) x 6 (30)

Round 6 :

(4 sc, inc) x 6 (36)

Round 7 :

(5 sc, inc) x 6 (42)

Round 8 :

(6 sc, inc) x 6 (48)

Round 9 :

(7 sc, inc) x 6 (54)

Round 10 :

(8 sc, inc) x 6 (60)

Round 11 :

(9 sc, inc) x 6 (66)

Round 12-19 :

66 sc (8 rounds)

Info :

Continue in turning rows

Row 20-22 :

8 sc, ch, turn

Row 23 :

sc, dec, 2 sc, dec, sc, ch, turn

Row 24 :

sc, 2 dec, sc, ch, turn

Row 25-28 :

4 sc

Info :

Fasten thread, secure and trim

β€” Body :

Info :

Crochet with Alize Softy black yarn

Round 1 :

6 sc in MR (6)

Round 2 :

6 inc (12)

Round 3 :

(sc, inc) x 6 (18)

Round 4 :

(2 sc, inc) x 6 (24)

Round 5 :

(3 sc, inc) x 6 (30)

Round 6 :

(4 sc, inc) x 6 (36)

Round 7 :

(5 sc, inc) x 6 (42)

Round 8 :

(6 sc, inc) x 6 (48)

Round 9 :

(7 sc, inc) x 6 (54)

Round 10 :

(8 sc, inc) x 6 (60)

Round 11-18 :

60 sc (8 rounds)

Round 19 :

(8 sc, dec) x 6 (54)

Round 20-22 :

54 sc (3 rounds)

Round 23 :

(7 sc, dec) x 6 (48)

Info :

Start filling the part with stuffing

Round 24-25 :

48 sc

Round 26 :

(6 sc, dec) x 6 (42)

Round 27-28 :

42 sc

Round 29 :

(5 sc, dec) x 6 (36)

Round 30-31 :

36 sc

Round 32 :

(4 sc, dec) x 6 (30)

Round 33-34 :

30 sc

Info :

Fasten thread, secure and trim

β€” Tail :

Info :

Crochet with Alize Softy black yarn. Do not stuff this part

Round 1 :

6 sc in MR (6)

Round 2 :

(sc, inc) x 3 (9)

Round 3 :

(2 sc, inc) x 3 (12)

Round 4 :

(3 sc, inc) x 3 (15)

Round 5 :

(4 sc, inc) x 3 (18)

Round 6 :

(5 sc, inc) x 3 (21)

Info :

Fold part in half and crochet both sides together with 10 sc. Fasten thread, cut and leave end for sewing

β€” Belly :

Info :

Crochet with milk color yarn in turning rows

Row 1 :

11 ch, turn

Row 2-3 :

Begin in 2nd st from hook, 10 sc, ch, turn

Row 4 :

sc, inc, 6 sc, inc, sc, ch, turn

Row 5 :

12 sc, ch, turn

Row 6 :

sc, inc, 8 sc, inc, sc, ch, turn

Row 7 :

14 sc, ch, turn

Row 8 :

sc, inc, 10 sc, inc, sc, ch, turn

Row 9 :

16 sc, ch, turn

Row 10 :

sc, inc, 12 sc, inc, sc, ch, turn

Row 11 :

18 sc, ch, turn

Row 12 :

sc, inc, 14 sc, inc, sc, ch, turn

Row 13-19 :

20 sc, ch, turn (7 rows)

Row 20 :

sc, dec, 14 sc, dec, sc, ch, turn

Row 21 :

18 sc, ch, turn

Row 22 :

sc, dec, 12 sc, dec, sc, ch, turn

Row 23 :

16 sc, ch, turn

Row 24 :

sc, dec, 10 sc, dec, sc, ch, turn

Row 25 :

sc, dec, 8 sc, dec, sc, ch, turn

Row 26 :

sc, dec, 6 sc, dec, sc, ch, turn

Row 27 :

sc, dec, 4 sc, dec, sc, ch, turn

Row 28-29 :

8 sc, ch, turn

Info :

Crochet sc around all edges. Fasten thread, secure and trim, leaving end for sewing

β€” Wings :

Info :

Crochet 4 parts total: 2 in milk color and 2 in black color. First crochet light parts, then black parts. Work in turning rows

Row 1 :

2 ch, turn

Row 2 :

Begin in 2nd st from hook, inc, ch, turn

Row 3 :

2 inc, ch, turn

Row 4 :

2 sc, inc, sc, ch, turn

Row 5 :

5 sc, ch, turn

Row 6 :

3 sc, inc, sc, ch, turn

Row 7 :

6 sc, ch, turn

Row 8 :

4 sc, inc, sc, ch, turn

Row 9 :

7 sc, ch, turn

Row 10 :

5 sc, inc, sc, ch, turn

Row 11 :

8 sc, ch, turn

Row 12 :

6 sc, inc, sc, ch, turn

Row 13 :

9 sc, ch, turn

Row 14 :

7 sc, inc, sc, ch, turn

Row 15 :

10 sc, ch, turn

Row 16 :

8 sc, inc, sc, ch, turn

Row 17 :

11 sc, ch, turn

Row 18 :

9 sc, inc, sc, ch, turn

Row 19-23 :

12 sc, ch, turn (5 rows)

Row 24 :

9 sc, dec, sc, ch, turn

Row 25 :

11 sc, ch, turn

Row 26 :

8 sc, dec, sc, ch, turn

Row 27 :

10 sc, ch, turn

Row 28 :

7 sc, dec, sc, ch, turn

Row 29 :

sc, dec, 6 sc, ch, turn

Row 30 :

5 sc, dec, sc, ch

Info :

Crochet sc around all edges. Clip and trim thread on light part. Don't cut thread on black part. Fold light and dark parts together and crochet together with sc. For one wing, place light part in front; for second wing, place light part behind

β€” Paws :

Info :

Crochet with yellow yarn

Round 1 :

6 sc in MR

Round 2 :

6 inc (12)

Round 3 :

(sc, inc) x 6 (18)

Round 4 :

(5 sc, inc) x 3 (21)

Round 5-6 :

21 sc

Round 7 :

(5 sc, dec) x 3 (18)

Round 8 :

18 sc

Info :

Fill part slightly. Fold in half and crochet both sides together with 9 sc. Fasten thread, secure and trim, leaving end for sewing

β€” Fish :

Info :

Crochet from acrylic yarn. Fill lightly as you crochet

Round 1 :

6 sc in MR

Round 2 :

(sc, inc) x 3 (9)

Round 3 :

(2 sc, inc) x 3 (12)

Round 4 :

(3 sc, inc) x 3 (15)

Round 5 :

15 sc

Round 6 :

(4 sc, inc) x 3 (18)

Info :

Change yarn color

Round 7 :

(8 sc, inc) x 2 (20)

Round 8 :

(9 sc, inc) x 2 (22)

Round 9 :

(10 sc, inc) x 2 (24)

Round 10-14 :

24 sc (5 rounds)

Round 15 :

(10 sc, dec) x 2 (22)

Round 16-17 :

22 sc (2 rounds)

Round 18 :

(9 sc, dec) x 2 (20)

Round 19 :

20 sc

Round 20 :

(8 sc, dec) x 2 (18)

Round 21 :

18 sc

Round 22 :

(7 sc, dec) x 2 (16)

Round 23 :

(6 sc, dec) x 2 (14)

Round 24 :

(5 sc, dec) x 2 (12)

Round 25 :

(4 sc, dec) x 2 (10)

Round 26 :

(3 sc, dec) x 2 (8)

Info :

Fold in half and crochet both sides together with 4 sc. Change yarn color for tail

Row 27 :

inc, 2 sc, inc, ch, turn

Row 28 :

inc, 4 sc, inc, ch, turn

Row 29 :

inc, 6 sc, inc, ch, turn

Row 30 :

inc, 8 sc, inc, ch

Info :

Fasten and trim thread. Glue the half-bead eyes
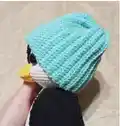
β€” Hat and Scarf (Knitted Version) :

Info :

Knit from acrylic yarn with 2mm knitting needles

Hat :

Cast on 72 stitches, close in circle. Knit 6 rows in K2P2 rib pattern. Then knit 30 rows in stockinette stitch (all knit stitches). Begin decreases: (10K, K2tog) x 6, (9K, K2tog) x 6, (8K, K2tog) x 6, (7K, K2tog) x 6, (6K, K2tog) x 6, (5K, K2tog) x 6, (4K, K2tog) x 6, (3K, K2tog) x 6, (2K, K2tog) x 6. Pull hole closed, make pompom and sew to hat

Scarf :

Cast on 10 stitches and knit in stockinette stitch to desired length

β€” Hat and Scarf (Crocheted Version) :

Info :

Crochet from Alize Lana Cotton in turning rows

Hat Row 1 :

26 ch, start in 2nd st from hook, 25 sc, ch, turn

Hat Row 2-51 :

BLO 25 sc, ch, turn (50 rows)

Hat Row 52 :

BLO 25 sc

Info :

Fasten thread, cut leaving end for sewing. Sew first and last rows together. Pull hole closed on one side and attach pompom

Scarf Row 1 :

111 ch, start in 2nd st from hook, crochet 110 slst, ch, turn

Scarf Row 2-7 :

110 slst, ch, turn

Scarf Row 8 :

110 slst. Fasten and trim thread

Assembly Instructions

  • Wear the black hood over the head and sew it securely in place, ensuring it fits snugly around the face opening
  • Fill the beak pieces with small amount of stuffing and sew the completed beak to the head center as shown in assembly photos
  • Create facial tightening following photos 3-7 in the pattern to give the penguin dimensional character and expression
  • Sew the milk-colored belly piece to the front of the black body, centering it carefully for symmetrical appearance
  • Attach the head to the body opening, sewing securely all around the neck area for stable connection
  • Sew the wings to sides of body at appropriate angle, with one light side facing forward and one facing back
  • Attach the tail to the back lower body and sew the yellow paws to the bottom of the body

Important Notes

  • πŸ’‘Use stitch markers consistently throughout rounds to avoid losing your place, especially when working with the black hood
  • πŸ’‘Insert safety eyes at the correct placement (rounds 16-17, 7-8 loops apart) before closing the head completely
  • πŸ’‘Stuff the penguin firmly but not too tightly to maintain the proper rounded shape without distorting stitches
  • πŸ’‘When assembling, pin all pieces in place first before sewing to ensure proper positioning and symmetry
  • πŸ’‘The pattern offers two accessory options (knitted or crocheted hat and scarf) so choose based on your preference and skill level
  • πŸ’‘Take time with the facial tightening process shown in assembly photos as this creates the penguin's personality and charm

This delightful Penguin Chilly pattern brings together classic amigurumi techniques with creative flexibility in accessories! Whether you choose to knit or crochet the winter wear, this adorable penguin becomes a cherished companion with its sweet expression and huggable shape. The included fish friend adds an extra touch of whimsy that makes this pattern truly special. Perfect for gift-giving or adding personality to your handmade collection! πŸ§β„οΈ

You ask,

we answer.

FAQs

Can I use different yarn weights for this pattern?

While the pattern specifies particular yarn weights, you can substitute with similar weight yarns. Just ensure your gauge matches by adjusting hook size, as this will affect the final size of your penguin. The finished toy is 9.05 inches with the specified materials.

Do I need to make both the knitted and crocheted accessories?

No! The pattern provides two options for the hat and scarf - you can choose either the knitted version or the crocheted version based on your skill level and preference. Both create adorable results.

What size safety eyes should I use?

The pattern calls for 12mm diameter safety eyes with secure mounting. Make sure to insert them between rounds 16-17 of the head, spacing them 7-8 loops apart, before you close up the head completely.

Is the fish companion required or optional?

The fish is an optional but charming addition to the pattern. It's a quick project that uses acrylic yarn and adds wonderful play value, especially if making this penguin as a gift for children.

How do I achieve the dimensional facial features shown in the photos?

The pattern includes detailed assembly photos (numbered 3-7) that demonstrate the tightening process. This involves strategic thread pulling between specific points to create depth and character in the penguin's face. Take your time with this step for best results.