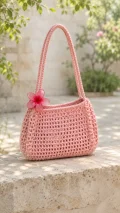
About This Pink Flower Crochet Handbag Pattern
This original handbag pattern takes its inspiration from the photograph’s pink body, slender straps, and bright flower accent. A rectangular single crochet base provides a foundation, while joined rounds of half double crochet build the sides without separate panel seams. A few firm single crochet rounds neaten the opening, and two narrow crocheted straps are sewn securely to the inside. Cotton yarn gives the stitches definition and helps the bag hold its shape, although the finished fabric will still have some natural flexibility. You’ll need to be comfortable working around a rectangle, joining rounds, and sewing crocheted pieces together.
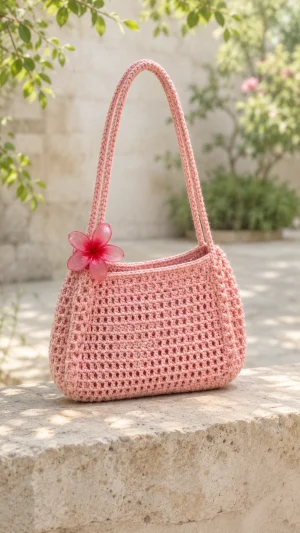
The half double crochet fabric creates a subtler texture than the openwork in the inspiration photograph, making this an approachable interpretation of the design. A purchased flower embellishment adds the finishing touch, and an optional lining can help contain small belongings and reduce stretching.
Why You'll Love This Pink Flower Crochet Handbag Pattern
I love how this handbag brings together a cheerful color and a practical shape without requiring complicated shaping. The project moves through manageable stages: first the base, then the sides, followed by the straps and finishing touches, so it is easy to find a natural stopping point. I also like that the flower can be removable, letting you change the look without making another bag. The firm top edge gives the opening a tidy finish, while the separate straps make it easy to check their length before sewing. Allow time to secure the strap ends and weave in the yarn tails carefully; these details matter when the bag carries everyday essentials. Use it for a light outing, a special handmade gift, or a colorful addition to a warm-weather outfit.
Switch Things Up
I would start by changing the yarn color while keeping the same yarn weight and hook combination, so the base and sides maintain their intended relationship. A soft cream, warm taupe, or lively coral would each give the bag a different character without changing a single stitch. For a two-tone version, I would work the base and lower rounds in one shade, then change color at a round join and continue the remaining rounds in the second shade. Keeping every round at 88 stitches preserves the shape, and carrying or weaving in color-change tails neatly keeps the inside tidy.
I would also adjust the strap length to suit the person carrying the bag, making both foundation chains the same length and working one single crochet into each chain on the return. Longer straps create more shoulder room, while shorter ones make the bag easier to carry by hand; either way, I would pin them in place and check the drop before sewing. For extra security with heavier contents, I would add a fabric lining and attach it by hand just below the top edge, leaving the crochet flexible and the opening clear. A small interior pocket can be sewn to the lining before it goes into the bag, keeping keys or cards easier to find.
For the flower, I would choose a removable brooch or clip in a contrasting color, then position it near one strap attachment for a look inspired by the photograph. A fabric flower or a simple bow would work as well, provided the fastening does not pull at the crochet stitches. If I wanted a taller bag, I would add complete half double crochet rounds before the top edging, keeping the stitch count at 88 and allowing extra yarn. Whatever details I change, I would keep the base, edge stitch count, and paired strap placement consistent so the bag remains balanced.
Common Mistakes & How to Fix Them
✗ Adding too many stitches around the base can make the sides flare. Place 36 stitches across each long edge and eight along each short edge, then count 88 before starting the next round.✗ Skipping the first stitch after a join can cause the body to narrow. Mark the first stitch of each round and count all 88 stitches before joining.✗ Working the straps at different tensions can leave one noticeably longer. Make both with the same hook and yarn, then lay them side by side before sewing.✗ Sewing the straps to only the top edge can leave weak attachment points. Stitch each end through several rows inside the bag, then tug gently to check that it is secure.✗ Pulling the base stitches too tightly can make the bottom curl. Relax your tension or try a larger hook for the base, then check that it lies reasonably flat.✗ Attaching the flower through a single strand may distort the fabric. Fasten it through several sturdy stitches or use a removable clip, and check that the embellishment sits securely.✗ Leaving long tails unsecured inside the bag can lead to unraveling. Weave each tail through several stitches in different directions, then gently stretch the fabric to check that it stays hidden.