🧢 Beautiful ✨ Detailed πŸ’ Adorable

The Camera Crochet Bag Pattern

The Camera Crochet Bag Pattern
4.0β˜… Rating
6-8 Hours Time Needed
3.7K Made This
βœ‚οΈ

Intermediate Level

Ideal for those with basic knitting experience, featuring slightly more advanced stitches and techniques to expand your skills.

⏱️

Weekend Treat

Takes 5-7 hours, making it an enjoyable project to finish over a couple of days.

✨

Stylish Touch

An elegant detail to elevate any look, combining traditional techniques with contemporary design sensibilities.

About This The Camera Crochet Bag Pattern

The Camera Crochet Bag Pattern crochet pattern - detailed view of completed project

Working in rounds creates a seamless construction, while color changes between sage green and cream yarn give the bag its distinctive camera appearance. The zippered top keeps your belongings secure while maintaining the clean vintage camera look.

Why You'll Love This The Camera Crochet Bag Pattern

I absolutely love how this pattern transforms simple crochet techniques into something so unique and eye-catching. The moment you add that camera lens detail, the whole piece comes to life and people instantly recognize what it represents. I'm drawn to how it combines nostalgic charm with modern functionalityβ€”it's not just cute, it's genuinely useful for carrying your phone, keys, and small essentials. The color-blocking technique keeps the stitching interesting without being overwhelming, and watching the camera shape emerge as you work is incredibly satisfying. Plus, there's something special about wearing a handmade accessory that sparks conversations wherever you go.

The Camera Crochet Bag Pattern step 1 - construction progress The Camera Crochet Bag Pattern step 2 - assembly progress The Camera Crochet Bag Pattern step 3 - details and accessories The Camera Crochet Bag Pattern step 4 - final assembly and finishing

Switch Things Up

I love experimenting with color combinations on this camera bag pattern to create different vintage vibes. Try working the bag body in classic brown or tan tones with black accents for an authentic leather camera aesthetic, or go bold with bright teal and coral for a fun retro tourist camera look. You could even create a modern white and silver color scheme that mimics contemporary digital cameras.

For a more textured approach, I've switched the bag body stitches to half double crochet for a chunkier fabric that works up faster, though you'll need to adjust your stitch counts slightly. Adding a fabric lining to the interior elevates the finished look and provides extra structure while protecting your belongings. Simply measure the interior dimensions and hand-sew a simple fabric pouch inside.

Consider personalizing the camera details by embroidering your initials or a camera brand name on the cover flap using chain stitch embroidery. I've also experimented with adding a small crocheted flash unit on the top left corner using short rows of white yarn for extra authenticity. For photography lovers, try creating multiple small camera bags in different color schemes and gift them to your fellow camera enthusiast friendsβ€”each one becomes a unique piece they'll treasure.

Common Mistakes & How to Fix Them

βœ— F βœ— o βœ— r βœ— g βœ— e βœ— t βœ— t βœ— i βœ— n βœ— g βœ— βœ— t βœ— o βœ— βœ— s βœ— l βœ— i βœ— p βœ— βœ— s βœ— t βœ— i βœ— t βœ— c βœ— h βœ— βœ— a βœ— r βœ— o βœ— u βœ— n βœ— d βœ— βœ— a βœ— f βœ— t βœ— e βœ— r βœ— βœ— c βœ— o βœ— m βœ— p βœ— l βœ— e βœ— t βœ— i βœ— n βœ— g βœ— βœ— r βœ— o βœ— u βœ— n βœ— d βœ— s βœ— βœ— c βœ— a βœ— n βœ— βœ— c βœ— a βœ— u βœ— s βœ— e βœ— βœ— y βœ— o βœ— u βœ— r βœ— βœ— s βœ— t βœ— i βœ— t βœ— c βœ— h βœ— βœ— c βœ— o βœ— u βœ— n βœ— t βœ— βœ— t βœ— o βœ— βœ— s βœ— h βœ— i βœ— f βœ— t βœ— βœ— a βœ— n βœ— d βœ— βœ— c βœ— r βœ— e βœ— a βœ— t βœ— e βœ— βœ— a βœ— n βœ— βœ— u βœ— n βœ— e βœ— v βœ— e βœ— n βœ— βœ— s βœ— h βœ— a βœ— p βœ— e βœ— βœ— t βœ— h βœ— r βœ— o βœ— u βœ— g βœ— h βœ— o βœ— u βœ— t βœ— βœ— t βœ— h βœ— e βœ— βœ— b βœ— a βœ— g βœ— βœ— b βœ— o βœ— d βœ— y βœ— . βœ— βœ— P βœ— u βœ— l βœ— l βœ— i βœ— n βœ— g βœ— βœ— s βœ— t βœ— i βœ— t βœ— c βœ— h βœ— e βœ— s βœ— βœ— t βœ— o βœ— o βœ— βœ— t βœ— i βœ— g βœ— h βœ— t βœ— βœ— d βœ— u βœ— r βœ— i βœ— n βœ— g βœ— βœ— t βœ— h βœ— e βœ— βœ— b βœ— a βœ— s βœ— e βœ— βœ— c βœ— h βœ— a βœ— i βœ— n βœ— βœ— f βœ— o βœ— u βœ— n βœ— d βœ— a βœ— t βœ— i βœ— o βœ— n βœ— βœ— w βœ— i βœ— l βœ— l βœ— βœ— m βœ— a βœ— k βœ— e βœ— βœ— i βœ— t βœ— βœ— d βœ— i βœ— f βœ— f βœ— i βœ— c βœ— u βœ— l βœ— t βœ— βœ— t βœ— o βœ— βœ— w βœ— o βœ— r βœ— k βœ— βœ— i βœ— n βœ— t βœ— o βœ— βœ— b βœ— o βœ— t βœ— h βœ— βœ— s βœ— i βœ— d βœ— e βœ— s βœ— βœ— a βœ— n βœ— d βœ— βœ— c βœ— r βœ— e βœ— a βœ— t βœ— e βœ— βœ— p βœ— u βœ— c βœ— k βœ— e βœ— r βœ— i βœ— n βœ— g βœ— βœ— i βœ— n βœ— βœ— t βœ— h βœ— e βœ— βœ— f βœ— i βœ— n βœ— i βœ— s βœ— h βœ— e βœ— d βœ— βœ— b βœ— a βœ— g βœ— βœ— b βœ— o βœ— t βœ— t βœ— o βœ— m βœ— . βœ— βœ— M βœ— i βœ— s βœ— p βœ— l βœ— a βœ— c βœ— i βœ— n βœ— g βœ— βœ— t βœ— h βœ— e βœ— βœ— c βœ— a βœ— m βœ— e βœ— r βœ— a βœ— βœ— l βœ— e βœ— n βœ— s βœ— βœ— o βœ— f βœ— f βœ— - βœ— c βœ— e βœ— n βœ— t βœ— e βœ— r βœ— βœ— r βœ— u βœ— i βœ— n βœ— s βœ— βœ— t βœ— h βœ— e βœ— βœ— a βœ— u βœ— t βœ— h βœ— e βœ— n βœ— t βœ— i βœ— c βœ— βœ— c βœ— a βœ— m βœ— e βœ— r βœ— a βœ— βœ— a βœ— p βœ— p βœ— e βœ— a βœ— r βœ— a βœ— n βœ— c βœ— e βœ— , βœ— βœ— s βœ— o βœ— βœ— a βœ— l βœ— w βœ— a βœ— y βœ— s βœ— βœ— m βœ— e βœ— a βœ— s βœ— u βœ— r βœ— e βœ— βœ— a βœ— n βœ— d βœ— βœ— p βœ— i βœ— n βœ— βœ— c βœ— a βœ— r βœ— e βœ— f βœ— u βœ— l βœ— l βœ— y βœ— βœ— b βœ— e βœ— f βœ— o βœ— r βœ— e βœ— βœ— s βœ— e βœ— w βœ— i βœ— n βœ— g βœ— βœ— i βœ— t βœ— βœ— p βœ— e βœ— r βœ— m βœ— a βœ— n βœ— e βœ— n βœ— t βœ— l βœ— y βœ— βœ— o βœ— n βœ— t βœ— o βœ— βœ— t βœ— h βœ— e βœ— βœ— b βœ— a βœ— g βœ— βœ— f βœ— r βœ— o βœ— n βœ— t βœ— . βœ— βœ— S βœ— k βœ— i βœ— p βœ— p βœ— i βœ— n βœ— g βœ— βœ— t βœ— h βœ— e βœ— βœ— b βœ— a βœ— c βœ— k βœ— βœ— l βœ— o βœ— o βœ— p βœ— βœ— o βœ— n βœ— l βœ— y βœ— βœ— i βœ— n βœ— s βœ— t βœ— r βœ— u βœ— c βœ— t βœ— i βœ— o βœ— n βœ— βœ— o βœ— n βœ— βœ— r βœ— o βœ— u βœ— n βœ— d βœ— βœ— t βœ— w βœ— e βœ— n βœ— t βœ— y βœ— - βœ— t βœ— w βœ— o βœ— βœ— e βœ— l βœ— i βœ— m βœ— i βœ— n βœ— a βœ— t βœ— e βœ— s βœ— βœ— t βœ— h βœ— e βœ— βœ— i βœ— m βœ— p βœ— o βœ— r βœ— t βœ— a βœ— n βœ— t βœ— βœ— t βœ— e βœ— x βœ— t βœ— u βœ— r βœ— e βœ— βœ— c βœ— h βœ— a βœ— n βœ— g βœ— e βœ— βœ— t βœ— h βœ— a βœ— t βœ— βœ— d βœ— e βœ— f βœ— i βœ— n βœ— e βœ— s βœ— βœ— w βœ— h βœ— e βœ— r βœ— e βœ— βœ— t βœ— h βœ— e βœ— βœ— b βœ— a βœ— g βœ— βœ— b βœ— o βœ— d βœ— y βœ— βœ— t βœ— r βœ— a βœ— n βœ— s βœ— i βœ— t βœ— i βœ— o βœ— n βœ— s βœ— βœ— t βœ— o βœ— βœ— t βœ— h βœ— e βœ— βœ— t βœ— o βœ— p βœ— βœ— s βœ— e βœ— c βœ— t βœ— i βœ— o βœ— n βœ— .

The Camera Crochet Bag Pattern

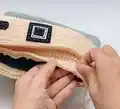
Create this charming camera-shaped crochet bag that's both functional and adorable. This unique crossbody purse features realistic camera details including a lens with highlight, viewfinder felt details, and an adjustable strap. Perfect for photographers, vintage camera lovers, or anyone who wants a conversation-starting accessory. The bag measures approximately 8x8 inches and includes a zippered closure to keep your essentials secure.

Intermediate 6-8 Hours

Materials Needed for The Camera Crochet Bag Pattern

β€” Main Fabric

  • 01
    100% acrylic DK or Light Worsted weight yarn in sage green/mint color (80g)
  • 02
    100% acrylic DK or Light Worsted weight yarn in cream/beige color (60g)
  • 03
    100% acrylic DK or Light Worsted weight yarn in black color (20g)

β€” Tools Required

  • 01
    Crochet hook size 3.75-4.5mm (US F-5, G-6, 7)
  • 02
    Black felt pieces
  • 03
    White felt pieces
  • 04
    Black plastic zipper approximately 9 inches
  • 05
    Wood button 15-20mm
  • 06
    Black embroidery thread
  • 07
    White embroidery thread
  • 08
    Yarn needle
  • 09
    Embroidery needle
  • 10
    Scissors
  • 11
    Pins for assembly

Progress Tracker

0% Complete

β€” Bag x 1:

Round 1:

Color A, Start from base, Base chain - sl knot, chain 35. sc 2 into 2nd chain from hook, sc each ch on next 32 sts, sc 3 on next ch (the first ch of the base chain). Turn sideways and continue along another side of the base chain, sc each ch on next 33 sts, slst to the ch st at the beginning round. (70)

Round 2:

ch 1, [*sc on next st, sc 2 on next st, sc each on next 32 sts, sc 2 on next st,] * 2 times, slst, then sl st(slip stitch) around, slst to the sc st at the beginning round. (74)

Round 3-21:

ch1, sc around ,slst, then slst around, slst to the sc st at the beginning round. (74)

Round 22:

Color B, blsc around , slst. (74)

Round 23-24:

ch1, sc around , slst. (74)

Info:

Fasten off, weave the yarn end.

β€” Camera Lens #1 x 1:

Round 1:

Black, 9 sc in Magic Ring, slst. (9)

Round 2:

ch 1, (inc) *9 times, slst. (18)

Round 3:

ch 1, (sc 1, inc) *9 times, slst. (27)

Round 4:

ch 1, (sc 2, inc) *9 times, slst. (36)

Round 5:

ch 1, Black (sc 3, inc) *2 times,White (sc 3, inc) *2 times, Black (sc 3, inc) *5 times, slst. (45)

Round 6:

ch 1, (sc 4, inc) *9 times, slst. (54)

Round 7:

White, ch 1, sc around, slst. (54)

Info:

Fasten off, weave the yarn end. Leave the back yarn ~30cm.

β€” Camera Lens #2 x 1:

Round 1:

White, Start from chains 54, slst to close circle. ch 1, sc around, slst. (54)

Info:

Fasten off, leave the yarn ~30 cm. Sew to the lens #1.

β€” Strap x 1:

Row 1:

Color B, sl knot, chain 4. (leave the yarn ~25-30 cm.) sc into 2nd chain from hook, sc each ch on next 2 sts, turn. (3)

Row 2-200:

Ch1, sc across, turn. (3)

Info:

Fasten off, leave the yarn ~25-30 cm. You can adjust the wide strap from sc 3 - sc 5. The length also you can adjust the row form your body.

β€” Cover x 1:

Round 1:

Color B, Start from base, Base chain - sl knot, chain 35. sc 2 into 2nd chain from hook, sc each ch on next 32 sts, sc 3 on next ch (the first ch of the base chain). Turn sideways and continue along another side of the base chain, sc each ch on next 33 sts, slst to the ch st at the beginning round. (70)

Round 2:

ch 1, [*sc on next st, sc 2 on next st, sc each on next 32 sts, sc 2 on next st,] * 2 times, slst, then sl st(slip stitch) around, slst to the sc st at the beginning round. (74)

Round 3-8:

ch1, sc around ,slst, then slst around, slst to the sc st at the beginning round. (74)

Info:

Fasten off, leave the yarn ~50 cm. Sew to the bag.

Assembly Instructions

  • Start with Color A from the base at Round 2, then slip stitch around to create the foundation of the bag body.
  • Crochet the bag following the pattern through Round 21, then switch to Color B for Rounds 22-24 to create the top rim of the bag.
  • Sew the black plastic zipper into the opening at the top of the bag, ensuring it's centered and functional.
  • Cut felt pieces according to the measurements provided (3.7x3.7cm, 2.4x2.4cm, 1.5x1.5cm, and 3.7x1.5cm) and sew the viewfinder felt details onto the center of the cover piece.
  • Mark the correct position for the camera lens on the front of the bag, then securely sew both lens pieces (Lens #1 and Lens #2) in place.
  • Sew the completed cover piece to the top front of the bag, aligning it properly with the bag opening.
  • Attach the strap to both the left and right sides of the bag at a comfortable height for crossbody wear.
  • Finally, sew the wooden button onto the left side of the bag front to represent the second camera lens detail.

Important Notes

  • πŸ’‘Always slip stitch around after completing each round to maintain proper stitch count and even bag shape
  • πŸ’‘Pin all pieces in place before sewing permanently to ensure proper alignment and camera-like appearance
  • πŸ’‘Leave long yarn tails as indicated in the pattern for easier assembly and secure seaming
  • πŸ’‘Work back loop single crochet on Round 22 to create the important texture ridge that defines the bag's top section
  • πŸ’‘Measure and mark the lens position carefully before sewing to achieve an authentic centered camera look
  • πŸ’‘You can customize the strap length by adjusting the number of rows to fit your preferred wearing style

This delightful Camera Crochet Bag pattern transforms vintage photography nostalgia into a wearable work of art. The combination of structured construction techniques and playful details creates a bag that's both practical and conversation-starting. Whether you're a photography enthusiast or simply love unique handmade accessories, this pattern offers a rewarding weekend project that results in a truly one-of-a-kind piece. The adjustable strap and zippered closure make it perfect for everyday use, while the whimsical camera design ensures you'll turn heads wherever you go. 🧢 Happy crocheting! πŸ“·βœ¨

You ask,

we answer.

FAQs

Can I use different yarn weights for this camera bag pattern?

While the pattern specifies DK or Light Worsted weight yarn, you can use different weights with appropriate hook size adjustments. Keep in mind that heavier yarn will create a larger bag, while lighter yarn will make it smaller. Always check your gauge to ensure proper sizing and adjust your hook accordingly to maintain the fabric density needed for a structured bag.

How do I attach the zipper if I've never sewn one into crochet before?

Pin the zipper in place first, ensuring it's centered along the opening. Using a yarn needle and matching yarn, sew through the zipper tape and the crochet stitches using a whipstitch or backstitch method. Work slowly and keep stitches close together for security. Alternatively, you can use magnetic snaps as suggested in the materials list for an easier closure option.

Can I make the strap wider or adjust its length?

Absolutely! The pattern notes that you can adjust the strap width from 3 to 5 single crochet stitches across. For length, simply work more or fewer rows to achieve your desired strap length. The pattern suggests 200 rows, but measure against your body to find what's comfortable for crossbody or shoulder wear.

What if I can't find the exact felt colors mentioned in the pattern?

The felt pieces are small decorative elements representing the camera's viewfinder details. You can use any colors that contrast well with your bag's main color. Black and white create authentic camera details, but you could get creative with colored felts to make a more whimsical or personalized camera bag design.

Is this bag sturdy enough to carry a phone and wallet?

Yes! The structured base and firm single crochet fabric create a durable bag suitable for everyday essentials like your phone, small wallet, keys, and lip balm. The 8x8 inch size provides enough room without being bulky. Using acrylic yarn also ensures the bag maintains its shape and withstands regular use without stretching.