๐Ÿงถ Beautiful โœจ Detailed ๐Ÿ’ Adorable

Adorable Dino Pillow Crochet Pattern

Adorable Dino Pillow Crochet Pattern
4.4โ˜… Rating
8-10 Hours Time Needed
3.8K Made This
โœ‚๏ธ

Intermediate Level

Ideal for those with basic knitting experience, featuring slightly more advanced stitches and techniques to expand your skills.

โฑ๏ธ

All-Day Adventure

Requires 8-10 hours, ideal for a full day of immersive knitting.

๐Ÿงธ

Cute Companion

An adorable friend to cherish, handcrafted with love to bring comfort and joy for years to come.

About This Adorable Dino Pillow Crochet Pattern

This delightful dinosaur pillow pattern combines functionality with whimsy, creating a piece that's both decorative and practical. The design features a charming frilled crest along the top, three distinctive horns, and sweet little limbs that give this dino loads of personality. Working with plush yarn creates an incredibly soft texture that makes this pillow irresistible to touch and cuddle.

Adorable Dino Pillow Crochet Pattern crochet pattern - detailed view of completed project

The pattern includes detailed instructions for creating each component separately before assembly, ensuring clean construction and professional results. The final size can vary slightly depending on your yarn choice and tension, giving you flexibility in customizing your finished piece.

Why You'll Love This Adorable Dino Pillow Crochet Pattern

I absolutely love how this pattern transforms simple stitches into something truly magical and huggable. The combination of textures between the main pillow body and the decorative frilled crest creates visual interest that makes this project stand out. What really makes my heart happy is seeing how the personality emerges as you add each detail โ€“ from the sweet embroidered eyes to those adorable little horns. The use of plush yarn means every stitch feels rewarding, and the finished piece has that professional, store-bought quality that makes it gift-worthy. Plus, there's something wonderfully satisfying about creating a functional item that doubles as room decor and a cuddle buddy.

Adorable Dino Pillow Crochet Pattern step 1 - construction progress Adorable Dino Pillow Crochet Pattern step 2 - assembly progress Adorable Dino Pillow Crochet Pattern step 3 - details and accessories Adorable Dino Pillow Crochet Pattern step 4 - final assembly and finishing

Switch Things Up

I love experimenting with color combinations to make each dino pillow unique. Instead of the classic green, try using purple or blue plush yarn for the main body and contrasting colors for the frilled crest โ€“ imagine a sunset-inspired dino with orange and pink! You could also make the horns in metallic or sparkle yarn to add a magical touch.

For a more personalized approach, consider embroidering a name or initial on the pillow body before assembly. This transforms it into a truly custom gift that any recipient would treasure. I've also had great success adding small felt details like textured scales or spots to give extra dimension.

If you want to make this pattern more challenging, try working the frilled crest in a tapestry crochet pattern with multiple colors for a rainbow effect. The decorative scallop edging could also be done in multiple colors, alternating with each scallop for a festive look. Don't be afraid to adjust the size โ€“ making a mini version using sport weight yarn creates an adorable desk companion, while upsizing with super bulky yarn makes an impressive floor cushion perfect for a reading nook.

Common Mistakes & How to Fix Them

โœ— Not using stitch markers to track round beginnings can lead to miscounting and uneven shaping throughout the pillow construction. โœ— Failing to stuff the pillow firmly and evenly in the corners results in a saggy appearance and poor structural integrity. โœ— Skipping the step to secure threads properly inside the piece can cause visible knots or unraveling over time with use. โœ— Not following the exact decrease pattern for the frilled crest rows creates an asymmetrical shape that won't sit properly on the pillow.

Adorable Dino Pillow Crochet Pattern

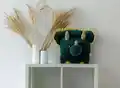
Create this incredibly soft and huggable dinosaur pillow that measures approximately 30x40 centimeters. This delightful project combines plush yarn with charming details like a frilled crest, cute horns, and adorable little arms and legs. Perfect as a decorative piece for kids' rooms or as a cuddly companion, this pattern uses YarnArt Dolce yarn to create an ultra-soft texture that both children and adults will love. The finished piece makes a wonderful gift and adds a playful prehistoric touch to any space.

Intermediate 8-10 Hours

Materials Needed for Adorable Dino Pillow Crochet Pattern

โ€” Main Fabric

  • 01
    YarnArt Dolce plush yarn (120m/100g) in green color - 3 skeins
  • 02
    YarnArt Dolce plush yarn (120m/100g) in yellow color - 1 skein
  • 03
    YarnArt Dolce plush yarn (120m/100g) in beige color - 1 skein
  • 04
    Small amount of white yarn for eyes
  • 05
    Black acrylic or cotton yarn for eyebrows
  • 06
    Alternative: Himalaya Dolphin Baby yarn can be substituted

โ€” Tools Required

  • 01
    Crochet hook size 3.5-5mm (size 3.5mm recommended)
  • 02
    Black beads or buttons for eyes (22mm)
  • 03
    Needle for sewing
  • 04
    Scissors
  • 05
    Stitch markers or pins
  • 06
    Stuffing material (hollofayber recommended)

Progress Tracker

0% Complete

โ€” Pillow :

Info :

Use green plush yarn

Round 1 :

90 ch, connect with the first loop

Round 2-37 :

90 sc

Info :

Leave a long thread and sew the top of the pillow. Fasten the thread and hide inside the pillow. Fill tightly and evenly, fill the angle of the pillow well. Sew and fasten the thread and hide inside the pillow.

โ€” Nose :

Info :

Use green plush yarn

Round 1 :

6 sc in magic ring (6)

Round 2 :

(inc) - repeat 6 times (12)

Round 3 :

(1 sc, inc) - repeat 6 times (18)

Round 4 :

(2 sc, inc) - repeat 6 times (24)

Round 5 :

(3 sc, inc) - repeat 6 times (30)

Round 6 :

(4 sc, inc) - repeat 6 times (36)

Round 7 :

(5 sc, inc) - repeat 6 times (42)

Round 8-14 :

42 sc (7 rounds)

Info :

Leave a long thread for sewing

โ€” Leg (2 details) :

Info :

Use yellow plush yarn

Round 1 :

6 sc in magic ring (6)

Round 2 :

(inc) - repeat 6 times (12)

Round 3 :

(1 sc, inc) - repeat 6 times (18)

Round 4 :

18 sc

Info :

Leave a long thread for sewing

โ€” Arm (2 details) :

Info :

Use yellow plush yarn

Round 1 :

6 sc in magic ring (6)

Round 2 :

(inc) - repeat 6 times (12)

Round 3 :

12 sc

Info :

Leave a long thread for sewing

โ€” Brow horn (2 details) :

Info :

Use beige yarn

Round 1 :

6 sc in magic ring

Round 2 :

5 sc, inc (7)

Round 3 :

6 sc, inc (8)

Round 4 :

(3 sc, inc) - repeat 2 times (10)

Round 5 :

(4 sc, inc) - repeat 2 times (12)

Round 6 :

(5 sc, inc) - repeat 2 times (14)

Round 7-12 :

14 sc (6 rounds)

Info :

Fill. Leave a long thread for sewing.

โ€” Nose horn :

Info :

Use beige yarn

Round 1 :

6 sc in magic ring

Round 2 :

5 sc, inc (7)

Round 3 :

6 sc, inc (8)

Round 4 :

7 sc, inc (9)

Round 5 :

8 sc, inc (10)

Info :

Fill. Leave a long thread for sewing.

โ€” Frilled crest (2 details) :

Info :

Use green yarn

Row 1 :

Make 69 ch

Row 2 :

Begin to work from the second loop from the hook: dec, 10 sc, inc, 42 sc, inc, 10 sc, dec, 1 ch

Row 3 :

Begin to work from the second loop from the hook: dec, 9 sc, inc, 44 sc, inc, 9 sc, dec, 1 ch

Row 4 :

Begin to work from the second loop from the hook: dec, 9 sc, inc, 44 sc, inc, 9 sc, dec, 1 ch

Row 5 :

Begin to work from the second loop from the hook: dec, 9 sc, inc, 44 sc, inc, 9 sc, dec, 1 ch

Row 6 :

Begin to work from the second loop from the hook: dec, 9 sc, inc, 13 sc, hdc, 16 dc, hdc, 13 sc, inc, 9 sc, dec, 1 ch

Row 7 :

Begin to work from the second loop from the hook: dec, 9 sc, inc, 13 sc, hdc, 16 dc, hdc, 13 sc, inc, 9 sc, dec, 1 ch

Row 8 :

Begin to work from the second loop from the hook: dec, 9 sc, inc, 12 sc, hdc, 18 sc, hdc, 12 sc, inc, 9 sc, dec, 1 ch

Row 9 :

Begin to work from the second loop from the hook: dec, 9 sc, inc, 11 sc, hdc, 20 sc, hdc, 11 sc, inc, 9 sc, dec, 1 ch

Row 10 :

Begin to work from the second loop from the hook: dec, 9 sc, inc, 12 sc, hdc, 18 sc, hdc, 12 sc, inc, 9 sc, dec

Info :

Add two parts. Use green yarn and sew two parts with sc. Fill tightly and sew bottom of frilled crest with sc. Leave a long thread for sewing.
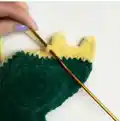
โ€” Decorative edging :

Info :

Use yellow yarn and crochet top part. The scallop: make 4 ch

Pattern :

Begin to work from the second loop from the hook: sc, hdc, dc. Skip one loop of the previous row and make 1 sc, then 2 sc. Repeat: 4 ch, begin to work from the second loop from the hook: sc, hdc, dc. Skip one loop of the previous row and make 1 sc, 2 sc. Repeat this way to the end of the top of the frilled crest

Assembly Instructions

  • Sew the frilled crest onto the top of the pillow, positioning it along the upper edge for maximum visual impact.
  • Fill the nose firmly and sew it to the front of the pillow between rounds 12 and 22, ensuring it's centered.
  • Attach the black beads or buttons for eyes between rounds 22 and 23, spacing them 12 single crochets apart.
  • Using white yarn, embroider around the eyes by inserting the needle through the bottom of the nose, leaving thread for knotting without pulling tightly around the eye.
  • Sew the nose horn to the center of the nose and attach the two brow horns symmetrically above the eyes.
  • Fill the arms and legs, then sew them to the sides and bottom corners of the pillow respectively.
  • Using black yarn, embroider expressive eyebrows above the eyes to complete the dinosaur's facial features.

Important Notes

  • ๐Ÿ’กRemember to use stitch markers or pins to mark the beginning of each round to maintain accurate stitch counts throughout the project.
  • ๐Ÿ’กWhen working with plush yarn, stitches can be harder to see, so work in good lighting and count carefully as you go.
  • ๐Ÿ’กStuff the pillow firmly and evenly, paying special attention to corners to maintain the square shape and prevent sagging.
  • ๐Ÿ’กLeave long tails when finishing each piece to make assembly easier and more secure with invisible seaming.
  • ๐Ÿ’กThe final size may vary depending on your yarn choice, hook size, and personal tension, so adjust stuffing accordingly.
  • ๐Ÿ’กWhen sewing the frilled crest, pin it in place first to ensure even positioning before permanently attaching it.

This adorable Dino Pillow pattern combines comfort and cuteness in one irresistible package. The ultra-soft plush yarn creates a huggable texture, while the charming details like the frilled crest and tiny horns give this prehistoric pal tons of personality. Whether you're making it for a child's room, as a unique gift, or simply to add some whimsical decor to your space, this pattern delivers a finished piece that's both functional and full of character. The step-by-step instructions make it approachable for intermediate crocheters ready to tackle a fun weekend project. ๐Ÿฆ•โœจ

You ask,

we answer.

FAQs

Can I use a different type of yarn instead of YarnArt Dolce?

Yes, you can substitute with any plush or velvet yarn such as Himalaya Dolphin Baby or similar weight yarn. Just note that different yarns may result in slightly different finished sizes and textures. Always check your gauge and adjust hook size accordingly.

What size will my finished pillow be?

The finished pillow measures approximately 30x40 centimeters, though this can vary based on your yarn choice, hook size, and personal tension. Plush yarns can stretch slightly over time as well.

How do I prevent the plush yarn from making my stitches difficult to see?

Work in good lighting and use stitch markers religiously to track your rounds. Count your stitches frequently, and consider working slightly looser than usual to make stitch identification easier. Some crocheters find it helpful to feel for the stitches rather than relying solely on sight.

Can I make this pillow larger or smaller?

Yes, you can adjust the size by using a thicker or thinner yarn with an appropriately sized hook, or by adding or removing rounds in the main pillow body. Just remember to adjust all other components proportionally to maintain the balanced appearance.

How should I care for the finished pillow?

Hand wash gently in cool water with mild detergent and lay flat to dry. Avoid machine washing as plush yarn can become matted or lose its soft texture. Spot clean when possible to maintain the pillow's appearance longer.