🧢 Beautiful ✨ Detailed πŸ’ Adorable

Beautiful Crochet Rose Pattern

Beautiful Crochet Rose Pattern
4.3β˜… Rating
3-4 Hours Time Needed
4.0K Made This
βœ‚οΈ

Beginner Friendly Level

Perfect for those just starting their sewing journey, with clear instructions and simple techniques

⏱️

Weekend Treat

Takes 5-7 hours, making it an enjoyable project to finish over a couple of days.

🌹

Warm Welcome

A comforting piece for home or gifts that brings handmade warmth to everyday moments and special occasions.

About This Beautiful Crochet Rose Pattern

This beautiful rose pattern creates realistic-looking flowers using basic crochet stitches. The pattern includes detailed instructions for creating layered petals that mimic the natural beauty of real roses. You'll learn to craft the rose bloom, protective calyx, and optional leaves, then assemble everything onto a wire stem for a professional finish.

Beautiful Crochet Rose Pattern crochet pattern - detailed view of completed project

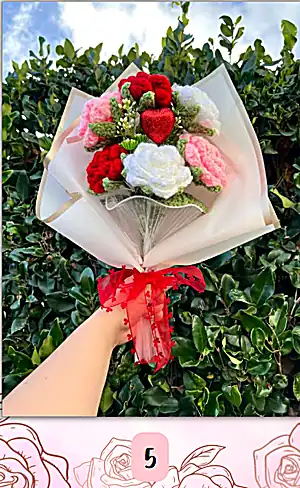
Using weight 4 acrylic yarn and a 4.0mm hook, you'll create roses perfect for bouquets, home decoration, or thoughtful handmade gifts. The pattern includes assembly techniques using floral wire and hot glue for durability.

Why You'll Love This Beautiful Crochet Rose Pattern

I absolutely love how these roses turn out so realistic and elegant! The way the petals layer and curve naturally creates such beautiful dimension. I enjoy the meditative process of wrapping and shaping each rose, and the satisfaction when you see that perfect rose bloom emerge. These make incredible gifts that last forever, unlike fresh flowers that wilt.

Beautiful Crochet Rose Pattern step 1 - construction progress Beautiful Crochet Rose Pattern step 2 - assembly progress Beautiful Crochet Rose Pattern step 3 - details and accessories Beautiful Crochet Rose Pattern step 4 - final assembly and finishing

Switch Things Up

I love experimenting with different color combinations to create unique rose varieties! Try making roses in soft pastels like blush pink, lavender, or cream for romantic bouquets, or go bold with deep burgundy and coral for dramatic arrangements. You can even create ombre effects by gradually changing colors as you work the petals.

For special occasions, I enjoy adding small pearl beads or tiny crystals to the center of each rose for extra elegance. Wedding bouquets look absolutely stunning with white and ivory roses accented with silver wire stems wrapped in satin ribbon.

Consider making mini versions by using a smaller hook and thinner yarn - they're perfect for boutonnières or delicate hair accessories. I've also made giant statement roses using chunky yarn that look amazing as wall art or centerpieces.

Common Mistakes & How to Fix Them

βœ— Using yarn that's too thick will make your rose chunky and lose fine details βœ— Not leaving enough tail yarn for sewing makes assembly difficult and insecure βœ— Pulling the magic ring too tight prevents proper wire insertion through the calyx βœ— Wrapping petals too loosely creates floppy roses that don't hold their shape well

Beautiful Crochet Rose Pattern

Create stunning, lifelike crochet roses with this comprehensive pattern! Perfect for bouquets, home decor, or special gifts, these handcrafted roses capture the beauty of real flowers with detailed petals, calyx, and optional leaves. Each rose features realistic layered petals and comes with complete assembly instructions for a professional finish.

Beginner Friendly 3-4 Hours

Materials Needed for Beautiful Crochet Rose Pattern

β€” Main Fabric

  • 01
    Weight 4 acrylic yarn in desired petal color (red, pink, white, etc.)
  • 02
    Weight 4 acrylic yarn in green for calyx and leaves
  • 03
    Big Twist Value or Red Heart Super Saver recommended

β€” Tools Required

  • 01
    Crochet hook (4.0mm)
  • 02
    Darning needle
  • 03
    Scissors
  • 04
    Hot glue gun and hot glue
  • 05
    Floral wire stems (2mm thick, 15 inches long)
  • 06
    Flexible floral wire (22 gauge)

Progress Tracker

0% Complete

β€” Rose :

Step 1 :

Ch 47 (47)

Step 2 :

In the 2nd chain from the hook, HDC down the entire chain (46)

Step 3 :

Ch 5. Turn your work. Dc in the same stitch as the chain. Sk 2, (1 dc, ch 3, 1 dc) in the same stitch. Repeat [Sk 2, 1 dc, ch 3, 1 dc] until you reach the end of the row. Place 1 DC in the last stitch.

Step 4 :

Ch 3. Turn your work. In the chain spaces, repeat [3 dc, 1 tr, 3 dc] and sl st in the space between the two dc from the previous row. Ch 1. Repeat [(3 dc, 1 tr, 3 dc), sl st, ch 1] to create the petals. Place 3 dc in the final chain space of the row. FO. Leave a 12" tail for sewing.

β€” Calyx :

Step 1 :

Place 6 dc in a ring. After the sixth dc, sl st to the top of the first dc to form a ring.

Info :

Leave a small hole in the center of the MR! Don't pull too tight - you need the hole to be big enough to fit your floral wire through.

Step 2 :

[Ch 7. Starting from the 1st stitch from your hook: (sl st, sc, hdc, dc, dc, tr)]. Sl st to the next stitch in the MR. Repeat this 6 times total to form 6 leaves of the calyx. FO after the sixth leaf and leave a short tail. Tie this tail and the tail from the MR in a knot and weave in the ends.

β€” Leaf (Optional) :

Info :

First, cut approximately an 8" piece of 22 gauge flexible floral wire. You will need this for the leaf.

Step 1 :

Ch 12 (12)

Step 2 :

For the leaf, you will be crocheting around the floral wire. Starting from the third chain from the hook: sc, HDC, DC, DC, TR, TR, DC, DC, HDC, 3 sc in the last chain.

Step 3 :

Fold your wire in half, with your work on the right side of the wire. We will now be working on the lefthand side of the wire, from right to left. Sk 1 st, HDC, DC, DC, TR, TR, DC, DC, HDC, sc.

Step 4 :

If you like the look of your leaf, FO, leaving a short tail. Weave in your tail. Twist the remaining wire together so your work doesn't slide off.

Step 5 (Optional) :

Sl st, chain 1, and sl st to the next st. Repeat this around the entire leaf. FO, weave in the end. Cut off any excess.

Assembly Instructions

  • Begin with the side that does not have the yarn tails and fold the first petal in half on itself
  • Continue wrapping your work from right to left, folding the petals in on each other until rose shape forms
  • Thread your darning needle onto the longest tail and sew several stitches horizontally to secure the last petal
  • Sew several stitches through the base of your rose to secure it, then tie yarn tails in a knot
  • Insert floral wire through the center of your rose, remove and add hot glue, then reinsert to secure
  • Insert the floral wire through the middle of the calyx and position so there's a leaf between each rose petal
  • Glue the calyx in place and wrap the stem with green yarn, adding the leaf about 1.5-2 inches down if desired

Important Notes

  • πŸ’‘Use Weight 4 acrylic yarn only - thicker yarn will make roses too chunky and lose details
  • πŸ’‘Leave a 12 inch tail when finishing the rose petals for proper sewing and assembly
  • πŸ’‘Don't pull the magic ring too tight in the calyx - you need space for the wire to pass through
  • πŸ’‘When wrapping the stem, work quickly before the hot glue dries to ensure proper adhesion
  • πŸ’‘Position the calyx so leaves alternate with rose petals for the most realistic appearance

This gorgeous crochet rose pattern brings the timeless beauty of fresh flowers into lasting handmade art. With detailed instructions for creating realistic petals, calyx, and optional leaves, you'll craft roses that capture nature's elegance perfectly. Whether for bouquets, home decor, or heartfelt gifts, these roses will bloom forever in the hearts of those who receive them. 🌹 Happy crocheting! 🧢✨

You ask,

we answer.

FAQs

Can I use a different weight yarn for this pattern?

It's best to stick with Weight 4 acrylic yarn as recommended. Thicker yarns will make your rose too chunky and you'll lose the delicate petal details that make this pattern so realistic.

How do I make my rose petals look more natural?

The key is in the assembly - keep the center petals tighter and allow the outer petals to be looser, just like a real rose. You can adjust and shape the petals after assembly to your liking.

Is the leaf optional and how many should I make?

Yes, the leaf is completely optional! The pattern suggests making 1 leaf per stem, but you can make as many or as few as you prefer for your desired look.

What if I don't have a hot glue gun?

While hot glue provides the strongest hold for assembly, you could try using strong craft glue, though you'll need to hold pieces in place longer while the glue sets.

How long will these roses last?

When properly assembled, these crochet roses will last for years! Unlike fresh flowers, they won't wilt or fade, making them perfect for keepsakes and long-lasting displays.