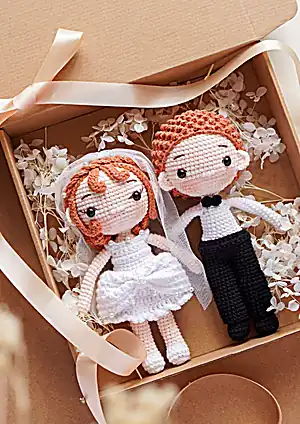
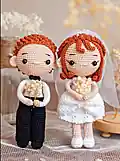
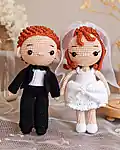
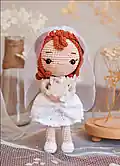
Create your own adorable wedding couple with this charming amigurumi pattern! Perfect for celebrating special occasions, these sweet bride and groom dolls feature intricate details including the bride's flowing dress with pearl beads and delicate veil, plus the groom's dapper vest and bowtie. This comprehensive pattern guides you through creating two complete figures that make wonderful wedding gifts, cake toppers, or keepsake decorations for any romantic celebration.
Progress Tracker
0% Complete
— Bride's Arms (make 2) :
Round 1 :
sc 6 into a magic loop (6)
Round 2 :
[sc 2, inc] 2x (8)
Rounds 3-20 :
sc 8 (18 rnds) (8)
Info :
Break the yarn, leave a long thread to sew later, do not need to stuff
— Bride's Legs (make 2) :
Round 1 :
ch 5, start on the 2nd stitch from the hook, sc 3, (sc 3) on the last st, continue to crochet on the other side, sc 2, inc (10)
Round 2 :
inc, sc 2, inc 3, sc 2, inc 2 (16)
Rounds 3-4 :
sc 16 (2 rnds) (16)
Round 5 :
sc 4, dec 4, sc 4 (14)
Round 6 :
sc 4, dec 2, sc 4, break yarn B, change to yarn A (10)
Rounds 7-23 :
sc 10 (17 rnds), stuff firmly (10)
Info :
Break the yarn for the 1st leg, crochet the 2nd leg the same way but do not break the yarn, continue to crochet sc 5, break yarn A, change to yarn B, crochet ch 2, join with the last st of the 1st leg with slst and continue to crochet the body
— Bride's Body :
Round 24 :
sc 10 (1st leg), sc 2 (on the ch-2), sc 10 (2nd leg), sc 2 (on the ch-2) (24)
Round 25 :
[sc 5, inc] 4x (28)
Rounds 26-28 :
sc 28 (3 rnds), break yarn B, change to yarn A (28)
Round 29 :
[sc 5, dec] 4x (24)
Round 30 :
[sc 4, dec] 4x (20)
Rounds 31-35 :
sc 20 (5 rnds), stuff firmly along crocheting (20)
Round 36 :
sc 4 (on the body), sc 4 (crochet together the 4 inner sts of the 1st arms with the next 4 sts of the body), sc 6 (on the body), sc 4 (crochet together the 4 inner sts of the 2nd arms with the next 4 sts of the body), sc 2 (on the body) (20)
Round 37 :
sc 4 (on the body), sc 4 (on the 4 remaining sts of the 1st arm), sc 6 (on the body), sc 4 (on the 4 remaining sts of the 2nd arm), sc 2 (20)
Round 38 :
[sc 2, dec] 5x (15)
Round 39 :
[sc 1, dec] 5x, stuff firmly, do not need to stuff the 2 arms (10)
Rounds 40-41 :
sc 10 (2 rnds) (10)
Round 43 :
[sc 1, inc] 10x (30)
Round 44 :
use the bendable wire to stuff inside the neck, [sc 2, inc, sc 2] 6x (36)
Round 45 :
[sc 5, inc] 6x (42)
Round 46 :
[sc 3, inc, sc 3] 6x (48)
Round 47 :
[sc 7, inc] 6x (54)
Rounds 48-59 :
sc 54 (12 rnds), insert the 8mm safety eyes between rnd 51&52, 9 sts apart after inserting 2 eyes, stuff firmly (54)
Round 60 :
[sc 7, dec] 6x (48)
Round 61 :
[sc 6, dec] 6x (42)
Round 62 :
[sc 5, dec] 6x (36)
Round 63 :
[sc 4, dec] 6x (30)
Round 64 :
[sc 3, dec] 6x (24)
Round 65 :
[sc 2, dec] 6x (18)
Round 66 :
[sc 1, dec] 6x (12)
Info :
Break the yarn, weave in the last 6 sts together. Use the brown thread to embroider the eyebrows (2 rnds above the eyes), the eyelashes. Cut a piece of yarn A, sew the nose (about 3-4 sts)
— Ears (make 2) :
Round 1 :
sc 5 into a magic loop, ch 1, turn (5)
Info :
Break the yarn, leave a long thread to sew later. Sew the ears between rnd 49&52, 5-6 sts from the eyes
— Bride's Hair :
Round 1 :
sc 6 into a magic loop (6)
Round 3 :
[sc 1, inc] 6x (18)
Round 4 :
[sc 1, inc, sc 1] 6x (24)
Round 5 :
[sc 3, inc] 6x (30)
Round 6 :
[sc 2, inc, sc 2] 6x (36)
Round 7 :
[ch 10, start on the 3rd st, hdc inc 2, hdc 6, slst on the next st] 2x, [ch 24, start on the 3rd st, hdc inc 4, hdc 18, skip 1 st, slst on the next st] 17x (19 curls)
Info :
Break the yarn, use the wrong side as the front side of the hair. Use pins to locate the hair. Use glue stick to glue the hair on the head or use the tapestry needle to sew the hair on the head
— Braided Hair :
Round 1 :
[ch 75, start on the 2nd st, sc 74] 3x (3 curls)
Info :
Break the yarn, leave a long thread to sew later. Braide 3 curls together, then use the tapestry needle to sew 2 tail together. Place the braided hair on the head
— Bride's Dress :
Round 1 :
ch 35, start on the 6th st, sc 30, ch 1, turn (30)
Round 2 :
sc 5, ch 3, skip 6 sts, sc 8, ch 3, skip 6 sts, sc 5, ch 1, turn (24)
Round 3 :
sc 5, sc 3 on the ch-3, inc, sc 6, inc, sc 3 on the ch-3, sc 5, ch 1, turn (26)
Round 4 :
sc 26, ch 1, turn (26)
Round 5 :
sc 26, fold the dress in half, from this rnd, we will crochet on rnds (26)
Round 7 :
[sc 6, inc, sc 6] 2x (28)
Round 8 :
[sc 13, inc] 2x (30)
Round 9 :
(blo) ch 2, [dc 2, dc inc] 10x, slst on the ch-2 (40)
Rounds 10-13 :
ch 2, dc 40, slst on the ch-2 (4 rnds) (40)
Round 14 :
*ch 3, slst on the next st*, repeat ** till the end
Info :
Break the yarn, hide the remaining yarn. Turn the dress up side down, join yarn B on the first st of the 9th rnd, continue to crochet the bowtie
Bowtie Round 1 :
ch 1, inc 30, slst on the ch 1 (60)
Bowtie Round 2 :
ch 1, turn, skip the 1st st, *sc 1, ch 1, skip 1 st*, repeat ** till the end, slst on the 1st ch-1 (60)
Bowtie Rounds 3-14 :
ch 1, turn, skip the 1st st, *sc 1 into the chain-space, ch 1, skip 1 st*, repeat ** till the end, slst on the 1st ch-1 (12 rnds) (60)
Info :
Cut a piece of yarn B, use the tapestry needle to sew the middle of the bowtie together
Bowtie Holder Round 1 :
ch 8, start on the 2nd st from the hook, sc 7, ch 1, turn (7)
Bowtie Holder Round 2 :
sc 7 (7)
Info :
Break the yarn, leave a long thread to sew later. Sew the piece in the middle of the bowtie. Sew the pearl beads on the edge of the bowtie and the collar
— Groom's Arms (make 2) :
Round 1 :
sc 6 into a magic loop (6)
Round 2 :
[sc 2, inc] 2x (8)
Round 3 :
sc 8, break yarn A, change to yarn B (8)
Rounds 4-20 :
sc 8 (17 rnds) (8)
Info :
Break the yarn, leave a long thread to sew later, do not need to stuff
— Groom's Legs (make 2) :
Info :
Crochet the same way as the Bride's Legs, just remember using yarn D for the shoes. Continue to crochet the Body
— Groom's Body :
Rounds 24-38 :
Follow the same pattern as Bride's Body rounds 24-38
Round 39 :
[sc 1, dec] 5x, stuff firmly, do not need to stuff the 2 arms, break yarn B, change to yarn A (10)
Rounds 40-67 :
repeat rnd 42-67 of the Bride's Body (6)
Info :
Break the yarn, weave in the last 6 sts together. Use the brown thread to embroider the eyebrows, the eyelashes. Cut a piece of yarn A, sew the nose
— Groom's Hair :
Round 1 :
sc 6 into a magic loop (6)
Round 2 :
(sc 1, Double Tr) 6x (12)
Round 4 :
[sc 1, Double Tr] 12x (24)
Round 5 :
[sc 1, inc] 12x (36)
Round 6 :
[sc 1, Double Tr] 18x (36)
Round 7 :
[sc 2, inc] 12x (48)
Round 8 :
[sc 1, Double Tr] 24x (48)
Round 10 :
[Double Tr, sc 1] 24x (48)
Rounds 12-19 :
Repeat rnd 8-11 two more times (8 rnds) (48)
Round 20 :
[sc 1, Double Tr] 24x (48)
Info :
Place the hair on the head, if the hair is too big for the head, do not need to crochet rnd 19-20, break the yarn
— Groom's Ears (make 2) :
Round 1 :
sc 5 into a magic loop, ch 1, turn (5)
Info :
Break the yarn, leave a long thread to sew later. Sew the ears between rnd 49&52, 4-5 sts from the eyes
— Groom's Pants :
Round 1 :
ch 35, start on the 6th st from the hook, sc 30, ch 1, turn (30)
Round 2 :
sc 30, ch 1, turn (30)
Round 3 :
sc 30, slst the 1st sc, from this rnd, we will crochet on rnds (30)
Rounds 4-6 :
sc 30 (3 rnds) (30)
Round 7 :
sc 15, slst the 1st sc (1st leg) (15)
Round 8 :
[sc 2, inc] 5x (20)
Rounds 9-24 :
sc 20 (16 rnds) (20)
Info :
Break the yarn, join yarn D on the remaining st of rnd 6, crochet rnd 7-24 for the 2nd leg. Sew a wooden button on the back of the pants
— Groom's Vest :
Round 1 :
ch 29, start on the 2nd st, sc 28, ch 1, turn (28)
Round 2 :
sc 4, ch 3, skip 6 sts, sc 8, ch 3, skip 6 sts, sc 4, ch 1, turn (22)
Round 3 :
sc 4, sc 3 on the ch-3, inc, sc 6, inc, sc 3 on the ch-3, sc 4, ch 1, turn (24)
Rounds 4-5 :
sc 24, ch 1, turn (2 rnds) (24)
Round 6 :
[sc 11, inc] 2x, ch 1, turn (26)
Round 7 :
[sc 6, inc, sc 6] 2x, ch 1, turn (28)
Round 8 :
sc 28, ch 1, turn (28)
Round 9 :
sc 28, do not break the yarn, continue to crochet around the edge: sc 9, move to the edge of the collar: hdc 4, dc 20, hdc 4, finally sc 9
Info :
Break the yarn, leave a long thread to sew later. Place 2 markers at the marked sts, join yarn D on the marked st, continue to crochet the sleeves
— Vest's Sleeves :
Round 1 :
[sc 1, inc] 3x (on the 6 sts of the front sleeve), sc 3 (on the 3 sts of the back sleeve) (12)
Round 2 :
[sc 3, inc] 3x (15)
Rounds 3-14 :
sc 15 (12 rnds) (15)
Info :
Break the yarn, leave a long thread to sew later. Join yarn D on the 2nd marked st, crochet the same way for the 2nd sleeve, hide the remaining yarn. Wear the pants and the vest for the groom
— Groom's Bowtie :
Round 1 :
MR, [ch 2 into the MR, dc 2, ch 2 into the MR] 2x
Info :
Break the yarn, leave a long thread to sew later, wrap the remaining yarn around the middle of the bowtie, sew the bowtie on the neck
Final Assembly :
Sew the wooden button on the back of the dress. Sew the pearl beads on the braided hair. Place the braided hair on the hair. Use a white chiffon (about 20*25cm), fold the chiffon, then use the tapestry needle to sew the edge together. Sew the chiffon behind the braided hair
This enchanting Wedding Couple pattern captures the magic of true love in adorable amigurumi form! Every stitch tells a story of romance, from the bride's pearl-beaded gown that shimmers with elegance to the groom's dapper vest and charming bowtie. The intricate details like the flowing braided hair, delicate chiffon veil, and textured clothing make these dolls perfect keepsakes for celebrating life's most precious moments. Whether you're creating them as wedding gifts, cake toppers, or simply to celebrate love, this pattern brings joy and romance into every hook and yarn. 🧶 Happy crocheting! 🧵✨