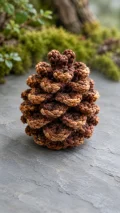
About This Crochet Pinecone Amigurumi Pattern
This pinecone starts with a magic ring and a stuffed, tapered body worked mostly in back loops, leaving visible front loops for the scales. Six separate layers of shell-shaped scales are crocheted onto those loops after the body is closed, creating the overlapping texture of the pictured design. A contrasting caramel edging brings out the curved tips, while a small cluster of stitches finishes the top. You’ll need to be comfortable working in continuous rounds, increasing, decreasing, and identifying individual loops on a finished piece.
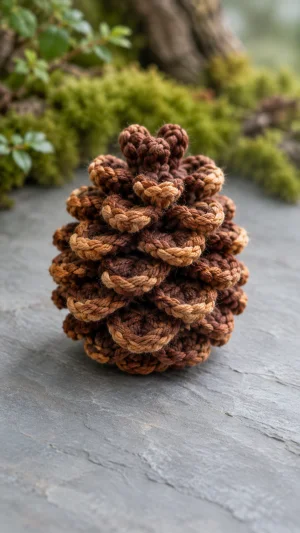
Smooth, medium-weight yarn makes the foundation loops easier to find and gives each scale a defined edge. Your finished size will depend on your yarn, hook, and tension, so use a hook that makes a firm fabric and keep the stuffing from showing through.
Why You'll Love This Crochet Pinecone Amigurumi Pattern
I love how the layered scales turn a straightforward stuffed shape into a recognizable pinecone, with the lighter edges giving every layer definition. The work breaks naturally into stages: make the body, stuff and close it, then add one scale layer at a time. You can pause between layers and see the texture grow without juggling separate pieces. The edging does take patience because each scale is finished individually, but it is also a satisfying way to add the warm contrast shown in the photograph. I would display a finished pinecone in a bowl with dried leaves, tie one to a wreath, or add a loop for a seasonal ornament. A small amount of shaping at the end helps the scales sit neatly.
Switch Things Up
I would start by exploring natural color combinations: deep chocolate with caramel tips creates strong contrast, while two closer browns give the scales a softer woodland look. To change the mood without changing the construction, choose a different main color and keep the same six scale layers and stitch counts. A warm gray body with pale gray edging can suggest a wintry pinecone, especially when displayed among evergreen branches. For a subtler finish, use the body color for the edging, or omit the contrasting edging entirely and let the shell stitches provide the texture.
I would also try a smooth cotton yarn for crisp stitch definition or a soft acrylic for a lighter, gentler finish, choosing a hook that keeps the body fabric dense. If you change yarn weight, use a suitable hook and expect the finished pinecone and the amount of yarn needed to change; retain the same round and scale instructions. Variegated brown yarn can add natural shifts of color, although a solid contrast yarn will make the scale edges easier to distinguish. Before committing to a whole pinecone, crochet a small sample of the body and a scale to see whether you like the fabric and color placement.
For a hanging decoration, I would attach a secure yarn loop through the top cluster after all the scales are complete, making it long enough for the branch or garland you have in mind. For a tabletop arrangement, leave off the loop and gently flatten the stuffed base so the pinecone sits steadily. You can group pinecones made in different yarn weights for variety, keeping the original shaping and scale counts for each one. Whichever version you choose, weave in the many edging ends securely and arrange the scales so their tips overlap the layer below.
Common Mistakes & How to Fix Them
✗ If the scale attachment loops are hard to find, you may have worked through both loops of the body stitches. Work rounds 2–15 in back loops only, and check that a ridge of front loops remains visible after each round.✗ If the body leans or its stitch count changes unexpectedly, the beginning of the continuous round may have shifted unnoticed. Move a stitch marker into the first stitch of every round and count before starting the next one.✗ If stuffing shows through the body, the stitches may be too loose or the filling packed too firmly. Try a smaller hook and add stuffing gradually; check the fabric under gentle pressure before closing the opening.✗ If a scale layer puckers or does not meet at the end, a front loop may have been skipped or used twice. Undo that layer, group the loops in threes, and check the stated number of scales before fastening off.✗ If the scales point upward or overlap awkwardly, the body may have been held upside down while attaching them. Keep the narrow closed top pointing away from you and check that each shell hangs toward the wider base.✗ If the caramel edging pulls a scale into a tight cup, the slip stitches are probably too tight. Redo them loosely across the five double-crochet tops and check that the edge follows the shell’s curve without gathering it.✗ If the finished pinecone wobbles, the stuffing may be uneven at the base. Before closing the body, redistribute the filling and gently press the bottom against a flat surface to check its balance.