🧢 Beautiful ✨ Detailed πŸ’ Adorable

Dog Hand Puppet Pattern

Dog Hand Puppet Pattern
4.6β˜… Rating
6-8 Hours Time Needed
3.1K Made This
βœ‚οΈ

Intermediate Level

Ideal for those with basic knitting experience, featuring slightly more advanced stitches and techniques to expand your skills.

⏱️

All-Day Adventure

Requires 8-10 hours, ideal for a full day of immersive knitting.

🐾

Whimsical Buddy

Playful characters full of personality, designed to spark imagination and become cherished playtime favorites.

About This Dog Hand Puppet Pattern

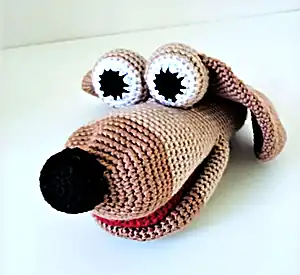
This delightful dog hand puppet pattern creates a functional and entertaining toy that measures 19cm long when made with the specified materials. The design features a clever construction method that combines the mouth pieces with a movable tongue, creating realistic puppet movement. The pattern includes detailed instructions for creating expressive eyes with multiple color changes and perfectly positioned floppy ears that frame the face beautifully.

Dog Hand Puppet Pattern crochet pattern - detailed view of completed project

Working in continuous rounds with American terminology, this pattern guides you through each component step-by-step. The optional squeaker adds an extra element of fun that children absolutely love.

Why You'll Love This Dog Hand Puppet Pattern

I absolutely love how this pattern brings such joy and interactive play into any home. The satisfaction of watching children's faces light up when they see this puppet come to life is incredible, and I find the construction process both challenging and rewarding. The way the mouth opens and closes with your hand movement creates such realistic puppet action that even adults can't resist playing with it!

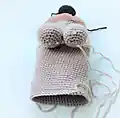
Dog Hand Puppet Pattern step 1 - construction progress Dog Hand Puppet Pattern step 2 - assembly progress Dog Hand Puppet Pattern step 3 - details and accessories Dog Hand Puppet Pattern step 4 - final assembly and finishing

Switch Things Up

I love experimenting with different color combinations to create unique dog breeds with this pattern. You could make a golden retriever using yellow and cream tones, or create a spotted dalmatian by adding embroidered spots after completion. I've also found that changing the ear shape slightly by adjusting the decrease rounds can give you different dog breeds - longer ears for a spaniel look or shorter, pointer ears for other breeds.

For those who want to add extra personality, consider embroidering eyebrows or adding a small felt collar around the neck area. I sometimes make multiple puppets in a family set, creating parent and puppy versions by scaling the pattern up or down. The possibilities are endless when you let your creativity run wild with this versatile base pattern!

Common Mistakes & How to Fix Them

βœ— Not maintaining consistent tension can cause the puppet opening to be too tight or loose for comfortable hand movement βœ— Forgetting to stuff the eyes and nose properly before closing will result in flat, unappealing facial features βœ— Sewing through both layers of the puppet body accidentally will close the hand opening completely βœ— Placing the ears too high or low on the head creates an unbalanced appearance that affects the overall look

Dog Hand Puppet Pattern

Create this adorable and interactive dog hand puppet that brings hours of entertainment and imaginative play. Perfect for storytelling, puppet shows, or simply making children smile, this charming design features expressive eyes, floppy ears, and a playful red tongue. The puppet is designed to fit comfortably on your hand and includes an optional squeaker for added fun. This pattern combines basic crochet techniques with creative assembly to produce a lovable companion that's sure to become a favorite.

Intermediate 6-8 Hours

Materials Needed for Dog Hand Puppet Pattern

β€” Main Fabric

  • 01
    Deramores Studio DK Oatmeal 100g
  • 02
    Deramores Studio DK Gingerbread 100g
  • 03
    Deramores Studio DK Ruby 50g
  • 04
    Deramores Studio DK Frost 50g
  • 05
    Deramores Studio DK Ebony small amount

β€” Tools Required

  • 01
    2.5mm Crochet hook
  • 02
    Fibrefill/toy stuffing
  • 03
    Toy Squeaker (optional)
  • 04
    Stitch Markers
  • 05
    Yarn Needle
  • 06
    Pins

Progress Tracker

0% Complete

β€” Tongue :

Using Ruby yarn :

Ch 2

Rnd 1 :

6 sc in 2nd ch from hook (6)

Rnd 2 :

inc in all 6 sts (12)

Rnd 3 :

(1 sc, inc in next st) x6 (18)

Rnd 4 :

(2 sc, inc in next st) x6 (24)

Rnd 5 :

(3 sc, inc in next st) x6 (30)

Rnd 6-20 :

30 sc (30)

Info :

Insert your squeak into the tongue if you are adding one. 15sc through both sides of the tongue to close. Sl last st and finish.

β€” Top of Mouth :

Using Gingerbread yarn :

Ch 2

Rnd 1 :

6 sc in 2nd ch from hook (6)

Rnd 2 :

inc in all 6 sts (12)

Rnd 3 :

(1 sc, inc in next st) x6 (18)

Rnd 4 :

(2 sc, inc in next st) x6 (24)

Rnd 5 :

(3 sc, inc in next st) x6 (30)

Rnd 6 :

(4 sc, inc in next st) x6 (36)

Rnd 7 :

(5 sc, inc in next st) x6 (42)

Rnd 8 :

(6 sc, inc in next st) x6 (48)

Rnd 9-12 :

48 sc (48)

Change to Oatmeal yarn :

Rnd 13-26 :

48 sc (48)

Info :

Sl last st, cut yarn.

β€” Bottom of Mouth :

Using Gingerbread yarn :

Ch 2

Rnd 1 :

6 sc in 2nd ch from hook (6)

Rnd 2 :

inc in all 6 sts (12)

Rnd 3 :

(1 sc, inc in next st) x6 (18)

Rnd 4 :

(2 sc, inc in next st) x6 (24)

Rnd 5 :

(3 sc, inc in next st) x6 (30)

Rnd 6 :

(4 sc, inc in next st) x6 (36)

Rnd 7 :

(5 sc, inc in next st) x6 (42)

Rnd 8 :

(6 sc, inc in next st) x6 (48)

Rnd 9-12 :

48 sc (48)

Change to Oatmeal yarn :

Rnd 13-23 :

48 sc (48)

Infos :

Do not cut yarn, we will now join the mouth and tongue pieces together. Place the top and bottom mouth pieces on top of one another with your yarn from the bottom mouth piece at the side. 5 sc through both pieces along what will be the middle seam to join both of the mouth pieces. Place a marker at the 1st st. Now add the tongue: 15 sc through the bottom of mouth, tongue and top of mouth to join them altogether along the same middle seam. Then 5 sc through the top and bottom mouth pieces only. This will be the new beginning of your rnds. Replace your marker here. You should now have a total of 54 sts around the outside of the puppets mouth.

Rnd 24 :

54 sc (54)

Rnd 25 :

(7 sc, dec) x6 (48)

Rnd 26-50 :

48 sc (48)

Info :

If you would like to make your puppet longer or shorter adjust the amount of rows worked here. Sl last st, tie off and finish.

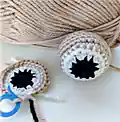
β€” Eyes (Make 2) :

Using Ebony yarn :

Ch 2

Rnd 1 :

6 sc in 2nd ch from hook (6)

Rnd 2 :

inc in all 6 sts (12)

Change to Frost yarn :

Rnd 3 :

(1 sc, inc in next st) x6 (18)

Rnd 4 :

(2 sc, inc in next st) x6 (24)

Change to Oatmeal yarn :

Rnd 5 :

(3 sc, inc in next st) x6 (30)

Rnd 6-9 :

30 sc (30)

Rnd 10 :

(3 sc, dec) x6 (24)

Rnd 11 :

(2 sc, dec) x6 (18)

Info :

Start to stuff

Rnd 12 :

(1 sc, dec) x6 (12)

Rnd 13 :

dec x6 (6)

Info :

Finish stuffing and close hole, leave enough yarn to sew to puppet later.

β€” Ears :

Using Gingerbread yarn :

Start 6 sc in a magic ring

Rnd 1 :

6 sts

Rnd 2 :

inc in all 6 sts (12)

Rnd 3 :

(1 sc, inc in next st) x6 (18)

Rnd 4 :

(2 sc, inc in next st) x6 (24)

Rnd 5 :

(3 sc, inc in next st) x6 (30)

Rnd 6 :

(4 sc, inc in next st) x6 (36)

Rnd 7 :

(5 sc, inc in next st) x6 (42)

Rnd 8-12 :

42 sc (42)

Rnd 13 :

(5 sc, dec in next st) x6 (36)

Rnd 14-18 :

36 sc (36)

Rnd 19 :

(sc 4, dec in next st) x6 (30)

Rnd 20-26 :

30 sc (30)

Rnd 27 :

(sc 3, dec in next st) x6 (24)

Rnd 28-32 :

24 sc (24)

Info :

Push both sides of the ears together, sc through both sides to close the top of the ear. Sl last stitch, cut yarn leaving enough thread to sew to head later.

β€” Nose :

Using Ebony yarn :

Start 6 sc in a magic ring

Rnd 1 :

6 sts

Rnd 2 :

inc in all 6 sts (12)

Rnd 3 :

(2 sc, 2 inc) x3 (18)

Rnd 4 :

3 sc, 2 inc, (4 sc, 2 inc) x2, 1 sc (24)

Rnd 5 :

4 sc, 2 inc, (6 sc, 2 inc) x2, 2 sc (30)

Rnd 6 :

30 sc (30)

Rnd 7 :

5 sc, 2 dec, (6 sc, 2 dec) x2, 1 sc (24)

Rnd 8 :

(2 sc, dec) x6 (18)

Rnd 9 :

(1 sc, dec) x6 (12)

Info :

Stuff lightly

Rnd 10 :

(1 dec) x6 (6)

Info :

Stuff a little more if needed. Close leaving a really long thread, this will be used to sew on to top of mouth later.

Assembly Instructions

  • Start by pinning the eyes and nose onto the top of the dog's head, making them as symmetrical as possible
  • Check the placement by putting the puppet on your hand before sewing
  • Sew the eyes and nose carefully, avoiding sewing through both sides of the puppet to keep the hand opening clear
  • Sew around each piece twice and connect the two eyes together through the back where they meet
  • Pin the ears across on a diagonal to help frame the face properly
  • Sew the ears in place once you're satisfied with their positioning

Important Notes

  • πŸ’‘Use stitch markers to keep track of your rounds throughout the pattern
  • πŸ’‘Maintain consistent tension to ensure the puppet opening fits your hand comfortably
  • πŸ’‘Be very careful not to sew through both layers when attaching facial features
  • πŸ’‘Pin all pieces in place before sewing to ensure proper positioning and symmetry
  • πŸ’‘The optional squeaker should be inserted into the tongue before closing
  • πŸ’‘Adjust the number of body rounds (26-50) to make your puppet longer or shorter as desired

This charming Dog Hand Puppet pattern creates the perfect interactive companion for storytelling and imaginative play. With its expressive eyes, floppy ears, and movable red tongue, this puppet comes alive in your hands and brings endless joy to children and adults alike. The clever construction method ensures smooth operation while the detailed facial features give this pup tons of personality. πŸ• Happy crocheting! 🧢✨

You ask,

we answer.

FAQs

Can I use different yarn weights for this pattern?

Yes, but remember that using different yarn weights will change the final size of your puppet. If you use a different weight, adjust your hook size accordingly and expect size variations.

Is the squeaker really necessary?

The squeaker is completely optional! The pattern works perfectly without it, but children especially love the added sound element it provides during play.

How do I know if my puppet opening is the right size?

Test the fit frequently by putting your hand inside during construction. The opening should be snug but comfortable, allowing easy movement of your fingers to operate the mouth.

Can I make this puppet in different colors?

Absolutely! Feel free to customize the colors to create different dog breeds or even fantasy creatures. Just maintain the same color-changing sequence for the best results.

What's the best way to clean this puppet?

Since it contains stuffing and possibly a squeaker, spot cleaning is recommended. Use a damp cloth with mild soap for surface cleaning, avoiding soaking the puppet completely.