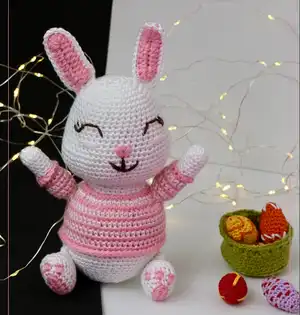
Create your own adorable Easter companion with this charming bunny amigurumi pattern! Perfect for spring celebrations, this sweet bunny features a pink striped sweater, soft white body, and comes complete with colorful Easter eggs and a matching basket. The detailed instructions guide you through creating every adorable detail, from the bunny's gentle smile to the tiny decorative eggs that make this project extra special for the season.
Progress Tracker
0% Complete
— Head and Torso :
Ring 1 :
Work 1 magic ring with the main color yarn, make 8 Sc into the ring, DO NOT COMBINE. Pull the rope tightly. Use the loop carrier on each ring.
Ring 2 :
8 times (Inc into each Sc) (16 grains Sc)
Ring 3 :
Next Sc into Next Sc, Next Inc (24 units Sc)
Ring 4 :
8 times (Sc into Next 2 Sc, next to Inc) (40 grains Sc)
Ring 5-8 (4 rings) :
Sc into each Sc throughout the ring (40 pieces Sc)
Ring 9 :
8 times (Sc into next 4 Sc, next to Inc) (48 sc in)
Ring 10-12 (3 rings) :
Sc into each Sc (48 pieces Sc)
Ring 13 :
8 times (every 5 Sc into Sc Next Inc) (56 sc in)
Ring 14 :
Sc into each Sc through the ring (56 grains Sc)
Ring 15 :
Sc into the next 12 Sc, [Inc into each of the next 4 Sc] Sc into each of the next 24 Sc [Inc into each of the next 4 Sc] Sc into each of the next 12 Sc ( 64 grain Sc)
Ring 16 :
Sc inside each Sc along the ring (64 sc)
Ring 17-18 (Two rings) :
Sc into each Sc (64 of Sc)
Ring 19 :
Sc into next 12 Sc [4 Sc Dec] Sc into next 24 Sc [4 Sc Dec] Sc into next 12 Sc (56 grains of Sc)
Ring 20 :
8 times (Sc inside every next 5 Sc, next Dec) (48 Sc)
Ring 21 :
6 times (Trailing 6 Sc into Sc next Dec) (42 sc in)
Ring 22 :
Sc into each Sc through the ring (42 pieces Sc)
Ring 23 :
6 times (Sc into next 5 Sc, next Dec) (36 sc in)
Ring 24 :
6 times (Sc into next 4 Sc, next Dec) (30 grains Sc)
Ring 25 :
2 times (Sc into each of the next 8 Sc) [2 Sc Dec] into each of the next 10 Sc [next 2 Sc Dec] (24 sc)
Ring 26 :
8 times (Sc into each of the next 2 Sc, next to Inc) (32 sc)
Ring 27 :
8 times (Inc each 3 Sc next to Sc) (40 Sc)
Ring 28 :
8 times (Inc each 4 Sc next to Sc) (48 Sc)
Ring 29 :
8 times (Inc each 5 Sc in the next one) (56 Sc in the next) leave the main color switch to color a.
Ring 30-43 (13 loops) :
Knit the primary color and a-colors alternately throughout the ring.
Ring 44 :
Switch to main color, leave out color a. Work only back rings. Sc into each Sc along the ring (56 Sc)
Ring 45 :
8 times (Sc into every 5 Sc, next Dec) (48 sc in)
Ring 46 :
Sc into each Sc through the ring (48 pieces Sc)
Ring 47 :
6 times (Sc into Next 6 Sc, next Dec) (42 sc in)
Ring 48 :
6 times (Sc into Next 5 Sc, next Dec) (36 grains Sc)
Ring 49 :
Sc into each Sc through the ring (36 pieces Sc)
Ring 50 :
6 times (Sc into Next 4 Sc, next Dec) (30 grains Sc)
Ring 51 :
Sc into each Sc through the ring (30 grains Sc)
Info :
Start filling the body. Keep filling as you go.
Ring 52 :
6 times (Sc into every 3 Sc next Dec) (24 grains Sc)
Ring 53 :
6 times (Sc into each 3 Sc next Dec) (18 grains Sc)
Ring 54 :
6 times (Sc into each 2 Sc next Dec) (12 sc in each)
Ring 55 :
(Sc into each 1 Sc next Dec) (6 units Sc)
Info :
Study the Sc that is not working. Cover Chain (FO), clear the thread end.
— Arms :
Ring 1 :
Work a magic ring with the main color thread. Make 6 Sc into the ring, pull the rope tightly.
Ring 2 :
6 times (Inc into each Sc) (12 of Sc)
Ring 3-7 (5 rings) :
Sc into each Sc (12 rings of Sc)
Ring 8 :
Finish the main color. Switch to color A. Just work the back loops.
Ring 9 :
Switch to main color. Sc into each Sc through the ring. (12 sc)
Ring 10 :
Switch to color A. Sc into each Sc through the ring. (12 sc)
Ring 11 :
Switch to primary color. Sc into each Sc through the ring. (12 sc)
Ring 12 :
Switch to color A. Sc into each Sc through the ring. (12 sc)
Ring 13 :
Switch to primary color. Sc into each Sc through the ring. (12 sc)
Ring 14 :
Switch to color A. Sc into each Sc through the ring. (12 sc)
Ring 15 :
Switch to primary color. Sc into each Sc through the ring. (12 sc)
Ring 16 :
Switch to color A. 2 times Sc Dec. (10 Sc)
Info :
Stuff the arms tightly. Finish FO. Leave a long thread end for sewing. Sleeve detail: Work non-working rings of ring 7 with thread A in color.
— Tail :
Ring 1 :
Work a magic ring with the main color thread. Make 6 Sc into the loop, pull the rope tightly.
Ring 2 :
6 times (Inc into each Sc) (12 of Sc)
Ring 3 :
6 times (Sc into next 1 Sc, next to Inc) (18 sc)
Ring 4-6 (3 rings) :
Sc into each Sc (18 pieces Sc)
Ring 7 :
6 times (Sc into next Sc, next Dec) (12 of Sc)
Ring 8 :
Finish 6 times (Sc Dec) 6 Sc FO. Leave a long thread end for sewing.
— Ears :
Info :
Make 4. Make 9 CH with thread A of color. Make 3 CRs into the second CH from the crochet. CR inside each of the next 7 CH. Make 6 CR inside the last CH. Make 1 CR inside each of the next 7 CHs. Make 3 CRs inside the last CH. Finish Closure Chain (FO). Combine the ears, make Sc into each Sc by sinking in every 2 layers with the primary color thread. Finish Close Chain (FO). Leave a long thread end for sewing.
— Legs :
Ring 1 :
Make 5 strands of CH with thread A of color. Make 2 Sc into the 2nd chain from the crochet. Make 1 Sc in each of the CH of the next 3 chains. Make 2 Sc in the last CH. Study the nonworking rings of CH. (12 sc)
Ring 2 :
Switch to main color rope, do not finish A color rope. Immerse 2 times in the first Sc. Sc for each of the 4 Sc, the next one is Inc. In the next 1 Sc, the next 1 Sc is in the next Inc. Sc into the next 4 Sc (16 Sc.)
Ring 3 :
Sc into each Sc along the ring (16 pieces Sc)
Ring 4 :
Sc for each of the next 6 Sc. Switch to color A. 2 Sc in the next 1 Sc. Switch to the main color. Make Sc into Sc. Switch to color A again. Make 2 Sc in 1 Sc. Switch to the main color. Make 1 Sc. Switch to color A again. Make 2 Sc in 1 Sc. Sc in the next 6 Sc. Finish the main color.
Ring 5 :
Sc into each Sc through the ring. (20 grains Sc) Finish A color.
Ring 6 :
Switch to main color. (2 rings) Sc into each ring Sc (20 grains Sc)
Ring 7 :
Sc into next 8 Sc [3 times Sc Dec] Sc into next 8 Sc (16 sc in)
Ring 8 :
Sc into 7 Sc [3 times Sc Dec] Sc into next 6 Sc. (13 sc in)
Ring 9 (3 rings) :
Sc into each Sc through the ring (13 pieces Sc)
Ring 12 :
Flatten. Make 6 Sc by plunging the crochet into both layers. Finish FO. Leave a long thread end for sewing.
— Egg and Basket :
Info :
Make 6. You can make it in various colors. The patterns depend entirely on your ability to decorate.
Ring 1 :
Study 1 magic ring. Make 6 Sc into the ring. Pull the rope tightly.
Ring 2 :
Sc into each Sc (6 pieces of Sc)
Ring 3 :
2 times Sc Inc (8 times Sc)
Ring 4 :
Sc into each Sc (8 grains of Sc)
Ring 5 :
4 times Sc Inc (2 Sc into Sc, next to Sc) (12 of Sc)
Ring 6 :
Sc into each Sc. (12 sc)
Ring 7 :
4 times Sc Inc (Sc into each Sc, next to Inc) (16 of Sc)
Ring 8-10 (3 rings) :
Sc into each Sc (16 pieces Sc)
Ring 11 :
4 times Sc Dec (Sc into each 2 Sc, next Dec) (12 Sc)
Info :
Start filling the egg. Fill in as you go.
Ring 12 :
2 times Sc Dec (Sc into next 3 Sc, next Dec) (10 of Sc)
Ring 13 :
Finish Sc Dec FO 3 times. Clean the thread end.
— Basket :
Ring 1 :
Work ring 1-6 on the head with green thread. At the end of ring 6 there should be 40 Sc.
Ring 7 :
Work the back loops only. Sc into each Sc through 7 rings (40 grains Sc)
Ring 15 :
2 Hdc into the first Sc. Skip a CH one Sc in between. 2 Hdc into Sc again. (20 times) Finish Fo.
This enchanting Easter Bunny pattern brings springtime joy right to your fingertips! Complete with a striped sweater, adorable facial expressions, and a basket full of colorful eggs, this project captures the magic of Easter in the sweetest way possible. The combination of classic amigurumi techniques with seasonal details makes it perfect for both experienced crocheters and those looking to challenge their skills. 🐰 Happy crocheting! 🧶✨