๐Ÿงถ Beautiful โœจ Detailed ๐Ÿ’ Adorable

Lily the Piglet Amigurumi Pattern

Lily the Piglet Amigurumi Pattern
4.2โ˜… Rating
8-10 Hours Time Needed
2.7K Made This
โœ‚๏ธ

Intermediate Level

Ideal for those with basic knitting experience, featuring slightly more advanced stitches and techniques to expand your skills.

โฑ๏ธ

All-Day Adventure

Requires 8-10 hours, ideal for a full day of immersive knitting.

๐Ÿงธ

Cute Companion

An adorable friend to cherish, handcrafted with love to bring comfort and joy for years to come.

About This Lily the Piglet Amigurumi Pattern

Lily the Piglet is a charming 26cm tall amigurumi that combines classic crochet techniques with modern jointed construction. This intermediate pattern features color changes, back post stitches, and detailed assembly instructions that create a truly professional-looking finished piece. The pattern includes comprehensive tutorials for plastic doll joints, making Lily's arms and legs fully poseable for hours of interactive play.

Lily the Piglet Amigurumi Pattern crochet pattern - detailed view of completed project

Designed by Kristi Tullus, this pattern showcases beautiful pink color combinations and includes detailed photo tutorials for every step. The finished piglet features safety eyes, embroidered details, and a perfectly shaped snout that gives Lily her distinctive personality.

Why You'll Love This Lily the Piglet Amigurumi Pattern

I absolutely love how this pattern teaches you advanced construction techniques while creating something so endearing! The jointed limbs make Lily incredibly huggable and poseable, and I find the color-changing techniques really help develop your crochet skills. The detailed photo instructions make even the trickiest parts manageable, and there's something so satisfying about watching Lily come together piece by piece. Plus, the final result is so professional-looking that everyone will think you bought it from a high-end toy store!

Lily the Piglet Amigurumi Pattern step 1 - construction progress Lily the Piglet Amigurumi Pattern step 2 - assembly progress Lily the Piglet Amigurumi Pattern step 3 - details and accessories Lily the Piglet Amigurumi Pattern step 4 - final assembly and finishing

Switch Things Up

I love how versatile this Lily pattern can be with just a few creative tweaks! You could easily transform her into different farm friends by changing the ear shape and colors - imagine a sweet lamb in cream and white, or a playful cow in black and white spots. I've experimented with adding a small flower crown made from tiny crocheted roses, which gives Lily such a whimsical garden party look.

For a seasonal twist, I sometimes use autumn colors like burnt orange and cream to create a harvest-themed piglet, or soft pastels for a spring version. The muzzle shape could be slightly modified to create different animal friends - a longer snout could make a adorable elephant, while a smaller one might work for a bear. I particularly enjoy making matching accessories like a tiny bow tie or a miniature scarf that can be removed and changed.

The joint system opens up so many posing possibilities - I love photographing Lily in different scenes, from tea parties to outdoor adventures. You could even create a whole farm family by scaling the pattern up or down using different yarn weights and hook sizes.

Common Mistakes & How to Fix Them

โœ— Forgetting to place stitch markers when changing colors - this makes it difficult to align features properly โœ— Not stuffing firmly enough before decreasing rounds - this creates a floppy, unstable shape that won't hold up โœ— Installing safety eyes too early before checking placement - always test position before securing permanently with washers โœ— Rushing the joint installation without proper alignment - take time to ensure stems face toward body for best movement

Lily the Piglet Amigurumi Pattern

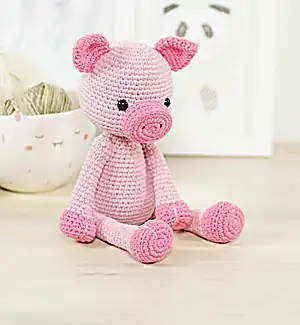
Create this adorable pink piglet with soft, cuddly features that will melt your heart! This intermediate pattern combines simple crochet techniques with charming details to bring Lily to life. Perfect for gift-giving or adding a sweet farm friend to your collection, this pattern includes detailed instructions for creating moveable limbs using plastic joints for extra playability.

Intermediate 8-10 Hours

Materials Needed for Lily the Piglet Amigurumi Pattern

โ€” Main Fabric

  • 01
    Alize Cotton Gold sport weight cotton-acrylic blend, 55g light pink and 20g dark pink
  • 02
    Cotton-acrylic blend yarn, 329m=100g, 14 wpi, size 2: fine weight

โ€” Tools Required

  • 01
    2.50-3.00mm crochet hook (US size 2/C - 3/D)
  • 02
    9mm safety eyes
  • 03
    Two 20mm plastic doll joints
  • 04
    Two 15mm plastic doll joints
  • 05
    Black or dark brown embroidery floss
  • 06
    Polyester fiberfill stuffing
  • 07
    Yarn needle
  • 08
    Scissors
  • 09
    Stitch markers

Progress Tracker

0% Complete

โ€” Head :

Round 1 :

mr, sc 6 (6)

Round 2 :

inc x 6 (12)

Round 3 :

(sc, inc) x 6 (18)

Round 4 :

(inc, sc 2) x 6 (24)

Round 5 :

(sc 3, inc) x 6 (30)

Round 6 :

sc, inc, (sc 4, inc) x 5, sc 3 (36)

Round 7 :

(sc 5, inc) x 6 (42)

Round 8 :

sc 2, inc, (sc 6, inc) x 5, sc 4 (48)

Round 9 :

(sc 7, inc) x 6 (54)

Round 10-15 :

sc in each st (54)

Info :

On round 16 place a stitch marker between stitches 24 and 25

Round 16-17 :

sc in each st (54)

Round 18 :

sc 11, inc, (sc 2, inc) x 2, sc 13, inc, (sc 2, inc) x 2, sc 16 (60)

Round 19-21 :

sc in each st (60)

Round 22 :

sc 3, dec, (sc 8, dec) x 5, sc 5 (54)

Round 23 :

(sc 7, dec) x 6 (48)

Round 24 :

sc 2, dec, (sc 6, dec) x 5, sc 4 (42)
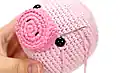
Info :

Attach safety eyes between rows 16 and 17, leaving 10 stitches between them. Start stuffing firmly.

Round 25 :

(sc 5, dec) x 6 (36)

Round 26 :

sc, dec, (sc 4, dec) x 5, sc 3 (30)

Round 27 :

(sc 3, dec) x 6 (24)

Round 28 :

(dec, sc 2) x 6 (18)

Info :

Sl st in next stitch. Cut yarn, leaving long tail for sewing, and fasten off. Stuff head firmly.

โ€” Muzzle :

Round 1 :

mr, sc 6 (6)

Round 2 :

(inc3 x 2, sc) x 2 (14)

Round 3 :

sc 2, inc x 3, sc 4, inc x 3, sc 2 (20)

Round 4 :

sc 3, inc x 3, sc 7, inc x 3, sc 4 (26)

Round 5 :

bpsc in each st (26)

Round 6-7 :

sc in each st (26)

Info :

Sl st in next stitch. Cut yarn, leaving long tail for sewing, and fasten off. Stuff muzzle firmly and sew to head. Embroider nostrils.

โ€” Ears (make 2) :

Round 1 :

mr, sc 6 (6)

Round 2 :

sc in each st (6)

Round 3 :

(inc, sc) x 3 (9)

Round 4 :

(sc 2, inc) x 3 (12)

Round 5 :

sc, inc, (sc 3, inc) x 2, sc 2 (15)

Round 6 :

(sc 4, inc) x 3 (18)

Round 7-9 :

sc in each st (18)

Round 10 :

(dec, sc) x 6 (12)

Info :

Sl st in next stitch. Cut yarn, leaving long tail for sewing, and fasten off. Flatten ears and sew to head.

โ€” Arms (make 2) :

Round 1 :

mr, sc 7 (7)

Round 2 :

inc x 7 (14)

Round 3 :

(sc, inc) x 7 (21)

Round 4 :

sc in each st BLO (21)

Round 5 :

sc 7, dec, (sc, dec) x 2, sc 6 (18)

Round 6 :

sc 4, dec, sc 7, dec, sc 3 (16)

Round 7 :

sc 8, dec, sc 6 (15)

Info :

Sc in next stitch, count as end of round. Switch to light pink yarn.

Round 8 :

sc in each st (15)

Round 9 :

sc 7, dec, sc 6 (14)

Info :

Stuff firmly. Make vertical stitch along front of hoof with light pink yarn. Continue stuffing after every few rounds.

Round 10 :

sc in each st (14)

Round 11 :

sc 7, dec, sc 5 (13)

Round 12 :

sc in each st (13)

Round 13 :

sc 7, dec, sc 4 (12)

Round 14 :

sc in each st (12)

Round 15 :

sc 7, dec, sc 3 (11)

Round 16-23 :

sc in each st (11)

Info :

On left arm only, sc in next 6 stitches. Attach 15mm joint between rounds 22-23.

Round 24 :

sc 5, dec x 3 (8)

Round 25 :

dec x 2, leave rest unworked (6)

Info :

Finish stuffing. Cut yarn, leaving long tail, and fasten off. Close opening.

โ€” Legs (make 2) :

Round 1 :

mr, sc 6 (6)

Round 2 :

inc x 6 (12)

Round 3 :

(sc, inc) x 6 (18)

Round 4 :

(inc, sc 2) x 6 (24)

Round 5 :

sc in each st BLO (24)

Round 6 :

sc 8, dec, (sc, dec) x 2, sc 8 (21)

Round 7 :

sc 5, dec, sc 8, dec, sc 4 (19)

Round 8 :

sc 9, dec, sc 8 (18)

Info :

Sc in next stitch, count as end of round. Switch to light pink yarn.

Round 9 :

sc in each st (18)

Round 10 :

sc 8, dec, sc 8 (17)

Info :

Stuff firmly. Make vertical stitch along front of hoof. Continue stuffing after every few rounds.

Round 11 :

sc in each st (17)

Round 12 :

sc 3, dec, sc 8, dec, sc 2 (15)

Round 13 :

sc in each st (15)

Round 14 :

sc 7, dec, sc 6 (14)

Round 15 :

sc in each st (14)

Round 16 :

sc 7, dec, sc 5 (13)

Round 17-28 :

sc in each st (13)

Info :

On left leg only, sc in next 7 stitches. Attach 20mm joint between rounds 27-28.

Round 29 :

sc 9, dec, sc 2 (12)

Round 30 :

sc 2, dec x 5 (7)

Round 31 :

sc, dec, leave rest unworked (6)

Info :

Finish stuffing. Cut yarn, leaving long tail, and fasten off. Close opening.

โ€” Body :

Round 1 :

mr, sc 6 (6)

Round 2 :

inc x 6 (12)

Round 3 :

(sc, inc) x 6 (18)

Round 4 :

(inc, sc 2) x 6 (24)

Round 5 :

(sc 3, inc) x 6 (30)

Round 6 :

sc, inc, (sc 4, inc) x 5, sc 3 (36)

Round 7 :

(sc 5, inc) x 6 (42)

Round 8-14 :

sc in each st (42)

Info :

Turn body so last stitch of round 14 is at center of back. Attach legs between rounds 8-9.

Round 15 :

sc 9, dec, sc 5, dec, sc 6, dec, sc 5, dec, sc 9 (38)

Round 16 :

sc 18, dec, sc 18 (37)

Round 17 :

(sc 11, dec) x 2, sc 11 (35)

Round 18 :

sc 4, dec, sc 24, dec, sc 3 (33)

Info :

Start stuffing body. Continue adding stuffing after every few rounds.

Round 19 :

sc 16, dec, sc 15 (32)

Round 20 :

dec, sc 30 (31)

Round 21 :

sc 7, dec, sc 14, dec, sc 6 (29)

Round 22 :

sc 14, dec, sc 13 (28)

Round 23 :

sc 10, dec, sc 6, dec, sc 8 (26)

Round 24 :

(dec, sc 11) x 2 (24)

Round 25 :

sc 6, dec, sc 9, dec, sc 5 (22)

Round 26 :

sc 9, dec, sc 2, dec, sc 7 (20)

Round 27 :

dec, sc 18 (19)

Round 28 :

sc 9, dec, sc 8 (18)

Round 29 :

sc in each st (18)

Info :

Sl st in next stitch. Cut yarn and fasten off. Attach arms between rows 24-25. Finish stuffing and sew head to body.

โ€” Tail :

Instructions :

ch 11, starting in 2nd ch from hook, 2 sc in each ch, crocheted into loops on back of chain (20)

Info :

Cut yarn, leaving long tail for sewing, and fasten off. Sew tail to body.

Assembly Instructions

  • Attach safety eyes to head between rows 16-17, leaving 10 stitches between them, then secure with washers
  • Stuff and sew muzzle to head just below round 15, then embroider nostrils with dark brown embroidery floss
  • Use yarn to shape head by pulling thread from bottom to beside each eye and back to create definition
  • Install plastic doll joints in arms and legs, ensuring stems face toward body for proper movement
  • Attach legs to body between rounds 8-9, positioning them at either side with joint stems toward center
  • Attach arms to body between rounds 24-25, ensuring proper alignment and secure attachment
  • Sew head to body using mattress stitch for strongest connection, adding extra stuffing before closing seam

Important Notes

  • ๐Ÿ’กWork in continuous spiral without joining rounds unless instructed otherwise in pattern
  • ๐Ÿ’กUse stitch markers to track round beginnings, especially during color changes and joint placements
  • ๐Ÿ’กStuff all pieces firmly but not too tightly to maintain proper shape and joint functionality
  • ๐Ÿ’กTest fit all joints before final assembly to ensure proper alignment and movement
  • ๐Ÿ’กPin all pieces in place before sewing to verify correct positioning and proportions

This charming Lily the Piglet pattern brings together classic amigurumi techniques with modern jointed construction for a truly special creation. The combination of soft pink tones and detailed finishing touches creates a professional-quality toy that's perfect for gifting or treasuring. With comprehensive photo tutorials and clear instructions, even intermediate crocheters can achieve beautiful results. ๐Ÿงถ Happy crocheting! ๐Ÿทโœจ

You ask,

we answer.

FAQs

Can I use different yarn weights for this pattern?

While the pattern is designed for sport weight yarn, you can use different weights by adjusting your hook size accordingly. Keep in mind that this will change the finished size of your piglet.

Are plastic doll joints necessary, or can I use alternatives?

The pattern provides alternatives including safety eyes, buttons with thread, or even just thread attachment. Plastic joints are recommended for durability and washability, but other methods work well too.

How do I ensure the safety eyes are properly positioned?

Place a stitch marker between stitches 24-25 on round 16 as your guide. Position eyes on either side leaving exactly 10 stitches (9 holes) between them, and always test placement before securing with washers.

What's the best way to stuff the piglet for optimal shape?

Stuff firmly but not too tightly, adding small amounts of fiberfill after every few rounds. Pay special attention to the muzzle and hooves, which need firm stuffing to maintain their shape.

Can I make this pattern child-safe?

Yes! Use embroidered eyes instead of safety eyes, and ensure all parts are securely attached. Avoid using joints for very young children, opting instead for sewn-on limbs.