🧢 Beautiful ✨ Detailed πŸ’ Adorable

Lucky Cat Amigurumi Pattern

Lucky Cat Amigurumi Pattern
4.0β˜… Rating
6-8 Hours Time Needed
1.2K Made This
βœ‚οΈ

Intermediate Level

Ideal for those with basic knitting experience, featuring slightly more advanced stitches and techniques to expand your skills.

⏱️

Weekend Treat

Takes 5-7 hours, making it an enjoyable project to finish over a couple of days.

🧸

Cute Companion

An adorable friend to cherish, handcrafted with love to bring comfort and joy for years to come.

About This Lucky Cat Amigurumi Pattern

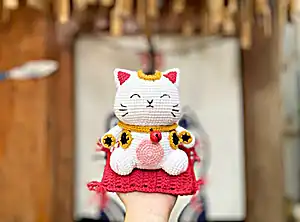
This Lucky Cat amigurumi pattern combines traditional Japanese symbolism with modern crochet techniques. The pattern includes everything you need to create a complete Lucky Cat scene, including the cat itself, a decorative pillow, and charming accessories. Each component is carefully designed with attention to detail, featuring the classic raised paw pose and peaceful expression that makes maneki-neko so beloved worldwide.

Lucky Cat Amigurumi Pattern crochet pattern - detailed view of completed project

The pattern uses basic amigurumi techniques with some intermediate colorwork and shaping. Multiple small components come together to create a stunning finished piece that's perfect for display or play.

Why You'll Love This Lucky Cat Amigurumi Pattern

I absolutely love how this pattern brings together cultural tradition with modern crafting! The satisfaction of watching each tiny component come together into this adorable lucky cat is incredible. What really makes me excited about this design is how the different textures and colors create such a rich, detailed finish - from the soft white body to the vibrant red pillow with those playful tassels. The size is perfect too - at 4 inches, it's substantial enough to be impressive but compact enough to fit anywhere in your home.

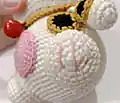
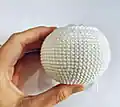
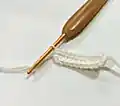
Lucky Cat Amigurumi Pattern step 1 - construction progress Lucky Cat Amigurumi Pattern step 2 - assembly progress Lucky Cat Amigurumi Pattern step 3 - details and accessories Lucky Cat Amigurumi Pattern step 4 - final assembly and finishing

Switch Things Up

I love experimenting with different color combinations for this lucky cat! While the traditional white with honey spots is classic, you could create a stunning black cat with silver accents for a more modern look, or even try pastels like soft blue and cream for a gentle, nursery-friendly version.

The pillow offers another great opportunity for creativity - instead of red, consider making it in deep purple for elegance, or bright orange for a more playful vibe. You could even add embroidered patterns or small appliquΓ©s to make it truly unique.

For those who want to add extra charm, I sometimes replace the simple bell with a tiny crocheted fish or mouse. The collar can also be customized with different buttons - perhaps a small wooden heart or even a miniature lucky charm.

Don't be afraid to adjust the facial expression either! While this pattern creates peaceful, closed eyes, you could easily modify it for open eyes using safety eyes, or even create a winking expression for extra personality.

Common Mistakes & How to Fix Them

βœ— Forgetting to mark stitch positions for facial features before stuffing the head completely βœ— Overstuffing the arms and legs which makes them too rigid for proper positioning βœ— Not maintaining consistent tension when switching between different colored yarns during spots βœ— Skipping the invisible decrease technique which creates visible holes in the finished piece

Lucky Cat Amigurumi Pattern

Create your own adorable Lucky Cat with this delightful amigurumi pattern! This charming maneki-neko brings good fortune and joy to any space. Perfect for gifting or adding a touch of Japanese culture to your home, this pattern includes detailed instructions for the cat, decorative pillow, and cute collar with bell. The finished doll measures 4 inches and features beautiful color combinations with traditional lucky cat elements.

Intermediate 6-8 Hours

Materials Needed for Lucky Cat Amigurumi Pattern

β€” Main Fabric

  • 01
    Yarnart Jeans yarn (160m/50gr) in white (01), black (53), red (51), pink (36), and honey (84) colors
  • 02
    Cotton or acrylic yarn suitable for amigurumi work in coordinating colors

β€” Tools Required

  • 01
    Crochet hook size 2.3mm
  • 02
    One bell 12mm
  • 03
    One wooden button 10mm
  • 04
    Fiberfill for stuffing
  • 05
    Yarn needle
  • 06
    Scissors
  • 07
    Stitch markers

Progress Tracker

0% Complete

β€” Head :

Round 1 :

8sc into magic ring (8)

Round 2 :

8inc (16)

Round 3 :

(sc, inc)*8 (24)

Round 4 :

(2sc, inc)*8 (32)

Round 5 :

(3sc, inc)*8 (40)

Round 6 :

(4sc, inc)*8 (48)

Round 7 :

(5sc, inc)*8 (56)

Round 8 :

56sc (56)

Round 9 :

(6sc, inc)*8 (64)

Round 10-14 :

64sc (64)

Round 15 :

26sc, mark the point, 12sc, mark the point, 26sc (64)

Round 16 :

64sc (64)

Round 17 :

9sc, (sc, inc)*8, 14sc, (sc, inc)*8, 9sc (80)

Round 18-22 :

80sc (80)

Round 23 :

(8sc, dec)*8 (72)

Round 24 :

(7sc, dec)*8 (64)

Round 25 :

(6sc, dec)*8 (56)

Round 26 :

BLO (2sc, dec)*14 (42)

Info :

Fasten off, leave a long tail for sewing. Stuff the head. Use black yarn to sew eyes on round 15, sew mouth between round 17-19 and sew whiskers between round 18-21. Use pink yarn to sew nose.

β€” Body :

Info :

Make a chain of 11ch. Start in the second chain from hook.

Round 1 :

9sc, 3sc into the last stitch, work on a long the other side: 8sc, inc (22)

Round 2 :

inc, 8sc, 3inc, 8sc, 2inc (28)

Round 3 :

sc, inc, 8sc, (inc, sc)*3, 8sc, (inc, sc)*2 (34)

Round 4 :

inc, 10sc, (2sc, inc)*3, 8sc, (2sc, inc)*2 (40)

Round 5 :

(4sc, inc)*8 (48)

Round 6 :

48sc (48)

Round 7 :

(5sc, inc)*8 (56)

Round 8 :

56sc (56)

Round 9 :

(13sc, inc)*4 (60)

Round 10-18 :

60sc (60)

Round 19 :

(13sc, dec)*4 (56)

Round 20 :

56sc (56)

Round 21 :

(12sc, dec)*4 (52)

Round 22 :

(11sc, dec)*4 (48)

Round 23 :

(6sc, dec)*6 (42)

Info :

Fasten off, leaving a long tail for sewing. Stuff the body.

β€” Arms (2) :

Round 1 :

8sc into magic ring (8)

Round 2 :

8inc (16)

Round 3-4 :

16sc (16)

Round 5 :

(6sc, dec)*2 (14)

Round 6-7 :

14sc (14)

Round 8 :

(5sc, dec)*2 (12)

Round 9-12 :

12sc (12)

Info :

Stuff the arms. Flatten and fold the top of the arm, join and sc together the 2 opposing stitches (6sc). Leave a long tail for sewing.

β€” Ears (2) :

Round 1 :

4sc into magic ring (4)

Round 2 :

4inc (8)

Round 3 :

(sc, inc)*4 (12)

Round 4 :

2sc, inc, 2sc, inc, (2sc, inc)*2 (16)

Round 5 :

3sc, inc, 2sc, sc, inc, (3sc, inc)*2 (20)

Round 6 :

4sc, inc, 2sc, 2sc, inc, (4sc, inc)*2 (24)

Round 7 :

5sc, inc, 2sc, 3sc, inc, (5sc, inc)*2 (28)

Round 8 :

9sc, 5sc, 14sc (28)

Info :

Stuff the ears. Fasten off, leave a long tail for sewing.

β€” Legs (2) :

Round 1 :

6sc into magic ring (6)

Round 2 :

6inc (12)

Round 3 :

(sc, inc)*6 (18)

Round 4 :

(2sc, inc)*6 (24)

Round 5 :

(3sc, inc)*6 (30)

Round 6-8 :

30sc (30)

Round 9 :

(3sc, dec)*6 (24)

Info :

Stuff the legs. Leave a long tail for sewing.

β€” Belly :

Round 1 :

6sc into magic ring (6)

Round 2 :

6inc (12)

Round 3 :

(sc, inc)*6 (18)

Round 4 :

(2sc, inc)*6 (24)

Round 5 :

(3sc, inc)*6 (30)

Info :

Fasten off, leave a long tail for sewing.

β€” Hand Spots (2) :

Round 1 :

6sc into magic ring, slst (6)

Round 2 :

Change to honey yarn ch, 6inc, slst (12)

Info :

Fasten off, leave a long tail for sewing.

β€” Body Spots (2) :

Round 1 :

6sc into magic ring (6)

Round 2 :

Ch, 6inc, slst (12)

Round 3 :

Change to honey yarn ch, (sc, inc)*6, slst (18)

Info :

Fasten off, leave a long tail for sewing.

β€” Head Spot :

Round 1 :

Ch5, start in the 2nd chain from hook: 3sc, 3sc-inc, 2sc, inc, slst (10)

Round 2 :

Ch, Inc, 2sc, 3inc, 2sc, 2inc, slst (16)

Round 3 :

Change to honey yarn ch, sc, inc, 2sc, (sc, inc)*3, 2sc, (sc, inc)*2, slst (22)

Round 3 :

Ch, 2sc, inc, 2sc, (2sc, inc)*3, 2sc, (2sc, inc)*2, slst (28)

Info :

Fasten off, leave a long tail for sewing.

β€” Collar :

Round 1 :

Make a chain of 62ch. Start in the 7th chain from hook 55sc (55)

Info :

Fasten off, weave in the yarn end. Sew the button and the bell through the collar. Wear collar for the cat.

β€” Tail :

Round 1 :

6sc into magic ring (6)

Round 2 :

6inc (12)

Round 3-9 :

12sc (12)

Info :

Don't stuff the tail. Flatten and fold the top of the tail, join and sc together the 2 opposing stitches (6sc). Leave a long tail for sewing. Sew tail to body on round 6.

β€” Pillow :

Round 1 :

Make a chain of 40ch. Start in the 3rd chain from hook 38dc, turn (38)

Round 2-13 :

Ch2, 38dc, turn (38)

Round 14 :

Ch2, 38dc (38)

Info :

Fasten off, leave a long tail about 40cm for sewing. Stuff some fiberfill in the pillow.

Tassels (4) :

Cut 20 equal yarns about 10cm. Take 5 yarns and thread needle. Thread the needle through one corner of the pillow. Knot. Separate the yarns into small yarns. Repeat the same steps for the remaining 3 corners.

Assembly Instructions

  • Sew head to body securely, ensuring proper alignment and stuffing
  • Attach ears to head between rounds 4-11 for proper positioning
  • Sew head spot to the head between rounds 1-9 for authentic lucky cat appearance
  • Position and sew legs to body between rounds 6-13, spacing them 10 stitches apart
  • Attach body spots to the body between rounds 14-20 for decorative detail
  • Sew belly piece to body between rounds 10-19 for color contrast
  • Attach arms to body sides and add hand spots to complete the look

Important Notes

  • πŸ’‘Use invisible decrease technique throughout for professional-looking results
  • πŸ’‘Mark stitch positions for facial features before stuffing the head completely
  • πŸ’‘Maintain consistent tension when working with multiple colors for clean color changes
  • πŸ’‘Stuff all parts firmly but not overly tight to maintain proper shape and flexibility
  • πŸ’‘Use pink yarn to add decorative lines on legs for authentic lucky cat details
  • πŸ’‘Ensure collar fits properly before final assembly and bell attachment

This enchanting Lucky Cat pattern brings the beloved Japanese maneki-neko tradition into your crafting world! Every detail has been thoughtfully designed to capture the peaceful expression and graceful pose that makes these cats so special. The combination of soft textures, vibrant colors, and traditional elements creates a truly magical finished piece. Whether you're making it for yourself or as a meaningful gift, this lucky cat will bring joy and good fortune wherever it goes. 🧢 Happy crocheting! 🐱✨

You ask,

we answer.

FAQs

What size will my finished Lucky Cat be?

The completed Lucky Cat measures approximately 4 inches tall, making it perfect for display on shelves, desks, or as a charming gift.

Can I use different yarn weights for this pattern?

This pattern is specifically designed for DK weight yarn like Yarnart Jeans. Using different weights will change the final size and may affect the stitch count and proportions.

Is the pillow attachment necessary?

The pillow is optional but adds to the traditional lucky cat presentation. You can make just the cat if you prefer a simpler project.

How do I make the invisible decreases mentioned in the pattern?

Insert your hook through the front loops only of the next two stitches, yarn over and pull through both loops, then yarn over and pull through the two loops on your hook.

Can I make this pattern larger?

Yes, you can use a larger hook and thicker yarn, but you'll need to adjust the stitch counts proportionally and the assembly measurements may change.