🧶 Beautiful ✨ Detailed 💝 Adorable

Mini Frog Amigurumi Pattern

Mini Frog Amigurumi Pattern
4.4★ Rating
3-4 Hours Time Needed
4.0K Made This
✂️

Beginner Friendly Level

Perfect for those just starting their sewing journey, with clear instructions and simple techniques

⏱️

Bite-Sized Project

Complete in under 2 hours—quick, fun, and perfect for a little creative escape.

🐰

Whimsical Buddy

Playful characters full of personality, designed to spark imagination and become cherished playtime favorites.

About This Mini Frog Amigurumi Pattern

This mini frog pattern creates an adorable 15cm (5.9 inches) companion perfect for gifts or personal collections. The design features a classic frog shape with bulging eyes, a cute snout, and striped clothing that gives it personality. The pattern includes comprehensive instructions for all body parts plus a bonus mini cross bag accessory that adds extra charm to your finished piece.

Mini Frog Amigurumi Pattern crochet pattern - detailed view of completed project

Using worsted weight yarn and a 5.0mm crochet hook, this pattern works up quickly and uses basic stitches throughout. The striped body design adds visual interest while remaining simple enough for confident beginners.

Why You'll Love This Mini Frog Amigurumi Pattern

I absolutely love how this pattern brings together classic amigurumi techniques with a playful American-inspired design! The combination of the bright green frog with those patriotic stripes creates such a fun character that's both timeless and unique. What really draws me to this pattern is how the simple construction still results in so much personality - those bulging eyes and that sweet little snout just make you smile every time you look at it.

Mini Frog Amigurumi Pattern step 1 - construction progress Mini Frog Amigurumi Pattern step 2 - assembly progress Mini Frog Amigurumi Pattern step 3 - details and accessories Mini Frog Amigurumi Pattern step 4 - final assembly and finishing

Switch Things Up

I love experimenting with this adorable frog pattern by switching up the color combinations to create entirely different personalities! Instead of the classic patriotic stripes, I've tried making a pastel version with soft pink and lavender stripes that looks absolutely dreamy. For autumn, I created one with warm orange and brown stripes that gives it a cozy fall vibe.

Sometimes I'll make the entire body in gradient colors, starting with light green at the head and transitioning to darker forest green at the legs. I've even made a rainbow version where each stripe section is a different bright color - it's like having a party frog!

One of my favorite variations is using metallic threads mixed with the regular yarn to add some sparkle, especially for gift-giving. The cross bag accessory is perfect for customization too - I've made tiny versions with different closure styles or even added small embroidered details.

Common Mistakes & How to Fix Them

✗ Forgetting to change yarn colors according to the symbol pattern chart can result in incorrect stripe placement ✗ Not using stitch markers when dividing legs can cause uneven leg positioning and difficulty with assembly ✗ Overstuffing the body and limbs can distort the shape and make the frog look bulky instead of cute ✗ Skipping the stuffing step before closing rounds can create a floppy, shapeless finished product

Mini Frog Amigurumi Pattern

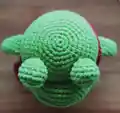
Create your own adorable mini frog friend with this charming amigurumi pattern! This delightful little amphibian features classic green coloring with a patriotic striped outfit in red, white, and blue. Perfect for beginners and experienced crocheters alike, this pattern includes detailed instructions for creating the body, head, legs, eyes, snout, arms, and even a cute mini cross bag accessory.

Beginner Friendly 3-4 Hours

Materials Needed for Mini Frog Amigurumi Pattern

— Main Fabric

  • 01
    Worsted weight yarn in light green for main body and head
  • 02
    Blue yarn for striped body sections
  • 03
    White yarn for stripe details and eye highlights
  • 04
    Red yarn for stripe accents and cross bag
  • 05
    Orange yarn for small details

— Tools Required

  • 01
    Crochet hook size 5.0mm (3mm)
  • 02
    Yarn needle for sewing
  • 03
    Fiberfill stuffing
  • 04
    Glue for attaching eyes
  • 05
    5mm Black plastic eyes x2
  • 06
    Stitch markers
  • 07
    Scissors

Progress Tracker

0% Complete

— Head/Body/Legs :

Round 1 :

Use Light green yarn to make MAGIC RING. sc×6 in the yarn loop, tighten the loop [6 sts]

Round 2 :

(2-sc inc) x 6 [12]

Round 3 :

(sc×1, 2-sc inc) x 6 [18]

Round 4 :

(sc×2, 2-sc inc) x 6 [24]

Round 5 :

(sc×3, 2-sc inc) x 6 [30]

Round 6 :

(sc×4, 2-sc inc) x 6 [36]

Round 7 :

(sc×5, 2-sc inc) x 6 [42]

Round 8 :

(sc×6, 2-sc inc) x 6 [48]

Round 9-35 :

sc in all 48 st [48]

Info :

Change yarn color according to SYMBOL PATTERNS. To make a leg, identify the center space between the legs by the 6 stitches, and each leg identifies the other by 18. Use stitch markers to help.

Round 36-39 :

sc in all 18 st [18]

Round 40 :

(sc×1, sc2tog) x 6 [12]

Round 41 :

(sc2tog) x 6 [6]

Info :

Fasten off, leaving a long tail. Stuff the leg. Using a yarn needle, weave the yarn tail through the front loop of each remaining st and pull tight to close.

Second Leg :

Rejoin the White yarn to 7th back unworked st of Rnd 35. Continue working the second leg (right leg) the same way as the first leg (left leg), from Rnd 36-41. Using a yarn needle, sew the 6 sts between the legs.

— Eye x2 :

Round 1 :

Use White yarn to make MAGIC RING. sc×6 in the yarn loop, tighten the loop [6 sts]

Round 2 :

(2-sc inc) x 6 [12]

Round 3 :

(sc×1, 2-sc inc) x 6 [18]

Round 4 :

sc in all 18 st [18]

Round 5 :

(sc×1, sc2tog) x 6 [12]

Round 6 :

sc in all 12 st [12]

Round 7 :

(sc2tog) x 6 [6]

Info :

Fasten off, leaving a long tail for sewing. Stuff the eye. Using a yarn needle, weave the yarn tail through the front loop of each remaining st and pull tight to close.

— Snout :

Round 1 :

Use Light green yarn to make MAGIC RING. sc×6 in the yarn loop, tighten the loop [6 sts]

Round 2 :

(2-sc inc) x 6 [12]

Round 3 :

(sc×1, 2-sc inc) x 6 [18]

Round 4 :

(sc×2, 2-sc inc) x 6 [24]

Round 5 :

(sc×3, 2-sc inc) x 6 [30]

Round 6 :

(sc×4, 2-sc inc) x 6 [36]

Round 7 :

(sc×5, 2-sc inc) x 6 [42]

Round 8 :

(sc×6, 2-sc inc) x 6 [48]

Round 9 :

(sc×7, 2-sc inc) x 6 [54]

Info :

Fasten off, leaving a long tail for sewing. Connect the same color to the marked points.

— Mini Cross Bag :

Chains :

Use Red yarn to make 7 chains. sc×1 in second ch from hook, sc×6 [6 sts]

Rounds 2-9 :

ch 1, turn, sc×6 [6] and ch 55

Info :

Fasten off, leaving a long tail for sewing. Fold the bag in half and sew it. Connect the hand holder of the cross bag to complete it.

— Arm x2 :

Round 1 :

Use Light green yarn to make MAGIC RING. sc×5 in the yarn loop, tighten the loop [5 sts]

Round 2 :

(2-sc inc) x 5 [10]

Round 3-11 :

sc in all 10 st [10]

Info :

Fasten off, leaving a long tail for sewing. Flatten the ARM, do not stuff.

Assembly Instructions

  • Attach the completed snout to the front center of the head using matching thread and small stitches
  • Position and glue the 5mm black plastic eyes onto the white eye pieces, then sew eyes to head
  • Sew the flattened arms to the sides of the body between the striped sections
  • Attach the mini cross bag to one arm or shoulder area using the chain strap
  • Ensure all pieces are securely attached and weave in any loose yarn ends

Important Notes

  • 💡Follow the symbol pattern chart carefully for correct color changes in the striped body section
  • 💡Use stitch markers to track leg divisions to ensure even spacing and proper construction
  • 💡Stuff firmly but not too tightly to maintain the proper frog shape and proportions
  • 💡Flatten arms completely before attaching - do not stuff them for the best appearance

This adorable Mini Frog pattern creates a delightful 15cm companion that's bursting with personality! The classic green coloring combined with patriotic red, white, and blue stripes makes this little guy both timeless and uniquely charming. Perfect for gift-giving or adding to your own amigurumi collection, this pattern proves that sometimes the smallest projects bring the biggest smiles. 🐸 Happy crocheting! 🧶✨

You ask,

we answer.

FAQs

What size will my finished frog be?

The completed frog measures approximately 15cm (5.9 inches) tall when using worsted weight yarn and a 5.0mm crochet hook.

Can I use different colors for the stripes?

Absolutely! While the pattern shows red, white, and blue stripes, you can customize the colors to match your preferences or decor.

Do I need to stuff the arms?

No, the pattern specifically states to flatten the arms and not stuff them for the best appearance and proper proportions.

Is the mini cross bag optional?

Yes, the cross bag is a cute bonus accessory that adds charm, but the frog is complete without it if you prefer a simpler version.

What if I can't find the exact eye size mentioned?

5mm black plastic eyes work best, but you can substitute with 4-6mm eyes or even embroider the eyes if you prefer a child-safe option.