🧢 Beautiful ✨ Detailed πŸ’ Adorable

Mini Turtle Amigurumi Pattern

Mini Turtle Amigurumi Pattern
4.6β˜… Rating
1.5-2 Hours Time Needed
2.6K Made This
βœ‚οΈ

Beginner Friendly Level

Perfect for those just starting their sewing journey, with clear instructions and simple techniques

⏱️

Bite-Sized Project

Complete in under 2 hoursβ€”quick, fun, and perfect for a little creative escape.

🐾

Pocket Pal

A mini friend to carry anywhere, providing comfort and companionship in a perfectly portable size.

About This Mini Turtle Amigurumi Pattern

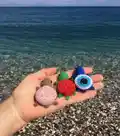
This adorable Mini Turtle pattern creates a tiny 6cm companion that fits perfectly in your palm. The design features a charming two-toned shell with light green top and darker green belly, complete with four little legs and a sweet tail. The pattern uses basic amigurumi techniques, making it ideal for beginners who want to practice working in the round and creating simple increases and decreases.

Mini Turtle Amigurumi Pattern crochet pattern - detailed view of completed project

Your finished turtle will have expressive eyes (using either safety eyes or half beads) and optional shell embroidery for extra personality. The compact size makes it perfect as a keychain, desk companion, or sweet gift.

Why You'll Love This Mini Turtle Amigurumi Pattern

I absolutely love how this tiny turtle captures so much personality in such a small package! The combination of simple stitches and adorable details makes every step enjoyable, and seeing this little guy come to life in just a couple of hours is incredibly satisfying. The pattern is forgiving for beginners but still engaging enough to keep you interested throughout the process.

Mini Turtle Amigurumi Pattern step 1 - construction progress Mini Turtle Amigurumi Pattern step 2 - assembly progress Mini Turtle Amigurumi Pattern step 3 - details and accessories Mini Turtle Amigurumi Pattern step 4 - final assembly and finishing

Switch Things Up

I love how versatile this little turtle pattern can be! You can easily customize the colors to create different turtle species - try browns and oranges for a wood turtle look, or go bold with bright blues and purples for a fantasy version. The shell is perfect for experimenting with different stitch patterns too - try working in front loops only for a ridged effect, or add some texture with bobble stitches.

For those wanting to make it even more special, consider adding small embroidered details like spots on the shell or tiny lines to create shell segments. You could even work in some sparkly thread for a magical underwater effect. The legs can be lengthened by adding more chain stitches, and the tail can be made longer or shorter to suit your preference.

Common Mistakes & How to Fix Them

βœ— Forgetting to stuff the head before closing - stuff firmly after round 7 for best shape βœ— Making legs too tight when joining shell and belly - keep tension loose for better leg formation βœ— Placing safety eyes too close together - leave 8-9 stitches between eyes for proper proportions βœ— Not securing yarn ends properly when switching between shell and belly colors

Mini Turtle Amigurumi Pattern

Create an adorable pocket-sized turtle with this charming amigurumi pattern! This delightful mini turtle measures just 6cm long and features a beautiful two-toned shell design in light green and green colors. Perfect for beginners looking to practice basic amigurumi techniques, this quick project combines simple stitches with cute details to make an irresistible tiny companion. The pattern includes options for both safety eyes and half beads, plus optional shell embroidery for extra charm.

Beginner Friendly 1.5-2 Hours

Materials Needed for Mini Turtle Amigurumi Pattern

β€” Main Fabric

  • 01
    Alize Cotton Gold yarn (100g-330m) in green, light green, white, and black colors
  • 02
    Any worsted weight cotton or acrylic yarn in similar colors can be substituted

β€” Tools Required

  • 01
    Crochet hook size 1.25mm
  • 02
    Safety eyes 6mm or half beads 6mm
  • 03
    Glue (if using half beads)
  • 04
    Stuffing material
  • 05
    Shell embroidery needle (optional)
  • 06
    Scissors
  • 07
    Yarn needle for sewing

Progress Tracker

0% Complete

β€” Shell :

Round 1 :

6 sc into MR

Round 2 :

6 inc (12)

Round 3 :

(1sc, inc)*6(18)

Round 4 :

(2sc, inc)*6(24)

Round 5 :

(3sc, inc)*6(30)

Round 6 :

(4sc, inc)*6(36)

Round 7-8 :

(2 rnds) 36sc (36)

Info :

Fasten off and cut yarn

β€” Belly :

Round 1 :

6sc into MR

Round 2 :

6 inc (12)

Round 3 :

(1sc, inc)*6(18)

Round 4 :

(2sc, inc)*6(24)

Round 5 :

(3sc, inc)*6(30)

Round 6 :

(4sc, inc)*6(36)

β€” Assembly & Legs :

Info :

Join shell and belly with remaining yarn, work in BLO of both pieces

Joining Round :

3sc, ch4, starting in 2nd ch from hook make 3sc in chain (leg), sl st in starting stitch, 9sc, ch4, starting in 2nd ch from hook make 3sc in chain (leg), sl st in starting stitch, 5sc, ch3, starting in 2nd ch from hook make 2sc in chain (tail), sl st in starting stitch, 4sc, ch4, starting in 2nd ch from hook make 3sc in chain (leg), sl st in starting stitch, 9sc, ch4, starting in 2nd ch from hook make 3sc in chain (leg), sl st in starting stitch, 3sc (36)

β€” Head :

Round 1 :

6 inc (12)

Round 2 :

12 inc (24)

Round 3-6 :

(4 rnds) 24 sc (24)

Round 7 :

(2sc, dec)*6(18)

Info :

If using safety eyes, insert between rounds 5-6, leave 8-9 sc between eyes

Info :

Stuff the piece

Round 8 :

(1sc, dec)*6(12)

Round 9 :

6 dec (6)

Info :

Fasten off, pull opening using front loops, leave yarn tail for sculpting

β€” Finishing :

Eyes (if using half beads) :

Make sculpting between rounds 5-6, leaving 8-9sc between eyes. Insert needle in one eye point, come out at opposite side, insert needle 1 sc away and bring back to first eye point. Pull slightly, fasten off. Glue on half beads.

Embroidery :

Embroider eye whites with white yarn

Optional :

Decorate shell with embroidery if desired

Assembly Instructions

  • Create shell and belly pieces separately, then join them using back loop only technique while crocheting legs and tail
  • Work the head directly from the opening created during the joining process
  • Insert safety eyes between rounds 5-6 of the head, leaving 8-9 stitches between them
  • Stuff the head firmly before closing and pull the opening tight using front loops
  • If using half beads, create eye indentations through sculpting before gluing them in place
  • Embroider white highlights around the eyes for a more expressive look

Important Notes

  • πŸ’‘The finished turtle size depends on your tension and yarn choice - pattern creates approximately 6cm length
  • πŸ’‘Keep consistent tension when joining shell and belly to ensure even leg formation
  • πŸ’‘Stuff the head firmly but not too tightly to maintain the rounded shape
  • πŸ’‘When using half beads, sculpting is essential for proper eye placement before gluing

This precious Mini Turtle pattern brings ocean charm to your crochet collection in the most delightful pocket-sized form! The simple techniques and quick completion time make it perfect for gift-giving or adding to your amigurumi family. With its sweet expression and tiny proportions, this little turtle is sure to bring smiles wherever it goes. 🐒 Happy crocheting! 🧢✨

You ask,

we answer.

FAQs

Can I use different yarn weights for this pattern?

Yes, but your finished size will vary. The pattern uses worsted weight yarn with 1.25mm hook. For larger turtles, use thicker yarn with appropriate hook size.

What's the difference between using safety eyes and half beads?

Safety eyes are easier to install and more secure, while half beads require sculpting and gluing but give a more realistic look. Choose based on your preference and skill level.

Can I make this turtle larger?

Absolutely! Use a larger hook and thicker yarn, or add more increase rounds to both shell and belly pieces before working straight rounds.

Is this pattern suitable for complete beginners?

Yes! This pattern uses only basic stitches (single crochet, increases, decreases) and teaches fundamental amigurumi techniques in a simple, quick project.