🧢 Beautiful ✨ Detailed πŸ’ Adorable

Ninja Turtle Amigurumi Pattern

Ninja Turtle Amigurumi Pattern
3.9β˜… Rating
4-6 Hours Time Needed
2.6K Made This
βœ‚οΈ

Intermediate Level

Ideal for those with basic knitting experience, featuring slightly more advanced stitches and techniques to expand your skills.

⏱️

Weekend Treat

Takes 5-7 hours, making it an enjoyable project to finish over a couple of days.

🧸

Cute Companion

An adorable friend to cherish, handcrafted with love to bring comfort and joy for years to come.

About This Ninja Turtle Amigurumi Pattern

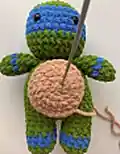
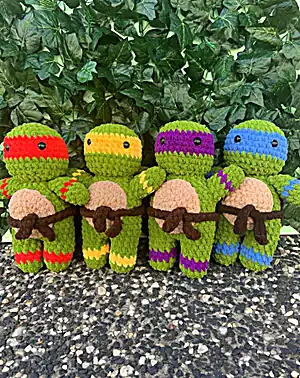
This delightful Ninja Turtle amigurumi pattern brings the beloved TMNT characters to life in soft, huggable form. Standing at 11 inches tall, each turtle features distinctive colored masks, detailed shells, and charming proportions that capture the essence of these iconic heroes. The pattern includes multiple arm attachment options and clear assembly instructions to help you create the perfect turtle companion.

Ninja Turtle Amigurumi Pattern crochet pattern - detailed view of completed project

Using chunky chenille yarn and a 7mm hook, this pattern works up quickly while maintaining excellent stitch definition. The finished turtle makes an excellent gift for fans of all ages.

Why You'll Love This Ninja Turtle Amigurumi Pattern

I absolutely love how this pattern combines nostalgia with crochet artistry! The way each turtle's personality shines through their colored masks brings back wonderful childhood memories of Saturday morning cartoons. I'm particularly fond of how the shell details create authentic texture, and the flexible arm options let you customize your turtle's pose. The clear instructions make it enjoyable to work through each step, and seeing the turtle come together piece by piece is incredibly satisfying.

Ninja Turtle Amigurumi Pattern step 1 - construction progress Ninja Turtle Amigurumi Pattern step 2 - assembly progress Ninja Turtle Amigurumi Pattern step 3 - details and accessories Ninja Turtle Amigurumi Pattern step 4 - final assembly and finishing

Switch Things Up

I love how versatile this Ninja Turtle pattern can be with just a few creative tweaks! Sometimes I'll add tiny crocheted weapons - a blue bandana Leo gets mini katanas made from silver wire wrapped in blue thread, while purple Donnie might get a small bo staff. I've also experimented with different shell textures by adding surface slip stitches in a crosshatch pattern to make it look more realistic.

For special occasions, I like to make seasonal variations - imagine a Christmas turtle with red and green stripes on the legs, or a Halloween version with orange and black details. I've even made tiny pizza slices from felt to attach to Mikey's hands because, let's face it, he's always thinking about pizza!

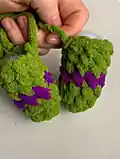
One of my favorite modifications is creating different poses by adjusting the arm attachment method or even adding wire armatures inside the arms and legs for poseable figures. The possibilities are endless when you let your creativity run wild with these lovable turtle heroes!

Common Mistakes & How to Fix Them
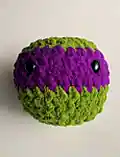
βœ— Forgetting to stuff as you go - always stuff the head and body firmly before closing βœ— Not maintaining consistent tension can affect the final size and shape of your turtle βœ— Placing safety eyes incorrectly - ensure they're positioned between rounds 7-8, 5 stitches apart βœ— Rushing the assembly process - take time to pin pieces in place before sewing for best results

Ninja Turtle Amigurumi Pattern

Create your own heroic Teenage Mutant Ninja Turtle with this adorable amigurumi pattern! This comprehensive guide walks you through crafting Leonardo, Donatello, Michelangelo, or Raphael using simple crochet techniques. The pattern includes detailed instructions for the head with colored mask, body, arms, legs, shell, belly, and waist strap. Perfect for TMNT fans and crochet enthusiasts alike, this pattern creates a charming 11-inch tall turtle that's sure to bring back nostalgic memories. Choose your favorite turtle's mask color and get ready to stitch up some turtle power!

Intermediate 4-6 Hours

Materials Needed for Ninja Turtle Amigurumi Pattern

β€” Main Fabric

  • 01
    Blanket Chenille Yarn in Forest Green (1-80m skein)
  • 02
    Chocolate Brown yarn for shell and waist strap
  • 03
    Beige yarn for belly
  • 04
    Mask color yarn (Red, Purple, Orange, or Blue depending on chosen turtle)

β€” Tools Required

  • 01
    7mm crochet hook
  • 02
    15mm safety eyes
  • 03
    Fiberfill/Hobbyfill stuffing
  • 04
    Yarn needle
  • 05
    Scissors
  • 06
    Stitch markers
  • 07
    4mm knitting needles (for assembly positioning)

Progress Tracker

0% Complete

β€” Head :

Starting in Green

Round 1 :

6 sc in MC (6)

Round 2 :

inc x6 (12)

Round 3 :

sc, inc x6 (18)

Round 4 :

2 sc, inc x6 (24)

Round 5 :

3 sc, inc x6 (30)

Info :

This is where you choose your Ninja turtle mask colour

Round 6-9 :

CC sc around (30) (4 rounds)

Round 10-11 :

CC sc around (30) (2 rounds)

Info :

Attach safety eyes in between rounds 7-8, 5 stitches apart

Round 12 :

3 sc, dec x6 (24)

Round 13 :

sc around (24)

Info :

STUFF AS YOU GO!

Round 14 :

2 sc, dec x6 (18)

Round 15 :

sc, dec x6 (12)

Info :

Use your needle now to weave in and out the FLO to close the circle and fasten off

β€” Arms make 2 :

Green

Round 1 :

6 sc in MC (6)

Round 2 :

sc, inc x6 (9)

Round 3 :

sc around (9)

Round 4 :

CC sc around (9)

Round 5-7 :

CC sc around (9) (3 rounds)

Info :

Lightly stuff the arm

Infos :

2 ARM OPTIONS: READ CAREFULLY! R8: Fold the top in half a SC closed (4) R8: Do NOT sc closed if you would like your arms to stick out of the body. Fasten off and leave tail for sewing

β€” Legs make 2 :

Green

Round 1 :

sc 6 in MC (6)

Round 2 :

inc x6 (12)

Round 3 :

sc around (12)

Info :

Changing colour to same as mask colour

Round 4-5 :

CC sc around (12) (2 rounds)

Round 6-7 :

CC sc around (12) (2 rounds)

Infos :

Fasten off first leg. CH 2 after finishing second leg but DO NOT cut the yarn. Insert you crochet hook into any stitch on first leg and continue with BODY instructions

β€” Body :

Green

Round 7 :

sc around (12 in first leg, 2 sc in the ch, 12 sc second leg, 2 sc in ch) (28)

Round 8 :

6 sc, inc x3, 6 sc (30)

Round 9-15 :

sc around (30) (7 rounds)

Info :

Stuff firmly

Round 16 :

3 sc, dec x6 (24)

Round 17 :

sc around (24)

Round 18 :

2 sc, dec x6 (18)

Round 19 :

sc around (18)

Round 20 :

sc, dec x6 (12)

Info :

Slst and leave a tail for sewing. DO NOT close circle

β€” Shell :

Brown

Round 1 :

sc 8 in MC (8)

Round 2 :

inc x8 (16)

Round 3 :

sc, inc x8 (24)

Round 4 :

3 sc, inc x8 (30)

Round 5-6 :

sc around (30)

Round 7 :

FLO hdc around (30)

Infos :

Slst and leave a long tail for sewing. Roll up the last row of HDC to create a lip of the shell

β€” Belly :

Beige

Round 1 :

6 sc in MC (6)

Round 2 :

inc x6 (12)

Round 3 :

sc, inc x6 (18)

Round 4 :

2 sc, inc x6 (24)

Round 5 :

sc around (24)

Infos :

Slst and leave a long tail for sewing. If you crochet tightly: using light motions loosen up the belly by stretching it out, this will help it lay flat against your turtle when it comes to sewing

β€” Waist Strap :

Brown

Round 1 :

ch 46

Round 2 :

turn chain and sc into 2nd stitch from hook, all the way down

Info :

Fasten off and weave in ends

Assembly Instructions

  • Attach the head to the body using the tail from the body, sewing all around until secured. Use 4mm knitting needles to help keep attachments in place while sewing.
  • Sew the belly onto the front of the body using knitting needles to hold in place until secured.
  • Attach the shell to the back of the body using the back loops of the last row, sewing halfway around, stuff lightly, then continue sewing until secured.
  • For arm attachment Option 1: Position arms on Row 2 under the neck and sew the top half of the arms until secured (arms will lay flat against body).
  • For arm attachment Option 2: Position arms on Row 2 under the neck and sew all the way around the arm until secured (arms will stick out from body).
  • Tie the waist strap around the turtle's middle to complete the classic TMNT look.

Important Notes

  • πŸ’‘Use 4mm knitting needles to help position pieces during assembly for more precise sewing
  • πŸ’‘Stuff firmly as you go, especially for the head and body sections
  • πŸ’‘Choose your turtle's personality by selecting the appropriate mask color: Leonardo (blue), Donatello (purple), Michelangelo (orange), or Raphael (red)
  • πŸ’‘The pattern uses chunky chenille yarn which creates excellent stitch definition and a soft, huggable texture
  • πŸ’‘Final measurements may vary depending on hook size and yarn tension - finished turtle should be approximately 11 inches tall

This fantastic Ninja Turtle amigurumi pattern brings childhood heroes to life in the most adorable way possible! Whether you choose Leo's leadership blue, Donnie's brainy purple, Mikey's fun orange, or Raph's fierce red, each turtle captures the spirit of these beloved characters. The detailed shell, expressive safety eyes, and authentic proportions make this pattern a true winner for TMNT fans and crochet enthusiasts alike. 🐒 Cowabunga, dude! Time to hook up some turtle power! 🧢✨

You ask,

we answer.

FAQs

Can I make all four turtles using this pattern?

Absolutely! This pattern works for all four turtles - simply change the mask color to create Leonardo (blue), Donatello (purple), Michelangelo (orange), or Raphael (red).

What's the difference between the two arm attachment options?

Option 1 creates arms that lay flat against the body for a more traditional pose, while Option 2 makes the arms stick out from the body for a more dynamic, action-ready appearance.

Can I use different yarn weights for this pattern?

While the pattern is designed for chunky chenille yarn with a 7mm hook, you can adapt it to other weights. Just remember that your finished turtle will be smaller or larger depending on your yarn and hook choice.

How do I get the shell texture to look authentic?

The key is in Round 7 where you work in front loops only with half double crochet, then roll up that last row to create the distinctive lip edge of the turtle shell.

Is this pattern suitable for beginners?

This is an intermediate pattern that requires knowledge of basic stitches, color changes, and assembly techniques. Beginners should be comfortable with magic circles, increases, decreases, and sewing pieces together.