🧢 Beautiful ✨ Detailed πŸ’ Adorable

Small Halloween Pumpkin Crochet Pattern

Small Halloween Pumpkin Crochet Pattern
4.4β˜… Rating
1-1.5 Hours Time Needed
3.2K Made This
βœ‚οΈ

Beginner Friendly Level

Perfect for those just starting their sewing journey, with clear instructions and simple techniques

⏱️

Bite-Sized Project

Complete in under 2 hoursβ€”quick, fun, and perfect for a little creative escape.

πŸŽƒ

Holiday Cheer

Festive fun for the season, bringing handmade magic to celebrations and creating new family traditions.

About This Small Halloween Pumpkin Crochet Pattern

Small Halloween Pumpkin Crochet Pattern crochet pattern - detailed view of completed project

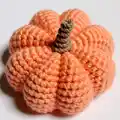
The pattern uses beautiful Scheepjes Catona cotton yarn in rich coral and caramel shades, creating that perfect harvest pumpkin look. With clear round-by-round instructions and beginner-friendly techniques, you'll have your first pumpkin completed before you know it.

Why You'll Love This Small Halloween Pumpkin Crochet Pattern

I absolutely love this pattern because it captures everything magical about fall in one tiny, palm-sized project. There's something so satisfying about watching those pumpkin ridges form as you thread the yarn through the bodyβ€”it's like watching autumn come to life in your hands. I find myself making these by the dozen because they work up so quickly, and honestly, who can resist having a whole pumpkin patch decorating their home? The pattern is straightforward enough that I can work on it while watching my favorite spooky movies, yet the finished result looks impressive enough that everyone asks where I bought them. I love that it uses minimal yarn, making it perfect for using up those gorgeous autumn-colored scraps in my stash, and the cotton yarn gives it a lovely weight that helps it sit beautifully wherever you place it.

Small Halloween Pumpkin Crochet Pattern step 1 - construction progress Small Halloween Pumpkin Crochet Pattern step 2 - assembly progress Small Halloween Pumpkin Crochet Pattern step 3 - details and accessories Small Halloween Pumpkin Crochet Pattern step 4 - final assembly and finishing

Switch Things Up

I love how versatile this little pumpkin pattern truly is once you start experimenting with the basic structure. One of my favorite variations is creating a whole pumpkin family by using different yarn weightsβ€”make tiny pumpkins with thread and a steel hook for adorable earrings or zipper pulls, or go big with chunky yarn for door basket fillers.

I've also discovered that changing the stalk can completely transform the look. Try making a curly vine by working a chain and then doing multiple stitches in each chain stitch back, or create leaves by adding small triangular shapes in green yarn. Some of my autumn displays feature pumpkins with real cinnamon sticks hot-glued on top for that rustic farmhouse aesthetic.

Color experimentation opens up endless possibilitiesβ€”I've made elegant cream and gold pumpkins for Thanksgiving centerpieces, and even pastel rainbow pumpkins for a whimsical children's room. Working with variegated yarn in autumn tones creates beautiful ombre effects without any color changes. You could also try adding surface details like embroidered faces for jack-o'-lanterns, or french knots for a bumpy gourd texture. The simple base pattern is truly just your starting point for creativity!

Common Mistakes & How to Fix Them

βœ— L βœ— o βœ— s βœ— i βœ— n βœ— g βœ— βœ— y βœ— o βœ— u βœ— r βœ— βœ— p βœ— l βœ— a βœ— c βœ— e βœ— βœ— i βœ— n βœ— βœ— c βœ— o βœ— n βœ— t βœ— i βœ— n βœ— u βœ— o βœ— u βœ— s βœ— βœ— r βœ— o βœ— u βœ— n βœ— d βœ— s βœ— βœ— - βœ— βœ— A βœ— l βœ— w βœ— a βœ— y βœ— s βœ— βœ— u βœ— s βœ— e βœ— βœ— a βœ— βœ— s βœ— t βœ— i βœ— t βœ— c βœ— h βœ— βœ— m βœ— a βœ— r βœ— k βœ— e βœ— r βœ— βœ— i βœ— n βœ— βœ— t βœ— h βœ— e βœ— βœ— f βœ— i βœ— r βœ— s βœ— t βœ— βœ— s βœ— t βœ— i βœ— t βœ— c βœ— h βœ— βœ— o βœ— f βœ— βœ— e βœ— a βœ— c βœ— h βœ— βœ— r βœ— o βœ— u βœ— n βœ— d βœ— βœ— t βœ— o βœ— βœ— t βœ— r βœ— a βœ— c βœ— k βœ— βœ— y βœ— o βœ— u βœ— r βœ— βœ— p βœ— r βœ— o βœ— g βœ— r βœ— e βœ— s βœ— s βœ— βœ— a βœ— n βœ— d βœ— βœ— p βœ— r βœ— e βœ— v βœ— e βœ— n βœ— t βœ— βœ— c βœ— o βœ— u βœ— n βœ— t βœ— i βœ— n βœ— g βœ— βœ— e βœ— r βœ— r βœ— o βœ— r βœ— s βœ— . βœ— βœ— S βœ— t βœ— u βœ— f βœ— f βœ— i βœ— n βœ— g βœ— βœ— t βœ— o βœ— o βœ— βœ— f βœ— i βœ— r βœ— m βœ— l βœ— y βœ— βœ— o βœ— r βœ— βœ— t βœ— o βœ— o βœ— βœ— l βœ— o βœ— o βœ— s βœ— e βœ— l βœ— y βœ— βœ— - βœ— βœ— S βœ— t βœ— u βœ— f βœ— f βœ— βœ— m βœ— o βœ— d βœ— e βœ— r βœ— a βœ— t βœ— e βœ— l βœ— y βœ— βœ— s βœ— o βœ— βœ— t βœ— h βœ— e βœ— βœ— p βœ— u βœ— m βœ— p βœ— k βœ— i βœ— n βœ— βœ— h βœ— o βœ— l βœ— d βœ— s βœ— βœ— i βœ— t βœ— s βœ— βœ— s βœ— h βœ— a βœ— p βœ— e βœ— βœ— b βœ— u βœ— t βœ— βœ— s βœ— t βœ— i βœ— l βœ— l βœ— βœ— a βœ— l βœ— l βœ— o βœ— w βœ— s βœ— βœ— t βœ— h βœ— e βœ— βœ— y βœ— a βœ— r βœ— n βœ— βœ— t βœ— o βœ— βœ— p βœ— u βœ— l βœ— l βœ— βœ— t βœ— h βœ— r βœ— o βœ— u βœ— g βœ— h βœ— βœ— w βœ— h βœ— e βœ— n βœ— βœ— c βœ— r βœ— e βœ— a βœ— t βœ— i βœ— n βœ— g βœ— βœ— t βœ— h βœ— e βœ— βœ— r βœ— i βœ— d βœ— g βœ— e βœ— s βœ— βœ— w βœ— i βœ— t βœ— h βœ— o βœ— u βœ— t βœ— βœ— d βœ— i βœ— s βœ— t βœ— o βœ— r βœ— t βœ— i βœ— n βœ— g βœ— βœ— t βœ— h βœ— e βœ— βœ— s βœ— t βœ— i βœ— t βœ— c βœ— h βœ— e βœ— s βœ— . βœ— βœ— P βœ— u βœ— l βœ— l βœ— i βœ— n βœ— g βœ— βœ— t βœ— h βœ— e βœ— βœ— r βœ— i βœ— d βœ— g βœ— e βœ— - βœ— c βœ— r βœ— e βœ— a βœ— t βœ— i βœ— n βœ— g βœ— βœ— y βœ— a βœ— r βœ— n βœ— βœ— t βœ— o βœ— o βœ— βœ— t βœ— i βœ— g βœ— h βœ— t βœ— βœ— - βœ— βœ— W βœ— h βœ— e βœ— n βœ— βœ— t βœ— h βœ— r βœ— e βœ— a βœ— d βœ— i βœ— n βœ— g βœ— βœ— y βœ— a βœ— r βœ— n βœ— βœ— f βœ— r βœ— o βœ— m βœ— βœ— t βœ— o βœ— p βœ— βœ— t βœ— o βœ— βœ— b βœ— o βœ— t βœ— t βœ— o βœ— m βœ— βœ— t βœ— o βœ— βœ— c βœ— r βœ— e βœ— a βœ— t βœ— e βœ— βœ— p βœ— u βœ— m βœ— p βœ— k βœ— i βœ— n βœ— βœ— s βœ— e βœ— c βœ— t βœ— i βœ— o βœ— n βœ— s βœ— , βœ— βœ— p βœ— u βœ— l βœ— l βœ— βœ— f βœ— i βœ— r βœ— m βœ— l βœ— y βœ— βœ— b βœ— u βœ— t βœ— βœ— n βœ— o βœ— t βœ— βœ— s βœ— o βœ— βœ— t βœ— i βœ— g βœ— h βœ— t βœ— βœ— t βœ— h βœ— a βœ— t βœ— βœ— i βœ— t βœ— βœ— s βœ— q βœ— u βœ— i βœ— s βœ— h βœ— e βœ— s βœ— βœ— t βœ— h βœ— e βœ— βœ— p βœ— u βœ— m βœ— p βœ— k βœ— i βœ— n βœ— βœ— o βœ— r βœ— βœ— c βœ— r βœ— e βœ— a βœ— t βœ— e βœ— s βœ— βœ— u βœ— n βœ— e βœ— v βœ— e βœ— n βœ— βœ— s βœ— e βœ— g βœ— m βœ— e βœ— n βœ— t βœ— s βœ— . βœ— βœ— I βœ— n βœ— c βœ— o βœ— n βœ— s βœ— i βœ— s βœ— t βœ— e βœ— n βœ— t βœ— βœ— t βœ— e βœ— n βœ— s βœ— i βœ— o βœ— n βœ— βœ— i βœ— n βœ— βœ— e βœ— a βœ— r βœ— l βœ— y βœ— βœ— r βœ— o βœ— u βœ— n βœ— d βœ— s βœ— βœ— - βœ— βœ— K βœ— e βœ— e βœ— p βœ— βœ— y βœ— o βœ— u βœ— r βœ— βœ— t βœ— e βœ— n βœ— s βœ— i βœ— o βœ— n βœ— βœ— c βœ— o βœ— n βœ— s βœ— i βœ— s βœ— t βœ— e βœ— n βœ— t βœ— , βœ— βœ— e βœ— s βœ— p βœ— e βœ— c βœ— i βœ— a βœ— l βœ— l βœ— y βœ— βœ— i βœ— n βœ— βœ— r βœ— o βœ— u βœ— n βœ— d βœ— s βœ— βœ— 1 βœ— - βœ— 4 βœ— , βœ— βœ— a βœ— s βœ— βœ— l βœ— o βœ— o βœ— s βœ— e βœ— βœ— s βœ— t βœ— i βœ— t βœ— c βœ— h βœ— e βœ— s βœ— βœ— h βœ— e βœ— r βœ— e βœ— βœ— w βœ— i βœ— l βœ— l βœ— βœ— c βœ— r βœ— e βœ— a βœ— t βœ— e βœ— βœ— a βœ— βœ— w βœ— o βœ— b βœ— b βœ— l βœ— y βœ— βœ— b βœ— a βœ— s βœ— e βœ— βœ— t βœ— h βœ— a βœ— t βœ— βœ— a βœ— f βœ— f βœ— e βœ— c βœ— t βœ— s βœ— βœ— t βœ— h βœ— e βœ— βœ— f βœ— i βœ— n βœ— a βœ— l βœ— βœ— p βœ— u βœ— m βœ— p βœ— k βœ— i βœ— n βœ— βœ— s βœ— h βœ— a βœ— p βœ— e βœ— .

Small Halloween Pumpkin Crochet Pattern

Create your own adorable miniature pumpkin that fits perfectly in the palm of your hand with this delightful autumn crochet pattern. This charming seasonal decoration brings festive Halloween spirit to your home while being quick enough to make several for gifting or creating a beautiful fall display. Whether you're decorating your mantle, creating a table centerpiece, or adding cozy touches throughout your space, this sweet little pumpkin works up quickly and captures the essence of the harvest season beautifully.

Beginner Friendly 1-1.5 Hours

Materials Needed for Small Halloween Pumpkin Crochet Pattern

β€” Main Fabric

  • 01
    Scheepjes Catona Cotton 4 ply yarn in Rich Coral #410 (1 x 10g ball)
  • 02
    Scheepjes Catona Cotton 4 ply yarn in Caramel #506 (1 x 10g ball or brown scrap)

β€” Tools Required

  • 01
    3mm Crochet Hook (US D/3)
  • 02
    Tapestry Needle
  • 03
    Toy Stuffing
  • 04
    Stitch Marker

Progress Tracker

0% Complete

β€” Pumpkin (Rich Coral #410) :

Magic Circle Start :

Sc8

Rnd 1 :

(Inc) 8 times (16)

Rnd 2 :

(Inc, Sc1) 8 times (24)

Rnd 3 :

(Inc, Sc2) 8 times (32)

Rnd 4 :

(Inc, Sc1) 16 times (48)

Rnd 5 to 16 :

Sc in all (48)

Rnd 17 :

(Dec2tog, Sc1) 16 times (32)

Rnd 18 :

(Dec2tog, Sc2) 8 times (24)

Rnd 19 :

(Dec2tog, Sc1) 8 times (16)

Info :

Stuff your Pumpkin

Rnd 20 :

(Dec2tog) 8 times (8)

Info :

Fasten off with a long yarn tail, weave the tail through the last 8 stitches and pull to close

Creating Pumpkin Ridges :

Take the yarn up the side of the pumpkin and down through the centre from the top to the bottom, pull tight and repeat around the pumpkin another 6 times. Secure the end

β€” Stalk (Caramel #506) :

Ch5, turn :

Starting chain

Row 1 :

Sc4, ch1, turn

Row 2 :

Sc4

Info :

Fasten off and sew onto the top centre of your pumpkin

Assembly Instructions

  • After completing Round 20 and closing the top, leave a long tail for creating the pumpkin ridges.
  • Thread the yarn tail onto your tapestry needle and bring it up the side of the pumpkin body.
  • Insert the needle down through the center from top to bottom, pulling firmly to create the first ridge indentation.
  • Repeat this threading process 6 more times around the pumpkin, spacing evenly to create 7-8 ridge sections.
  • Complete the stalk by chaining 5, then working 2 rows of 4 single crochet stitches.
  • Sew the completed stalk securely to the center top of your pumpkin using the yarn tail.
  • Weave in all remaining ends and trim excess yarn for a neat finish.

Important Notes

  • πŸ’‘Work in continuous rounds without joining, using a stitch marker in the first stitch of each round to track your progress
  • πŸ’‘The pattern creates a sphere shape that gets its pumpkin character from the ridge-threading technique at the end
  • πŸ’‘Stuff firmly enough to hold shape but not so tight that you cannot pull yarn through for creating ridges
  • πŸ’‘The finished pumpkin measures approximately 7cm round by 3cm high when using the recommended yarn and hook size
  • πŸ’‘You can easily customize the size by using thicker or thinner yarn with an appropriate hook size
  • πŸ’‘Cotton yarn is recommended as it has beautiful stitch definition and gives the pumpkin a nice weight for displaying

This charming Small Halloween Pumpkin pattern brings all the cozy vibes of autumn into a quick, satisfying project that fits right in your palm. Using simple techniques and continuous rounds, you'll create an adorable decoration perfect for scattering throughout your home or gifting to friends. The clever ridge-creating technique transforms a basic sphere into an authentic-looking miniature pumpkin that captures the essence of fall perfectly. Happy crocheting and enjoy your handmade harvest! πŸŽƒπŸ§Άβœ¨

You ask,

we answer.

FAQs

Can I use a different yarn weight for this pattern?

Yes! While the pattern calls for 4-ply cotton yarn with a 3mm hook, you can use any yarn weight. Just match your hook size to your yarn (check the yarn label) and your pumpkin will turn out larger or smaller accordingly. DK weight yarn with a 4mm hook makes a lovely medium-sized pumpkin.

How do I create even pumpkin ridges?

The key is spacing your thread-throughs evenly around the pumpkin. After the first ridge, count the stitches between each threading point to keep them uniform. Pull each ridge with the same tension for consistency. Threading 7 times total (creating 7-8 sections) gives the most realistic pumpkin look.

What if my pumpkin looks more like a ball than a pumpkin?

The pumpkin shape comes entirely from the ridge-threading technique after you complete the basic sphere. Make sure you're pulling the yarn firmly from top to bottom through the center, and that you've stuffed the pumpkin moderately (not too tight). The ridges should create visible indentations that define the pumpkin sections.

Can I make the pumpkin in different colors?

Absolutely! While orange is traditional, pumpkins come in many colors. Try cream or white for elegant white pumpkins, variegated yarn for a harvest mix, or even unconventional colors like teal or purple for a modern twist. Just keep the stalk in a brown or green shade for authenticity.

How many pumpkins can I make from one ball of yarn?

Each small pumpkin uses only 10g of the main color, so a standard 50g ball of Scheepjes Catona will make approximately 5 pumpkins. This makes it perfect for creating a whole pumpkin patch display or making multiple gifts without investing in lots of yarn.