🧢 Beautiful ✨ Detailed πŸ’ Adorable

WALL-E Robot Amigurumi Pattern

WALL-E Robot Amigurumi Pattern
4.2β˜… Rating
8-10 Hours Time Needed
3.8K Made This
βœ‚οΈ

Intermediate Level

Ideal for those with basic knitting experience, featuring slightly more advanced stitches and techniques to expand your skills.

⏱️

All-Day Adventure

Requires 8-10 hours, ideal for a full day of immersive knitting.

πŸ€–

Cute Companion

An adorable friend to cherish, handcrafted with love to bring comfort and joy for years to come.

About This WALL-E Robot Amigurumi Pattern

This WALL-E amigurumi pattern brings the beloved Pixar character to life in miniature form. Standing approximately 15cm tall, he features all of WALL-E's iconic characteristics including his expressive binocular-style eyes, articulated neck with internal wire support, and distinctive cube-shaped body. The pattern uses a combination of crochet techniques and felt appliquΓ© to achieve authentic details.

WALL-E Robot Amigurumi Pattern crochet pattern - detailed view of completed project

The design includes movable arms with finger details, a structured body with cardboard reinforcement for shape retention, and the signature triangular wheel base that makes WALL-E instantly recognizable.

Why You'll Love This WALL-E Robot Amigurumi Pattern

I absolutely love how this pattern captures WALL-E's endearing personality through careful attention to detail. The wire-supported neck allows for poseable expressions, making your finished amigurumi feel truly alive. The combination of textures and techniques keeps the project engaging, while the final result is a display-worthy piece that brings back all the heartwarming memories from the movie.

WALL-E Robot Amigurumi Pattern step 1 - construction progress WALL-E Robot Amigurumi Pattern step 2 - assembly progress WALL-E Robot Amigurumi Pattern step 3 - details and accessories WALL-E Robot Amigurumi Pattern step 4 - final assembly and finishing

Switch Things Up

I love how this WALL-E pattern pushes creative boundaries by combining traditional crochet with structural elements like wire and cardboard. The engineering aspect really appeals to me - you're not just making a soft toy, you're building a functional character with moving parts! I particularly enjoy the challenge of getting those iconic eyes just right, and the satisfaction when that neck finally has the perfect pose. The way this pattern teaches you to think dimensionally about your work, considering how each piece contributes to the overall structure, has definitely influenced how I approach other amigurumi projects. It's these kinds of patterns that remind me why I fell in love with crochet in the first place - the endless possibilities for bringing imagination to life through yarn and creativity!

Common Mistakes & How to Fix Them

βœ— Not using stitch markers consistently can lead to uneven rounds and misshapen pieces βœ— Insufficient stuffing in the body panels can cause the cube shape to collapse over time βœ— Incorrectly positioning the wire in the neck can make the head unstable or difficult to pose βœ— Rushing the eye assembly without proper alignment can affect WALL-E's characteristic expression

WALL-E Robot Amigurumi Pattern

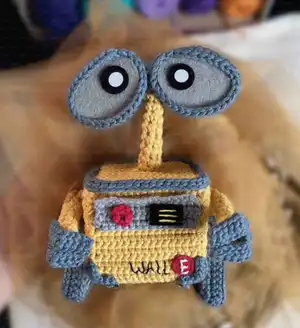
Create your own adorable WALL-E robot with this detailed amigurumi pattern! This charming 15cm tall companion features his iconic large eyes, articulated neck with wire support, movable arms, and signature triangular wheel base. Perfect for Disney fans and robot enthusiasts, this pattern includes step-by-step instructions for creating WALL-E's distinctive yellow and gray color scheme, complete with felt details and embroidered features.

Intermediate 8-10 Hours

Materials Needed for WALL-E Robot Amigurumi Pattern

β€” Main Fabric

  • 01
    Cotton yarn 3mm in gray, dark gray, mustard yellow, and small amount of red
  • 02
    Recommended: Cotton Revesderecho in colors 91 (gray), 92 (dark gray), 05 (mustard), 40 (red)

β€” Tools Required

  • 01
    Crochet hook 2.5mm
  • 02
    Felt in black, red, gray, and white
  • 03
    Paperboard for structural support
  • 04
    Needle for sewing
  • 05
    Scissors
  • 06
    Fabric adhesive
  • 07
    Fiber fill stuffing
  • 08
    Tape measure
  • 09
    Wire for neck support
  • 10
    Tape for wire covering

Progress Tracker

0% Complete

β€” Body Panels :

Large Panel (Make 4) :

18 ch, start from 2nd stitch from hook, 17 sc, 1 ch and turn, start from 2nd stitch from hook (17)

Rounds 2-13 :

17 sc, 1 ch and turn, start from 2nd stitch from hook (17)

Round 14 :

17 sc, fasten off (17)

Small Panel (Make 2) :

16 ch, start from 2nd stitch from hook, 15 sc, 1 ch and turn, start from 2nd stitch from hook (15)

Rounds 2-13 :

15 sc, 1 ch and turn, start from 2nd stitch from hook (15)

Round 14 :

15 sc, fasten off (15)

β€” Arms :

First Part (Shoulder) - Make 2 :

MR 7sc (7)

Rounds 2-3 :

7 sc, fasten off and leave long tail (7)

Second Part (Arm) - Make 2 :

MR 7sc (7)

Rounds 2-11 :

7 sc (7)

Info :

Fill arms lightly

Round 12 :

Flatten arm and make 3 sl st, fasten off and leave long tail

Fingers (Make 2) :

10 ch, start from 2nd stitch from hook, 9 sc, 1 ch and turn, start from 2nd stitch from hook (9)

Round 2 :

9 sc, fasten off

β€” Neck :

Round 1 :

MR 6 sc (6)

Rounds 2-15 :

6 sc (6), fasten off and leave long tail

Info :

Cut wire 2cm longer than neck, cover top with tape, insert wire, fill neck lightly

β€” Eyes Front Part :

Round 1 :

MR 6sc (6)

Round 2 :

6 inc (12)

Round 3 :

(1 sc, 1 inc) x6 (18)

Round 4 :

(2 sc, 1 inc) x6 (24)

Round 5 :

(3 sc, 1 inc) x6 (30)

Round 6 :

30 sc BLO

Rounds 7-9 :

30 sc, fasten off

β€” Eyes Back Part :

Round 1 :

MR 6 sc (6)

Round 2 :

6 inc (12)

Round 3 :

(1 sc, 1 inc) x6 (18)

Round 4 :

18 sc BLO

Rounds 5-8 :

18 sc, fasten off and leave long tail

β€” Eyes Middle Part :

Round 1 :

MR 7 sc (7)

Rounds 2-7 :

7 sc (7)

Info :

Stuff with fiber and fasten off

Glasses Chain :

40 ch, fasten off and leave long tail for assembly
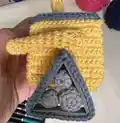
β€” Wheels :

Wheel Base :

40 ch, start from 2nd stitch from hook, 39 sc, 1 ch and turn, start from 2nd stitch from hook (39)

Round 2 :

39 sc, 1 ch and turn, start from 2nd stitch from hook (39)

Round 3 :

39 sc, fasten off and leave long tail (39)

Large Wheel Parts (Make 2) :

MR 6 sc (6), 6 inc (12), 12 sc BLO (12), 6 dec (6), fasten off

Small Wheel Parts (Make 4) :

MR 8 sc (8), 8 sc BLO (8), 4 dec (4), fasten off

β€” Details :

Small Front Panel :

17 ch, start from 2nd stitch from hook, 16 sc, 1 ch and turn, start from 2nd stitch from hook (16)

Rounds 2-3 :

16 sc, 1 ch and turn, start from 2nd stitch from hook (16)

Round 4 :

16 sc, fasten off (16)

Lower Corners (Make 4) :

8 ch, start from 2nd stitch from hook, 3sc, skip 1 ch, 3sc, fasten off

Upper Edge :

61 ch, start from 2nd stitch from hook, 60 sc (60), fasten off

Assembly Instructions

  • Join arm shoulder and arm parts using the long tail, securing them together to form complete arms
  • Insert wire into neck, cover wire tip with tape, and secure neck to one large body panel 3 rows down from top
  • Glue cardboard pieces behind each panel (4.5x4cm for small panels, 4.5x5cm for large panels) for structure
  • Sew all body panels together along edges to form cube shape, stuffing firmly before closing
  • Attach glasses chain to back of eye pieces, then sew front and back eye parts together with middle piece
  • Glue felt eye lenses to inside edges of completed eyes, then attach eyes to glasses support on neck
  • Create wheel assembly by joining wheel base into triangle, glue cardboard and felt rectangles, attach wheel parts inside
  • Attach completed arms to small side panels of body, position wheels under arms about 8 rows from bottom
  • Add all detail pieces: upper edge, small front panel, corner pieces, and felt decorations to complete WALL-E

Important Notes

  • πŸ’‘Use stitch markers consistently throughout to maintain even rounds and proper stitch counts
  • πŸ’‘Stuff body panels firmly but not overly tight to maintain the cube shape structure
  • πŸ’‘Handle wire carefully when inserting into neck - bend tip as shown to secure properly inside body
  • πŸ’‘Pin all major pieces in place before final sewing to ensure correct positioning and proportions
  • πŸ’‘Work with tight tension throughout for best structural integrity and appearance
  • πŸ’‘Take time with eye assembly as proper alignment is crucial for WALL-E's characteristic expression

This delightful WALL-E amigurumi pattern captures all the charm and personality of Pixar's beloved robot companion. From his expressive binocular eyes to his distinctive wheel base, every detail has been carefully designed to bring this heartwarming character to life. The combination of crochet techniques, wire armature, and felt details creates a truly special finished piece that's perfect for display or gifting. Whether you're a Disney fan or simply love creating unique amigurumi, this pattern will bring joy to your crafting journey! πŸ€–βœ¨

You ask,

we answer.

FAQs

What type of wire should I use for the neck support?

Use craft wire that's sturdy enough to hold the neck upright but flexible enough to pose. Floral wire or armature wire around 1mm thickness works well. Make sure to cover the end with tape as instructed.

Can I make WALL-E without the wire in the neck?

While possible, the wire is recommended for the authentic poseable neck that makes WALL-E special. Without it, the neck may be floppy and unable to hold positions.

How important is the cardboard reinforcement in the body?

The cardboard is essential for maintaining WALL-E's cube shape. Without it, the body will be soft and lose its geometric form that's characteristic of the character.

What's the best way to attach the felt eye details?

Use fabric glue for the felt pieces as instructed in the pattern. Make sure to position them carefully before gluing as they're difficult to reposition once attached.

Can I use different colors than those specified?

While you can customize colors, the specified gray, dark gray, and mustard yellow are chosen to match WALL-E's authentic appearance. Other colors will create a different character interpretation.