๐Ÿงถ Beautiful โœจ Detailed ๐Ÿ’ Adorable

Lily Bunny Amigurumi Pattern

Lily Bunny Amigurumi Pattern
3.9โ˜… Rating
4-5 Hours Time Needed
3.4K Made This
โœ‚๏ธ

Intermediate Level

Ideal for those with basic knitting experience, featuring slightly more advanced stitches and techniques to expand your skills.

โฑ๏ธ

Weekend Treat

Takes 5-7 hours, making it an enjoyable project to finish over a couple of days.

๐Ÿฐ

Whimsical Buddy

Playful characters full of personality, designed to spark imagination and become cherished playtime favorites.

About This Lily Bunny Amigurumi Pattern

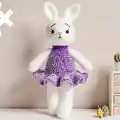
Lily Bunny is a delightful amigurumi project that combines classic bunny charm with fashionable flair. This pattern guides you through creating a soft, huggable friend dressed in an elegant purple ruffled dress. The chenille yarn gives Lily an extra-soft, plush texture that's perfect for cuddling, while the embroidered details bring her sweet face to life. Whether you're making this as a gift for a child or as a decorative piece for yourself, Lily Bunny's timeless design and lovable appearance will bring joy to anyone who meets her.

Lily Bunny Amigurumi Pattern crochet pattern - detailed view of completed project

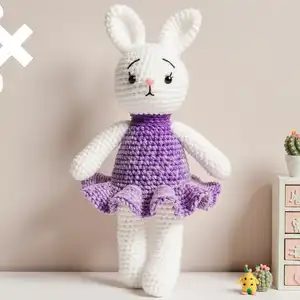
Using sport-weight chenille yarn and a 5mm hook, this pattern creates a bunny that's both substantial and soft. The ruffled skirt adds a special touch of whimsy, worked directly into the body for a seamless, professional finish that makes Lily stand out from ordinary stuffed animals.

Why You'll Love This Lily Bunny Amigurumi Pattern

I absolutely love this pattern because it combines simplicity with elegance in the most delightful way. The chenille yarn creates such a luxurious, cloud-like texture that makes every stitch feel rewarding. What really captures my heart is the clever construction of the ruffled dress โ€“ it's worked directly into the body, which means no fiddly sewing of separate pieces! I also appreciate how the pattern balances detailed work (like the head sculpting and embroidered features) with straightforward rounds, making it engaging without being overwhelming. The finished bunny has such personality and presence, standing tall at 35cm, yet remains wonderfully huggable. Every time I make Lily, I'm reminded why amigurumi is such a magical craft โ€“ you're literally bringing a character to life, stitch by stitch.

Lily Bunny Amigurumi Pattern step 1 - construction progress Lily Bunny Amigurumi Pattern step 2 - assembly progress Lily Bunny Amigurumi Pattern step 3 - details and accessories Lily Bunny Amigurumi Pattern step 4 - final assembly and finishing

Switch Things Up

I love how versatile this Lily Bunny pattern truly is! While the original design features a gorgeous purple ruffled dress, I often experiment with different color combinations to create unique personalities for each bunny. Try using pastel pink or soft blue for a springtime feel, or go bold with bright red or sunny yellow for a more vibrant look.

The chenille yarn is wonderful, but I've also made successful versions using cotton or acrylic sport weight yarn when I want a more traditional crochet texture. You can even add small accessories like a tiny bow between the ears or a miniature flower embroidered on the dress for extra charm.

For a seasonal twist, I sometimes swap the ruffled dress for a simple tunic by working fewer rounds in the contrasting color, or add festive elements like a small scarf for winter bunnies. The embroidered facial features are another area where you can get creative โ€“ try different eyebrow shapes or add rosy cheeks with a bit of pink thread for variety.

If you're making Lily as a gift for a baby, consider using safety eyes with a locking washer and ensuring all embroidered features are extra secure. I've also made smaller versions by using a thinner yarn with a 3mm hook, resulting in adorable palm-sized bunnies perfect for little hands to hold.

Common Mistakes & How to Fix Them

โœ— N โœ— o โœ— t โœ— โœ— s โœ— t โœ— u โœ— f โœ— f โœ— i โœ— n โœ— g โœ— โœ— t โœ— h โœ— e โœ— โœ— n โœ— e โœ— c โœ— k โœ— โœ— f โœ— i โœ— r โœ— m โœ— l โœ— y โœ— โœ— e โœ— n โœ— o โœ— u โœ— g โœ— h โœ— โœ— c โœ— a โœ— n โœ— โœ— c โœ— a โœ— u โœ— s โœ— e โœ— โœ— t โœ— h โœ— e โœ— โœ— h โœ— e โœ— a โœ— d โœ— โœ— t โœ— o โœ— โœ— w โœ— o โœ— b โœ— b โœ— l โœ— e โœ— โœ— o โœ— r โœ— โœ— d โœ— r โœ— o โœ— o โœ— p โœ— โœ— โ€“ โœ— โœ— m โœ— a โœ— k โœ— e โœ— โœ— s โœ— u โœ— r โœ— e โœ— โœ— t โœ— o โœ— โœ— p โœ— a โœ— c โœ— k โœ— โœ— t โœ— h โœ— i โœ— s โœ— โœ— a โœ— r โœ— e โœ— a โœ— โœ— w โœ— e โœ— l โœ— l โœ— โœ— b โœ— e โœ— f โœ— o โœ— r โœ— e โœ— โœ— c โœ— o โœ— n โœ— t โœ— i โœ— n โœ— u โœ— i โœ— n โœ— g โœ— โœ— t โœ— o โœ— โœ— t โœ— h โœ— e โœ— โœ— h โœ— e โœ— a โœ— d โœ— โœ— r โœ— o โœ— u โœ— n โœ— d โœ— s โœ— . โœ— โœ— P โœ— l โœ— a โœ— c โœ— i โœ— n โœ— g โœ— โœ— s โœ— a โœ— f โœ— e โœ— t โœ— y โœ— โœ— e โœ— y โœ— e โœ— s โœ— โœ— t โœ— o โœ— o โœ— โœ— c โœ— l โœ— o โœ— s โœ— e โœ— โœ— t โœ— o โœ— g โœ— e โœ— t โœ— h โœ— e โœ— r โœ— โœ— o โœ— r โœ— โœ— a โœ— t โœ— โœ— t โœ— h โœ— e โœ— โœ— w โœ— r โœ— o โœ— n โœ— g โœ— โœ— h โœ— e โœ— i โœ— g โœ— h โœ— t โœ— โœ— c โœ— h โœ— a โœ— n โœ— g โœ— e โœ— s โœ— โœ— L โœ— i โœ— l โœ— y โœ— ' โœ— s โœ— โœ— e โœ— n โœ— t โœ— i โœ— r โœ— e โœ— โœ— e โœ— x โœ— p โœ— r โœ— e โœ— s โœ— s โœ— i โœ— o โœ— n โœ— โœ— โ€“ โœ— โœ— a โœ— l โœ— w โœ— a โœ— y โœ— s โœ— โœ— p โœ— o โœ— s โœ— i โœ— t โœ— i โœ— o โœ— n โœ— โœ— t โœ— h โœ— e โœ— m โœ— โœ— b โœ— e โœ— t โœ— w โœ— e โœ— e โœ— n โœ— โœ— r โœ— o โœ— u โœ— n โœ— d โœ— s โœ— โœ— 8 โœ— - โœ— 9 โœ— โœ— w โœ— i โœ— t โœ— h โœ— โœ— e โœ— x โœ— a โœ— c โœ— t โœ— l โœ— y โœ— โœ— 8 โœ— โœ— s โœ— t โœ— i โœ— t โœ— c โœ— h โœ— e โœ— s โœ— โœ— b โœ— e โœ— t โœ— w โœ— e โœ— e โœ— n โœ— โœ— t โœ— h โœ— e โœ— m โœ— โœ— f โœ— o โœ— r โœ— โœ— t โœ— h โœ— e โœ— โœ— p โœ— e โœ— r โœ— f โœ— e โœ— c โœ— t โœ— โœ— l โœ— o โœ— o โœ— k โœ— . โœ— โœ— F โœ— o โœ— r โœ— g โœ— e โœ— t โœ— t โœ— i โœ— n โœ— g โœ— โœ— t โœ— o โœ— โœ— w โœ— o โœ— r โœ— k โœ— โœ— t โœ— h โœ— e โœ— โœ— s โœ— k โœ— i โœ— r โœ— t โœ— โœ— i โœ— n โœ— โœ— t โœ— h โœ— e โœ— โœ— f โœ— r โœ— o โœ— n โœ— t โœ— โœ— l โœ— o โœ— o โœ— p โœ— s โœ— โœ— o โœ— n โœ— l โœ— y โœ— โœ— o โœ— f โœ— โœ— r โœ— o โœ— u โœ— n โœ— d โœ— โœ— 8 โœ— โœ— c โœ— a โœ— n โœ— โœ— m โœ— a โœ— k โœ— e โœ— โœ— i โœ— t โœ— โœ— d โœ— i โœ— f โœ— f โœ— i โœ— c โœ— u โœ— l โœ— t โœ— โœ— t โœ— o โœ— โœ— a โœ— t โœ— t โœ— a โœ— c โœ— h โœ— โœ— l โœ— a โœ— t โœ— e โœ— r โœ— โœ— โ€“ โœ— โœ— p โœ— a โœ— y โœ— โœ— c โœ— l โœ— o โœ— s โœ— e โœ— โœ— a โœ— t โœ— t โœ— e โœ— n โœ— t โœ— i โœ— o โœ— n โœ— โœ— t โœ— o โœ— โœ— t โœ— h โœ— i โœ— s โœ— โœ— s โœ— t โœ— e โœ— p โœ— โœ— f โœ— o โœ— r โœ— โœ— a โœ— โœ— c โœ— l โœ— e โœ— a โœ— n โœ— , โœ— โœ— r โœ— u โœ— f โœ— f โœ— l โœ— e โœ— d โœ— โœ— d โœ— r โœ— e โœ— s โœ— s โœ— . โœ— โœ— O โœ— v โœ— e โœ— r โœ— s โœ— t โœ— u โœ— f โœ— f โœ— i โœ— n โœ— g โœ— โœ— t โœ— h โœ— e โœ— โœ— a โœ— r โœ— m โœ— s โœ— โœ— m โœ— a โœ— k โœ— e โœ— s โœ— โœ— t โœ— h โœ— e โœ— m โœ— โœ— s โœ— t โœ— i โœ— f โœ— f โœ— โœ— a โœ— n โœ— d โœ— โœ— u โœ— n โœ— n โœ— a โœ— t โœ— u โœ— r โœ— a โœ— l โœ— โœ— โ€“ โœ— โœ— o โœ— n โœ— l โœ— y โœ— โœ— f โœ— i โœ— l โœ— l โœ— โœ— 2 โœ— / โœ— 3 โœ— โœ— o โœ— f โœ— โœ— e โœ— a โœ— c โœ— h โœ— โœ— a โœ— r โœ— m โœ— โœ— t โœ— o โœ— โœ— m โœ— a โœ— i โœ— n โœ— t โœ— a โœ— i โœ— n โœ— โœ— a โœ— โœ— s โœ— o โœ— f โœ— t โœ— , โœ— โœ— p โœ— o โœ— s โœ— e โœ— a โœ— b โœ— l โœ— e โœ— โœ— q โœ— u โœ— a โœ— l โœ— i โœ— t โœ— y โœ— โœ— t โœ— h โœ— a โœ— t โœ— โœ— l โœ— o โœ— o โœ— k โœ— s โœ— โœ— m โœ— o โœ— r โœ— e โœ— โœ— l โœ— i โœ— f โœ— e โœ— l โœ— i โœ— k โœ— e โœ— .

Lily Bunny Amigurumi Pattern

Create your own adorable Lily Bunny with this charming amigurumi pattern! This sweet white bunny features a beautiful purple ruffled dress that adds a touch of elegance and whimsy. Standing approximately 35 cm tall, Lily Bunny makes a perfect companion for children or a delightful decorative piece for any room. With her soft chenille texture, embroidered facial features, and floppy ears, this bunny is designed to become a cherished friend. The pattern includes detailed instructions for creating the head, body, arms, legs, ears, and a gorgeous ruffled skirt that brings Lily's personality to life.

Intermediate 4-5 Hours

Materials Needed for Lily Bunny Amigurumi Pattern

โ€” Main Fabric

  • 01
    Sport weight chenille yarn in white (Chenille 01)
  • 02
    Sport weight chenille yarn in purple (Chenille 13)
  • 03
    Brown embroidery thread for eyebrows and muzzle
  • 04
    Pink embroidery thread for nose
  • 05
    White thread for head sculpting

โ€” Tools Required

  • 01
    Crochet hook 5mm
  • 02
    Safety eyes 14mm
  • 03
    Polyester fiber fill stuffing
  • 04
    Yarn needle for sewing
  • 05
    Scissors
  • 06
    Stitch markers

Progress Tracker

0% Complete

โ€” Arms :

Info :

Crochet with white yarn. Stuff only 2/3 of the arm

Round 1 :

6 sc into a magic ring (6)

Round 2 :

6 inc (12)

Round 3 :

(3 sc, inc) * 3 (15)

Round 4-5 :

15 sc (2 rounds)

Round 6 :

(3 sc, dec) * 3 (12)

Round 7-14 :

12 sc (8 rounds)

Round 15 :

(4 sc, dec) * 2 (10)

Round 16 :

10 sc

Info :

Fold the arm in half and crochet 5 sc through both sides. Fasten off and cut the yarn, leaving a tail for sewing. Sew the arms two rounds under the beginning of the head

โ€” Legs :

Info :

Crochet with white yarn. Stuff as you go

Round 1 :

7 sc into a magic ring (7)

Round 2 :

7 inc (14)

Round 3 :

(sc, inc) * 7 (21)

Round 4-5 :

21 sc (2 rounds)

Round 6 :

7 sc, 4 dec, 6 sc (17)

Round 7 :

7 sc, 2 dec, 6 sc (15)

Round 8-10 :

15 sc (3 rounds)

Round 11 :

(4 sc, inc) * 3 (18)

Round 12 :

18 sc

Round 13 :

For the left leg: crochet only 14 sc. Fasten off, cut the yarn. For the right leg: 18 sc. Don't cut the yarn, we will continue with the body

โ€” Body :

Round 1 :

Crochet 7 sc on the right leg; make 3 chains; 18 sc on the left leg; 3 sc on the chain; 18 sc on the right leg; 3 sc on the chain; put the marker here (42)

Round 2 :

(6 sc, inc) * 6 (48)

Round 3-6 :

48 sc (4 rounds). Change the yarn to pink color

Round 7 :

48 sc

Round 8 :

back loops only: 48 sc

Round 9 :

(6 sc, dec) * 6 (42)

Round 10-11 :

42 sc (2 rounds)

Round 12 :

(5 sc, dec) * 6 (36)

Round 13-14 :

36 sc (2 rounds)

Round 15 :

(4 sc, dec) * 6 (30)

Round 16-17 :

30 sc (2 rounds)

Round 18 :

(3 sc, dec) * 6 (24)

Round 19 :

24 sc

Round 20 :

(6 sc, dec) * 3 (21)

Info :

Stuff the body firmly, especially in the neck. Cut the pink yarn, we will continue with the head, but first, we need to make the dress

โ€” Skirt :

Info :

Attach the pink yarn to the back of the body in the front loops of round 8. Crochet with the body turned upside down

Round 1 :

(2 dc in one stitch) * 48 (96)

Round 2 :

96 dc. Fasten off, and cut the yarn. Hide the thread inside the body

โ€” Head :

Info :

Change the yarn to white color. Stuff as you go

Round 1 :

21 sc

Round 2 :

21 inc (42)

Round 3 :

(6 sc, inc) * 6 (48)

Round 4 :

(7 sc, inc) * 6 (54)

Round 5-9 :

54 sc (5 rounds). Insert the safety eyes between rounds 8 and 9 with 8 st between them

Round 10 :

(7 sc, dec) * 6 (48)

Round 11-13 :

48 sc (3 rounds)

Round 14 :

(6 sc, dec) * 6 (42)

Round 15 :

42 sc

Round 16 :

(5 sc, dec) * 6 (36)

Round 17 :

(4 sc, dec) * 6 (30)

Round 18 :

(3 sc, dec) * 6 (24)

Round 19 :

(2 sc, dec) * 6 (18)

Round 20 :

(sc, dec) * 6 (12)

Round 21 :

6 dec (6). Make sure that the head is stuffed firmly. Close the opening and hide the yarn inside

Info :

Head sculpting

โ€” Ears :

Info :

Crochet with white yarn

Round 1 :

6 sc into a magic ring (6)

Round 2 :

6 inc (12)

Round 3 :

(sc, inc) * 6 (18)

Round 4 :

(2 sc, inc) * 6 (24)

Round 5-6 :

24 sc (2 rounds)

Round 7 :

(6 sc, dec) * 3 (21)

Round 8 :

(5 sc, dec) * 3 (18)

Round 9 :

(4 sc, dec) * 3 (15)

Round 10-12 :

15 sc (3 rounds). Fasten off and cut the yarn, leaving a tail for sewing. Fold the ear in half and sew the ends together. Sew the ears on the top of the head with 4 stitches between them

Assembly Instructions

  • Sew the arms to the body two rounds below where the head begins, ensuring they are positioned symmetrically on each side
  • Fold each ear in half lengthwise and sew the bottom edges together to create a natural folded shape
  • Attach the ears to the top of the head with 4 stitches of space between them for proper positioning
  • Use brown embroidery thread to create eyebrows above the safety eyes and stitch the muzzle details on the face
  • Embroider a small pink nose in the center of the muzzle area using pink thread
  • Perform head sculpting using white thread to define the cheeks and create facial dimension
  • Weave in all yarn ends securely and trim excess thread for a professional finish

Important Notes

  • ๐Ÿ’กUse stitch markers to track your rounds, especially when working the body and head sections where counting is crucial
  • ๐Ÿ’กStuff the neck area very firmly before beginning the head to prevent wobbling and ensure the bunny stands properly
  • ๐Ÿ’กOnly stuff 2/3 of each arm to maintain a soft, natural drape and poseable quality
  • ๐Ÿ’กInsert safety eyes between rounds 8 and 9 of the head with exactly 8 stitches between them before stuffing completely
  • ๐Ÿ’กWhen attaching the skirt, make sure to work in the front loops only of round 8 for a clean, ruffled appearance
  • ๐Ÿ’กTake time with the embroidered facial features as they give Lily her unique personality and expression

This enchanting Lily Bunny pattern brings together the softness of chenille yarn with the charm of a beautifully dressed amigurumi friend. The elegant purple ruffled dress, worked seamlessly into the body, gives this bunny a touch of sophistication that sets her apart. With embroidered facial details and floppy ears, Lily is designed to become a treasured companion for years to come. Whether gifted to a child or displayed as a handmade decoration, this bunny radiates warmth and personality with every stitch. Happy crocheting and enjoy watching Lily come to life!

You ask,

we answer.

FAQs

What size will my finished Lily Bunny be?

Using the recommended sport weight chenille yarn and a 5mm hook, your finished bunny will stand approximately 35 cm (about 14 inches) tall. The size may vary slightly depending on your tension and how firmly you stuff the toy.

Can I use regular yarn instead of chenille?

Yes, you can substitute regular sport weight yarn, but the finished texture will be different. Chenille creates a uniquely soft, plush feel that regular yarn won't replicate. If using regular yarn, your bunny will be slightly smaller and have a traditional crochet texture rather than the velvety chenille finish.

How do I work the ruffled skirt into the body?

After completing round 8 of the body in back loops only, you'll attach your yarn to the front loops of that same round. Turn the body upside down and work double crochets with increases to create the ruffled effect. This technique creates a seamless, professional-looking dress without separate pieces to sew.

What does 'head sculpting' mean in this pattern?

Head sculpting involves using thread to create indentations and definition in the face, typically to emphasize cheeks or create facial contours. You'll use white thread to make small stitches that pull the fabric slightly inward, giving Lily a more dimensional, expressive face.

Why should I only stuff 2/3 of the arms?

Partial stuffing keeps the arms soft and naturally poseable rather than stiff. This creates a more realistic, huggable quality and allows the arms to drape naturally at Lily's sides instead of sticking out awkwardly.