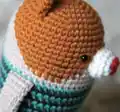
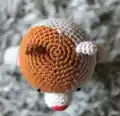
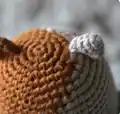
๐Ÿงถ Beautiful โœจ Detailed ๐Ÿ’ Adorable

Mini Cat Amigurumi Pattern

Mini Cat Amigurumi Pattern
4.5โ˜… Rating
4-6 Hours Time Needed
3.0K Made This
โœ‚๏ธ

Beginner Friendly Level

Perfect for those just starting their sewing journey, with clear instructions and simple techniques

โฑ๏ธ

Weekend Treat

Takes 5-7 hours, making it an enjoyable project to finish over a couple of days.

๐Ÿงธ

Cute Companion

An adorable friend to cherish, handcrafted with love to bring comfort and joy for years to come.

About This Mini Cat Amigurumi Pattern

This delightful mini cat pattern combines simplicity with charm, featuring a distinctive striped sweater that gives this feline friend his unique personality. The pattern starts with a magic ring technique and uses continuous rounds to create seamless shaping. Working from the head down through the body and legs, you'll learn essential amigurumi skills while creating an adorable 15cm companion. The color-changing technique for the striped sweater adds visual interest without complexity, making this perfect for beginners ready to try something slightly more advanced.
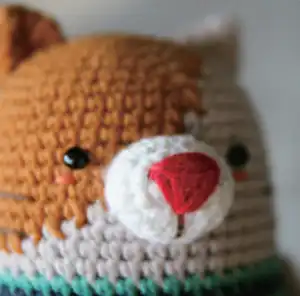
Mini Cat Amigurumi Pattern crochet pattern - detailed view of completed project

Designed with beginner crocheters in mind, this pattern uses only basic single crochet stitches, increases, and decreases. The clear stitch count guidance and detailed assembly instructions ensure your success in creating this charming cat companion.

Why You'll Love This Mini Cat Amigurumi Pattern

I absolutely love this pattern because it perfectly balances simplicity with adorable results! The mini size makes it a quick and satisfying project that you can complete in a weekend, giving you that wonderful sense of accomplishment. I'm particularly drawn to the charming striped sweater detail - it adds such personality without being overwhelming for beginners. The fact that it uses basic stitches means you can focus on perfecting your tension and stitch consistency while still creating something utterly precious. Plus, there's something so heartwarming about watching this little cat come to life as you work through each section, and the final result is so huggable and gift-worthy!

Mini Cat Amigurumi Pattern step 1 - construction progress Mini Cat Amigurumi Pattern step 2 - assembly progress Mini Cat Amigurumi Pattern step 3 - details and accessories Mini Cat Amigurumi Pattern step 4 - final assembly and finishing

Switch Things Up

I love experimenting with different color combinations for this little cat! You could create a calico version using orange, black, and white yarns, or go for a sleek all-black cat with a bright colored sweater. I've also tried making seasonal versions - imagine a Halloween cat in orange and black, or a Christmas cat with red and green stripes! The beauty of this pattern is how adaptable it is to your yarn stash.

For those wanting to add extra personality, consider embroidering different facial expressions or adding small accessories like a tiny bow tie or collar. I've even seen crafters add small bells or create multiple cats in different sizes by adjusting hook sizes. The possibilities are endless, and each variation brings its own unique charm to this already adorable pattern!

Common Mistakes & How to Fix Them

โœ— Forgetting to use stitch markers when changing colors can lead to misaligned stripes in the sweater pattern โœ— Stuffing too firmly in the head area can make it difficult to close the opening neatly โœ— Not maintaining consistent tension can result in uneven shaping, especially noticeable in the rounded head section โœ— Skipping the invisible decrease technique can create visible holes when shaping from body to legs

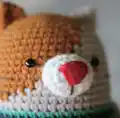
Mini Cat Amigurumi Pattern

Create your own adorable mini cat companion with this beginner-friendly amigurumi pattern! This sweet 15cm (5.9 inches) feline friend features a charming striped sweater in green and navy colors, giving him a cozy winter look. Perfect for cat lovers, this pattern uses simple single crochet stitches and basic amigurumi techniques to create a huggable companion that fits perfectly in your palm. The detailed instructions guide you through creating the head, body, arms, snout, and ears, with clear color-changing instructions for the striped pattern. This mini cat makes an excellent gift for children, a delightful desk companion, or a sweet addition to any amigurumi collection.

Beginner Friendly 4-6 Hours

Materials Needed for Mini Cat Amigurumi Pattern

โ€” Main Fabric

  • 01
    Worsted weight yarn in soft beige (head and arms)
  • 02
    Worsted weight yarn in orange brown (head)
  • 03
    Worsted weight yarn in navy blue (body stripes)
  • 04
    Worsted weight yarn in green (body stripes)
  • 05
    Worsted weight yarn in lime (leg accent)
  • 06
    Small amounts of white yarn (snout)
  • 07
    Small amounts of red yarn (nose)
  • 08
    Small amounts of brown yarn (details)

โ€” Tools Required

  • 01
    Crochet hook size 5/0 (3mm)
  • 02
    Yarn needle for sewing
  • 03
    5mm black plastic safety eyes (2 pieces)
  • 04
    Fiberfill stuffing
  • 05
    Fabric glue for eyes
  • 06
    Stitch markers
  • 07
    Scissors

Progress Tracker

0% Complete

โ€” Head/Body/Legs :

Round 1 :

6 sc in magic ring, tighten the loop [6 sts]

Round 2 :

(2-sc inc) x 6 [12]

Round 3 :

(sc x1, 2-sc inc) x 6 [18]

Round 4 :

(sc x2, 2-sc inc) x 6 [24]

Round 5 :

(sc x3, 2-sc inc) x 6 [30]

Round 6 :

(sc x4, 2-sc inc) x 6 [36]

Round 7 :

(sc x5, 2-sc inc) x 6 [42]

Round 8 :

(sc x6, 2-sc inc) x 6 [48]

Round 9-36 :

sc in all 48 st [48]

Round 37-40 :

sc in all 18 st [18]

Round 41 :

(sc x1, sc2tog) x 6 [12]

Round 42 :

(sc2tog) x 6 [6]

โ€” Arms (Make 2) :

Round 1 :

5 sc in magic ring, tighten the loop [5 sts]

Round 2 :

(2-sc inc) x 5 [10]

Round 3-11 :

sc in all 10 st [10]

โ€” Snout :

Foundation :

Make 4 chains with white yarn

Round 1 :

sc x1 in second ch from hook, sc x1 in next chain, sc x3 in bottom chain, working up other side: sc x1, sc x2 in next chain, slst [8 sts]

Round 2 :

ch 1, 2-sc inc, sc x1, (2-sc inc) x 3, sc x1, (2-sc inc) x 2, slst [14]

Round 3-4 :

ch 1, sc in all 14 st, slst [14]

โ€” Ears (Make 2) :

Round 1 :

3 sc in magic ring, tighten the loop [3 sts]

Round 2 :

(2-sc inc) x 3 [6]

Round 3 :

(sc x1, 2-sc inc) x 3 [9]

Round 4 :

(sc x2, 2-sc inc) x 3 [12]

Assembly Instructions

  • Attach safety eyes between rounds 13-14, separated by approximately 4 stitches
  • Sew the white snout to the face and embroider red nose and mouth details
  • Attach ears between rounds 20-21 on top of the head
  • Sew arms to the body between rounds 20-21, ensuring they're evenly positioned
  • Add small beard details between rounds 15-16 and 17-18 using brown yarn
  • Stuff all pieces firmly but not too tightly before closing openings
  • Weave in all yarn ends securely and trim excess

Important Notes

  • ๐Ÿ’กUse stitch markers to keep track of color changes for the striped pattern
  • ๐Ÿ’กChange yarn colors according to the symbol pattern shown on page 1 of the PDF
  • ๐Ÿ’กFlatten arms and ears before sewing - do not stuff these pieces
  • ๐Ÿ’กPlace safety eyes before stuffing the head completely
  • ๐Ÿ’กUse invisible decrease technique to minimize holes when shaping

This precious Mini Cat pattern brings together classic amigurumi techniques with an irresistibly cute design that's perfect for beginners ready to try color work. The finished 15cm cat with his cozy striped sweater makes an ideal desk companion, gift for cat lovers, or addition to any handmade toy collection. With clear instructions and simple stitches, you'll have this adorable feline friend completed in just a weekend! ๐Ÿงถ Happy crocheting! ๐Ÿฑโœจ

You ask,

we answer.

FAQs

What yarn weight works best for this pattern?

Worsted weight yarn is recommended for the 15cm size. If you prefer a smaller cat, you can use fingering weight yarn with a 3mm hook.

Can I make this pattern without safety eyes?

Absolutely! You can embroider eyes using black yarn or thread instead of using plastic safety eyes.

How do I keep track of the color changes for the stripes?

Use stitch markers and refer to the symbol pattern on page 1 of the pattern. The pattern clearly indicates which rounds use which colors.

Should I stuff the arms and ears?

No, the pattern specifically states to flatten the arms and ears without stuffing them before sewing to the body.