๐Ÿงถ Beautiful โœจ Detailed ๐Ÿ’ Adorable

Mini Milk Cow Amigurumi Pattern

Mini Milk Cow Amigurumi Pattern
4.1โ˜… Rating
4-5 Hours Time Needed
1.7K Made This
โœ‚๏ธ

Beginner Friendly Level

Perfect for those just starting their sewing journey, with clear instructions and simple techniques

โฑ๏ธ

Weekend Treat

Takes 5-7 hours, making it an enjoyable project to finish over a couple of days.

๐Ÿ„

Charming Critter

Delightful animal designs with sweet details that capture the essence of your favorite woodland and farmyard friends.

About This Mini Milk Cow Amigurumi Pattern

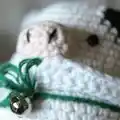
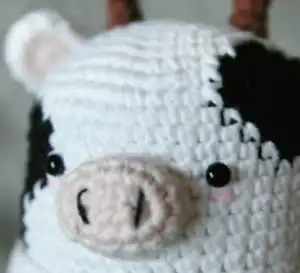
This mini milk cow pattern combines simple crochet techniques with adorable farm charm. The pattern uses basic stitches like single crochet and increases/decreases to create a sturdy 15cm cow with distinctive black and white markings. The design includes thoughtful details like a pink snout, brown horns, and a decorative collar with bell that brings this little cow to life.

Mini Milk Cow Amigurumi Pattern crochet pattern - detailed view of completed project

What makes this pattern special is its beginner-friendly approach while still creating a professional-looking result. The clear symbol patterns and step-by-step instructions ensure success even for newer crocheters.

Why You'll Love This Mini Milk Cow Amigurumi Pattern

I absolutely love how this pattern brings out the sweet personality of a farm cow in miniature form. The combination of classic black and white with the pink snout creates such an endearing expression, and I find the process of watching this little character come together incredibly satisfying. The size is perfect for gift-giving, and the sturdy construction means it will be cherished for years to come.

Mini Milk Cow Amigurumi Pattern step 1 - construction progress Mini Milk Cow Amigurumi Pattern step 2 - assembly progress Mini Milk Cow Amigurumi Pattern step 3 - details and accessories Mini Milk Cow Amigurumi Pattern step 4 - final assembly and finishing

Switch Things Up

I love how versatile this little cow pattern can be with just a few creative tweaks. You could easily change up the color scheme to create different cow breeds - try brown and white for a jersey cow, or even go wild with rainbow colors for a fantasy version. I've experimented with adding different accessories too, like a tiny farmer's hat or a small flower crown for a more whimsical look.

The collar is another great place to get creative - instead of the traditional bell, I've tried adding tiny crocheted flowers, a small bow, or even a miniature name tag. For holidays, you could adapt the colors to match the season, like red and green for Christmas or pastels for spring.

I also love making these in different sizes by adjusting the hook size and yarn weight. A tiny version makes perfect keychains or bag charms, while a larger version using chunky yarn creates an adorable huggable friend. The basic construction is so solid that it adapts beautifully to any size you want to create.

Common Mistakes & How to Fix Them

โœ— Forgetting to change yarn colors according to the symbol pattern - always check the color guide before starting each section โœ— Not stuffing the legs properly before closing - make sure to stuff firmly but not too tightly for proper shape โœ— Misplacing the collar position - it should be sewn at Round 20 with the bell centered on the cow's face โœ— Incorrect eye placement - eyes should be positioned between rounds 13-14 for the most appealing expression

Mini Milk Cow Amigurumi Pattern

Create your own adorable mini milk cow with this delightful amigurumi pattern! This charming little cow stands at 15cm tall and features classic black and white coloring with a sweet pink snout and adorable horns. Perfect for beginners looking to expand their skills, this pattern includes detailed instructions for creating the head, body, legs, arms, snout, horns, collar, and ears. The finished cow makes a wonderful gift or addition to any farm-themed collection.

Beginner Friendly 4-5 Hours

Materials Needed for Mini Milk Cow Amigurumi Pattern

โ€” Main Fabric

  • 01
    Worsted weight yarn in white, light peach, green, light yellow, beige, sky blue, and black colors
  • 02
    Alternatively, fingering weight yarn can be used with a 3mm crochet hook for a smaller version

โ€” Tools Required

  • 01
    Crochet hook 5/0 (3mm)
  • 02
    5mm Black plastic eyes x2
  • 03
    6mm Metal bell
  • 04
    Yarn needle
  • 05
    Stuffing fiberfill
  • 06
    Glue for attaching eyes
  • 07
    Stitch markers
  • 08
    Scissors

Progress Tracker

0% Complete

โ€” Head / Body / Legs :

Round 1 :

sc x6 in the yarn loop, tighten the loop [6 sts]

Round 2 :

(2-sc inc) x 6 [12]

Round 3 :

(sc x1, 2-sc inc) x 6 [18]

Round 4 :

(sc x2, 2-sc inc) x 6 [24]

Round 5 :

(sc x3, 2-sc inc) x 6 [30]

Round 6 :

(sc x4, 2-sc inc) x 6 [36]

Round 7 :

(sc x5, 2-sc inc) x 6 [42]

Round 8 :

(sc x6, 2-sc inc) x 6 [48]

Round 9-19 :

sc in all 48 st [48]

Round 20 :

sctbl in all 48 st [48]

Round 21-36 :

sc in all 48 st [48]

Info :

Divide the legs - identify center space between legs by 6 stitches, each leg has 18 stitches

Round 37-40 :

sc in all 18 st [18]

Round 41 :

(sc x1, sc2tog) x 6 [12]

Round 42 :

(sc2tog) x 6 [6]

โ€” Arms :

Info :

Make 2 pieces

Round 1 :

sc x5 in the yarn loop, tighten the loop [5 sts]

Round 2 :

(2-sc inc) x 5 [10]

Round 3-4 :

sc in all 10 st [10]

Round 5 :

sctbl in all 10 st [10]

Round 6-11 :

sc in all 10 st [10]

โ€” Snout :

Round 1 :

sc x1 in second ch from hook, sc x2 in next chain, sc x3 in bottom chain, working up other side - sc x2, sc x2 in next chain, slst [10 sts]

Round 2 :

ch 1, sc x4, 3-sc inc, sc x4, 3-sc inc, slst [14]

Round 3-4 :

ch 1, sc in all 14 st, slst [14]

โ€” Horns :

Info :

Make 2 pieces

Round 1 :

sc x4 in the yarn loop, tighten the loop [4 sts]

Round 2 :

sc in all 4 st [4]

Round 3 :

2-sc inc, sc x3 [5]

Round 4 :

2-sc inc, sc x4 [6]

โ€” Collar :

Round 1 :

sc x1 in second ch from hook, sc x47 [48 sts]

Round 2 :

ch 3, turn, dc2tog in second & third st, hdc, sc x40, hdc, dc3tog [48]

โ€” Ears :

Info :

Make 2 light peach and 2 white ears

Round 1 :

sc x6 in the yarn loop, tighten the loop [6 sts]

Round 2 :

(2-sc inc) x 6 [12]

Round 3 :

Edging - locate light peach ear on white ear, then sc together with white yarn [12]

Assembly Instructions

  • Attach the snout to the face between rounds 13-14, filling with light stuffing before securing
  • Position and glue the 5mm black plastic eyes between rounds 13-14, separated by appropriate spacing
  • Sew the horns to the top of the head using the dark brown yarn tails
  • Attach the ears to the sides of the head between rounds 14-15 for optimal positioning
  • Sew the arms to the body between rounds 20-21, ensuring they are evenly placed
  • Attach the collar around round 20, centering it on the front of the cow's face and sewing 6 stitches to each side
  • Hang the metal bell on green yarn and tie it to the collar as a decorative element

Important Notes

  • ๐Ÿ’กUse stitch markers to track your rounds, especially when changing yarn colors according to the symbol patterns
  • ๐Ÿ’กStuff all parts firmly but not too tightly to maintain proper shape and proportions
  • ๐Ÿ’กChange yarn colors as indicated in the symbol patterns - this is crucial for the cow's distinctive markings
  • ๐Ÿ’กPin all parts in place before final sewing to ensure correct positioning and symmetry
  • ๐Ÿ’กThe collar should be positioned carefully at round 20 with the bell centered for best appearance

This adorable Mini Milk Cow pattern captures all the charm of a barnyard friend in a perfectly huggable 15cm size. The combination of classic farm colors with sweet details like the pink snout and jingling bell collar creates a character that's both nostalgic and irresistibly cute. Whether you're making it as a gift for a little one or adding to your own collection, this little cow is sure to bring smiles and countryside charm wherever it goes. The beginner-friendly instructions make it accessible while still delivering professional results that you'll be proud to display.

You ask,

we answer.

FAQs

Can I use different yarn weights for this pattern?

Yes! The pattern is written for worsted weight yarn with a 3mm hook, but you can use fingering weight yarn with the same hook size for a smaller version, or adjust hook size accordingly for other yarn weights.

How do I change colors according to the symbol pattern?

Follow the color chart provided - white for the head and main body, black for the cow patches, light peach for the snout, sky blue and light yellow for the leg sections. Change colors as indicated in each round.

What if I can't find plastic safety eyes?

You can embroider the eyes using black yarn or felt, or substitute with similar-sized safety eyes in black. Just ensure they're securely attached, especially if making this for young children.

How should I position the cow's markings?

The black patches should be worked according to the symbol pattern provided. The pattern shows specific placement for the characteristic cow spots on the head and body areas.

Can I make this cow without the bell collar?

Absolutely! The collar can be made without the bell, or you can skip the collar entirely for a simpler version. The bell adds a nice touch but isn't essential to the overall design.