About This Mini Parrot Amigurumi Pattern
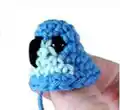
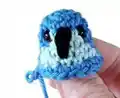
This mini parrot pattern is designed to be simple yet satisfying, perfect for crafters who want quick results without sacrificing quality. The pattern works from top to bottom, creating a seamless body with integrated color changes that form the parrot's distinctive markings. With clear round-by-round instructions and helpful visual references, you'll find this project flows smoothly from start to finish.

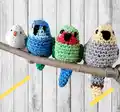
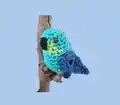
The finished parrots are incredibly versatile - attach them to branches with hot glue for charming home decor, transform them into keychains for practical accessories, or simply display them as a colorful flock of handmade treasures.
Why You'll Love This Mini Parrot Amigurumi Pattern
I absolutely love how quickly these little parrots come together! There's something so satisfying about watching the color changes create the parrot's natural markings without any complicated sewing. I appreciate that the pattern uses minimal materials and the results are always adorable, no matter which color combination you choose. The small size makes them perfect for using up yarn scraps, and I find myself making multiple parrots in one sitting because they're so enjoyable to create. Best of all, the minimal assembly means you can finish a complete bird in one relaxed crafting session.
Switch Things Up
I love how versatile this mini parrot pattern truly is! While the original design features beautiful turquoise, blue, and green color combinations, I find myself constantly experimenting with different parrot species color palettes. Try creating a bright red and blue macaw, a sunny yellow and green parakeet, or even a classic grey and white cockatiel by simply switching your yarn colors.
The tail is another area where I get creative - sometimes I make it longer and more dramatic by adding extra rounds, or I'll incorporate striped patterns using multiple colors for a tropical vibe. I've even made tiny lovebird pairs by working the pattern in softer pinks and peaches.
For unique gifts, I attach them to branches collected from nature walks and create charming desktop displays. They also make fantastic bag charms when you add a lobster clasp to the top. During the holidays, I've transformed them into ornaments by adding a loop of metallic thread. The possibilities are endless, and each variation brings its own personality to life!
Common Mistakes & How to Fix Them
✗ Not using a stitch marker can cause you to lose track of rounds, especially during color changes - always mark your first stitch
✗ Pulling color changes too tightly creates puckering on the body - keep tension even and gentle when switching yarn colors
✗ Forgetting to stuff the body before closing rounds 15-16 makes it difficult to achieve proper shaping - stuff gradually as you go
✗ Embroidering the beak too large overwhelms the tiny face - keep it small and triangular with just three simple stitches