🧢 Beautiful ✨ Detailed πŸ’ Adorable

Ollie the Giraffe Amigurumi Pattern

Ollie the Giraffe Amigurumi Pattern
4.6β˜… Rating
8-10 Hours Time Needed
1.2K Made This
βœ‚οΈ

Intermediate Level

Ideal for those with basic knitting experience, featuring slightly more advanced stitches and techniques to expand your skills.

⏱️

All-Day Adventure

Requires 8-10 hours, ideal for a full day of immersive knitting.

🧸

Cute Companion

An adorable friend to cherish, handcrafted with love to bring comfort and joy for years to come.

About This Ollie the Giraffe Amigurumi Pattern

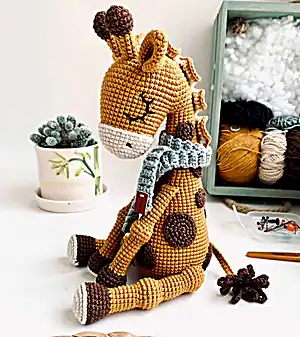
This delightful Ollie the Giraffe pattern combines classic amigurumi techniques with charming details that bring this gentle giant to life. With his distinctive long neck, spotted coat, and adorable accessories like a cozy scarf, Ollie is designed to be both cuddly and durable. The pattern includes detailed instructions for creating realistic proportions and features that capture the essence of this beloved African animal in miniature form.

Ollie the Giraffe Amigurumi Pattern crochet pattern - detailed view of completed project

Each component is carefully crafted to ensure Ollie has the perfect giraffe silhouette, from his elegant neck to his sturdy legs. The combination of colors creates a warm, inviting appearance that appeals to crafters and gift recipients alike.

Why You'll Love This Ollie the Giraffe Amigurumi Pattern

I absolutely love how this pattern captures the gentle, friendly nature of giraffes in such a huggable form! The way Ollie's long neck curves gracefully and his sweet embroidered expression comes together makes every stitch worthwhile. I find the color combination of mustard yellow with brown spots incredibly soothing and natural-looking, while the little turquoise scarf adds just the right touch of whimsy that makes him extra special.

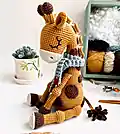
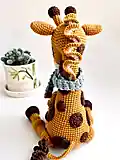
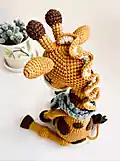
Ollie the Giraffe Amigurumi Pattern step 1 - construction progress Ollie the Giraffe Amigurumi Pattern step 2 - assembly progress Ollie the Giraffe Amigurumi Pattern step 3 - details and accessories Ollie the Giraffe Amigurumi Pattern step 4 - final assembly and finishing

Switch Things Up

I love how versatile this giraffe pattern can be with just a few creative modifications! You could easily change up the color scheme to create a fantasy giraffe in pastels or bright rainbow colors instead of the traditional mustard and brown. I've experimented with adding different textured stitches to the spots for a more dimensional look, or even making some spots in sparkly yarn for a magical touch.

The scarf is another perfect place to get creative - try making it in seasonal colors, adding stripes, or even crocheting a tiny pattern like hearts or stars. I've also made versions where I've added small pockets to the scarf or even a little bell that jingles softly. For a more advanced touch, you could create jointed limbs using button joints or cotter pins to make Ollie fully poseable.

The mane offers wonderful opportunities too - try making it longer and more flowing, or add different colors in ombre effect. I've even seen beautiful versions where crafters added small flowers or beads woven into the mane for extra charm!

Common Mistakes & How to Fix Them

βœ— Forgetting to stuff the neck gradually as you work can cause sagging and poor shape retention βœ— Placing spots randomly without considering leg attachment areas makes assembly more difficult later βœ— Not maintaining consistent tension when changing colors can create visible gaps in the pattern βœ— Skipping stitch markers during complex shaping rounds leads to miscounted stitches and uneven proportions

Ollie the Giraffe Amigurumi Pattern

Create your own adorable Ollie the Giraffe with this detailed amigurumi pattern! This charming long-necked friend features beautiful mustard yellow coloring with brown spots, a cute milky white muzzle, and a cozy turquoise scarf. Perfect for gifting or adding to your handmade toy collection, Ollie brings warmth and personality to any space with his sweet expression and huggable design.

Intermediate 8-10 Hours

Materials Needed for Ollie the Giraffe Amigurumi Pattern

β€” Main Fabric

  • 01
    Sport weight/4ply yarn YarnArt Jeans in mustard color (code 84) - main color
  • 02
    Sport weight/4ply yarn YarnArt Jeans in brown color (code 70) - for spots, horns, hooves and tail
  • 03
    Sport weight/4ply yarn YarnArt Jeans in milky color (code 86) - for muzzle, mane and hooves
  • 04
    Sport weight/4ply yarn YarnArt Jeans in turquoise color (code 81) - for scarf
  • 05
    Black yarn or DK cotton embroidery floss threads for eyes, mouth and nose

β€” Tools Required

  • 01
    Crochet hook size 2.0 mm
  • 02
    Yarn needle for embroidery and sewing pieces
  • 03
    Fiberfill or synthetic toy filling
  • 04
    Stitch marker for marking stitches
  • 05
    Scissors

Progress Tracker

0% Complete

β€” Head :

Rnd 1 :

6 sc in MR [6]

Rnd 2 :

6 inc [12]

Rnd 3 :

(1 sc, 1 inc)*6 [18]

Rnd 4 :

(2 sc, 1 inc)*6 [24]

Rnd 5 :

(3 sc, 1 inc)*6 [30]

Rnd 6 :

(4 sc, 1 inc)*6 [36]

Rnd 7 :

(5 sc, 1 inc)*6 [42]

Rnd 8 :

(6 sc, 1 inc)*6 [48]

Rnd 9 :

48 sc [48]

Rnd 10 :

(7 sc, 1 inc)*6 [54]

Rnd 11 :

54 sc [54]

Rnd 12 :

(8 sc, 1 inc)*6 [60]

Rnd 13 :

60 sc [60]

Rnd 14 :

28 sc, (1 dec, 8 sc)*3, 2 sc [57]

Rnd 15 :

57 sc [57]

Info :

Next, ch5, skip 15 sc and start from the next stitch in a spiral

Rnd 16 :

6 sc, 1 dec, 10 sc, 1 dec, 14 sc, 1 dec, 6 sc, 5 sc on the chain [44]

Info :

For convenience, move the round beginning (marker) into the last sc on the chain

Rnd 17 :

44 sc [44]

Rnd 18 :

41 sc, 1 dec, 1 sc [43]

Rnd 19 :

43 sc [43]

Rnd 20 :

2 sc, 1 dec, 15 sc, 1 dec, 14 sc, 1 dec, 6 sc [40]

Rnds 21-22 :

40 sc [40]

Rnd 23 :

(6 sc, 1 dec)*5 [35]

Rnds 24-25 :

35 sc [35]

Rnd 26 :

(5 sc, 1 dec)*5 [30]

Rnd 27 :

30 sc [30]

Rnd 28 :

(3 sc, 1 dec)*6 [24]

Rnd 29 :

(2 sc, 1 dec)*6 [18]

Rnd 30 :

(1 sc, 1 dec)*6 [12]

Rnd 31 :

6 dec [6], stuff the head tightly with fiberfill. Cut the yarn, tighten the hole and fasten off

β€” Neck :

Info :

Now take the head and crochet the neck on it (where the hole is left). Attach the mustard yarn and crochet in a spiral

Rnd 1 :

15 sc, 5 sc on the chain [20]

Rnd 2 :

17 sc, 1 dec, 1 sc [19]

Rnds 3-4 :

19 sc [19]

Rnd 5 :

17 sc, 1 inc, 1 sc [20]

Rnds 6-9 :

20 sc [20]

Rnd 10 :

18 sc, 1 inc, 1 sc [21]

Rnds 11-13 :

21 sc [21]

Rnd 14 :

1 sc, 1 inc, 15 sc, 1 inc, 3 sc [23]

Rnds 15-17 :

23 sc [23]

Rnd 18 :

3 sc, 1 inc, 14 sc, 1 inc, 3 sc, 1 inc [26]

Rnds 19-21 :

26 sc [26]

Rnd 22 :

5 sc, 1 inc, 13 sc, 1 inc, 5 sc, 1 inc [29]

Rnds 23-24 :

29 sc [29]

Info :

Stuff the neck tightly and gradually in the process with fiberfill

Rnd 25 :

4 sc, 1 inc, 18 sc, 1 inc, 4 sc, 1 inc [32]

Rnds 26-27 :

32 sc [32]

Rnd 28 :

1 inc, 2 sc, 1 inc, 22 sc, 1 inc, 2 sc, 1 inc, 2 sc [36]

Rnds 29-30 :

36 sc [36]

Rnd 31 :

1 sc, 1 inc, 30 sc, 1 inc, 3 sc [38]

Rnds 32-33 :

38 sc [38]

Rnd 34 :

(1 sc, 1 inc)*3, 26 sc, (1 sc, 1 inc)*3 [44]

Rnd 35 :

44 sc [44]

Info :

Stuff the neck, but do not cut the yarn. Since the giraffe neck is conditional and it smoothly passes into the body

β€” Body :

Rnd 36 :

13 sc, (1 inc, 3 sc)*4, 15 sc [48]

Rnd 37 :

(2 sc, 1 inc)*3, 30 sc, (2 sc, 1 inc)*3 [54]

Rnd 38 :

54 sc [54]

Rnd 39 :

(8 sc, 1 inc)*6 [60]

Rnd 40 :

60 sc [60]

Rnd 41 :

(3 sc, 1 inc)*3, 36 sc, (3 sc, 1 inc)*3 [66]

Rnds 42-46 :

66 sc [66]

Rnd 47 :

(20 sc, 1 dec)*3 [63]

Rnds 48-49 :

63 sc [63]

Info :

Stuff the body tightly and gradually in the process with fiberfill

Rnd 50 :

(19 sc, 1 dec)*3 [60]

Rnd 51 :

60 sc [60]

Rnd 52 :

(13 sc, 1 dec)*4 [56]

Rnd 53 :

56 sc [56]

Rnd 54 :

(6 sc, 1 dec)*7 [49]

Rnd 55 :

(5 sc, 1 dec)*7 [42]

Rnd 56 :

(4 sc, 1 dec)*7 [35]

Rnd 57 :

(3 sc, 1 dec)*7 [28]

Rnd 58 :

(2 sc, 1 dec)*7 [21]

Rnd 59 :

(1 sc, 1 dec)*7 [14]

Rnd 60 :

7 dec [7]

Info :

Stuff the body, tighten the hole, fasten off and cut the yarn

β€” Muzzle :

Info :

Crochet in milky color

Rnd 1 :

6 sc in MR [6]

Rnd 2 :

6 inc [12]

Rnd 3 :

(1 sc, 1 inc)*6 [18]

Rnd 4 :

(2 sc, 1 inc)*6 [24]

Rnd 5 :

(3 sc, 1 inc)*6 [30]

Rnd 6 :

(9 sc, 1 inc)*3 [33]

Rnd 7 :

4 sc, (1 inc, 10 sc)*2,1 inc, 6 sc [36]

Rnd 8 :

36 sc [36]

Rnd 9 :

(8 sc, 1 inc)*4 [40]

Rnd 10 :

40 sc [40], sl st, cut the yarn, leaving a long tail for sewing pieces

β€” Ears (2 pieces) :

Info :

Crochet in mustard color

Rnd 1 :

5 sc in MR [5]

Rnd 2 :

5 inc [10]

Rnd 3 :

10 sc [10]

Rnd 4 :

(1 sc, 1 inc)*5 [15]

Rnds 5-6 :

15 sc [15]

Rnd 7 :

(2 sc, 1 inc)*5 [20]

Rnds 8-9 :

20 sc [20]

Rnd 10 :

(3 sc, 1 inc)*5 [25]

Rnd 11 :

25 sc [25]

Rnd 12 :

(3 sc, 1 dec)*5 [20]

Rnd 13 :

10 dec [10]

Info :

Fasten off with sl st, cut the yarn, leaving a long tail for sewing pieces. Fold the ear in half and make several stitches with a needle to secure it in this position

β€” Scarf :

Info :

Ch5, from the second chain

Row 1 :

4 sc, ch1 (turn) [4]

Rows 2-101 :

4 sc, ch1 (turn) [4] (through back loops; 100 rows)

Info :

Fasten off and cut the yarn

β€” Horns (2 pieces) :

Info :

Start in brown color

Rnd 1 :

6 sc in MR [6]

Rnd 2 :

6 inc [12]

Rnd 3 :

(1 sc, 1 inc)*6 [18]

Rnds 4-5 :

18 sc [18]

Rnd 6 :

9 dec [9]

Info :

Change color to mustard

Rnds 7-11 :

9 sc [9]

Info :

Fasten off with sl st, cut the yarn, leaving a long tail for sewing pieces

β€” Spots :

Info :

Crochet all spots in brown color

Small (5 pcs.) :

Rnd 1: 7 sc in MR [7] Rnd 2: 7 inc [14], sl st, cut the yarn, leaving a long tail for sewing pieces

Medium (5 pcs.) :

Rnd 1: 7 sc in MR [7] Rnd 2: 7 inc [14] Rnd 3: (1 sc, 1 inc)*7 [21], sl st, cut the yarn, leaving a long tail for sewing pieces

Large (5 pcs.) :

Rnd 1: 7 sc in MR [7] Rnd 2: 7 inc [14] Rnd 3: (1 sc, 1 inc)*7 [21] Rnd 4: (2 sc, 1 inc)*7 [28], sl st, cut the yarn, leaving a long tail for sewing pieces

β€” Legs (4 pieces) :

Info :

Start in milky color

Rnd 1 :

7 sc in MR [7]

Rnd 2 :

7 inc [14]

Rnd 3 :

(1 sc, 1 inc)*7 [21]

Rnd 4 :

(2 sc, 1 inc)*7 [28]

Info :

Change color to brown

Rnd 5 :

28 BPslst (from the wrong side) [28]

Rnd 6 :

28 sc (through sl st of the previous round) [28]

Rnd 7 :

(2 sc, 1 dec)*7 [21]

Rnds 8-10 :

21 sc [21]

Rnd 11 :

(1 sc, 1 dec)*7 [14]

Info :

Change color to mustard

Rnds 12-18 :

14 sc [14]

Rnd 19 :

(5 sc, 1 dec)*2 [12]

Rnd 20 :

(1 sc, 1 inc)*6 [18]

Rnd 21 :

(2 sc, 1 inc)*6 [24]

Rnds 22-23 :

24 sc [24]

Rnd 24 :

(2 sc, 1 dec)*6 [18]

Rnd 25 :

(1 sc, 1 dec)*6 [12]

Rnd 26 :

(5 sc, 1 inc)*2 [14]

Rnds 27-33 :

14 sc [14]

Info :

Stuff the leg tightly and gradually around the hoof and knee. For the rest - do not overdo so that the leg is flexible, but at the same time keeps its shape

Rnd 34 :

(2 sc, 1 inc)*4, 2 sc [18]

Rnd 35 :

(2 sc, 1 inc)*6 [24]

Rnds 36-37 :

24 sc [24]

Rnd 38 :

(2 sc, 1 dec)*6 [18]

Rnd 39 :

18 sc [18]

Rnd 40 :

(1 sc, 1 dec)*6 [12]

Rnd 41 :

6 dec [6], sl st, cut the yarn. Tighten the hole and fasten off. Leave the yarn tail for sewing pieces

β€” Arms (2 pieces) :

Info :

Start in milky color

Rnd 1 :

7 sc in MR [7]

Rnd 2 :

7 inc [14]

Rnd 3 :

(1 sc, 1 inc)*7 [21]

Info :

Change color to brown

Rnd 4 :

21 BPslst (from the wrong side) [21]

Rnd 5 :

21 sc (through sl st of the previous round) [21]

Rnd 6 :

21 sc [21]

Rnd 7 :

(5 sc, 1 dec)*3 [18]

Rnd 8 :

18 sc [18]

Rnd 9 :

(1 sc, 1 dec)*6 [12]

Info :

Change color to mustard

Rnd 10 :

(4 sc, 1 dec)*2 [10]

Rnds 11-20 :

10 sc [10]

Rnd 21 :

(1 sc, 1 inc)*5 [15]

Rnd 22 :

(2 sc, 1 inc)*5 [20]

Rnd 23 :

20 sc [20]

Rnd 24 :

(2 sc, 1 dec)*5 [15]

Rnd 25 :

(1 sc, 1 dec)*5 [10]

Rnds 26-36 :

10 sc [10]

Info :

Stuff the arm tightly around the hoof and lightly along the entire length so that it holds its shape but remains flexible. Finally, crochet 5 sc through both sides, fasten off and cut the yarn, leaving a long tail for sewing pieces

β€” Mane :

Info :

Start in mustard color. Ch31, from the second chain on the hook

Row 1 :

30 sc, ch1 (turn) [30]

Info :

Change color to milky

Row 2 :

(3 sc inc)*30, ch1 (turn) [90]

Info :

Change color to mustard

Row 3 :

90 sc [90], cut the yarn, leaving a long tail for sewing pieces

β€” Tail :

Info :

Crochet the base of the tail in mustard color

Base :

Ch17 (leave the yarn tail 10 cm long for sewing). From the second chain on the hook: 1 inc, 15 sc. The base of the tail is ready!

Info :

Crochet the brush in brown color

Brush :

Start in MR: (1 sc, ch15)*10

Info :

Pull the ring at the end, cut the yarn, leaving a long tail for sewing. Now you should sew the brush to the base of the tail. Fasten off, cut the yarn

Assembly Instructions

  • Put the muzzle on the bottom of the head and sew along the perimeter, then embroider nostrils and mouth with black yarn
  • Place the horns on the crown between rounds 5 and 8 of the head symmetrically relative to the amigurumi ring
  • Sew the ears 3 sc below the horns, symmetrically on both sides of the head
  • Sew the mane through the first round starting from the crown between the horns and continue down the middle of the neck
  • Embroider eyes using black yarn or insert plastic safety eyes as desired
  • Sew spots all over the body randomly, starting with large spots at the bottom and middle, then medium, and finally small spots
  • Sew the arms at the level of round 25 of the neck in front, at a distance of 3 sc from each other
  • Sew the legs between rounds 48 and 54 of the body on the sides in a circle of the inner thigh
  • Sew the tail between rounds 44 and 45 of the body in the back in the middle

Important Notes

  • πŸ’‘Use stitch markers to keep track of your rounds, especially during the long neck construction
  • πŸ’‘Stuff the neck tightly and gradually as you work to maintain proper shape and prevent sagging
  • πŸ’‘Do not sew spots in the places where legs will be attached to avoid complications during assembly
  • πŸ’‘Keep consistent tension when changing colors to prevent visible gaps in the color transitions
  • πŸ’‘Stuff legs firmly around hooves and knees but keep the middle sections flexible for natural posing
  • πŸ’‘Pin all pieces in place before final sewing to ensure proper positioning and proportions

This charming Ollie the Giraffe pattern brings together all the beloved characteristics of these gentle giants in an adorable, huggable form. With his graceful long neck, distinctive spotted pattern, and sweet accessories, Ollie is designed to capture hearts and become a treasured companion. The detailed instructions guide you through creating realistic proportions while maintaining that special handmade charm that makes amigurumi so special. πŸ¦’ Happy crocheting! 🧢✨

You ask,

we answer.

FAQs

What yarn weight works best for this pattern?

Sport weight/4ply yarn is recommended, but you can use any yarn weight as long as all colors are the same weight and you adjust your hook size accordingly.

How do I prevent the long neck from becoming floppy?

Stuff the neck tightly and gradually as you work each round. The key is consistent, firm stuffing throughout the neck construction process.

Can I make Ollie smaller or larger?

Yes! Use a smaller hook and thinner yarn for a mini version, or a larger hook and thicker yarn for a bigger giraffe. Just ensure all materials are proportionally sized.

What's the best way to attach the spots?

Sew spots randomly starting with large ones at the bottom and middle of the body, then add medium and small spots. Avoid areas where legs will be attached.

Should I use safety eyes or embroider the eyes?

Both options work well! Safety eyes give a professional look, while embroidered eyes are safer for young children and add a handmade charm.

How do I make the legs stable but poseable?

Stuff firmly around the hooves and knee areas, but stuff the middle sections more lightly to maintain flexibility while keeping the shape.