🧢 Beautiful ✨ Detailed πŸ’ Adorable

Starfish Crochet Pattern

Starfish Crochet Pattern
4.6β˜… Rating
1-2 Hours Time Needed
3.4K Made This
βœ‚οΈ

Beginner Friendly Level

Perfect for those just starting their sewing journey, with clear instructions and simple techniques

⏱️

Bite-Sized Project

Complete in under 2 hoursβ€”quick, fun, and perfect for a little creative escape.

🌊

Cozy Accent

A warm touch for your space that transforms ordinary corners into inviting nooks filled with handmade charm.

About This Starfish Crochet Pattern

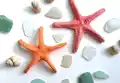
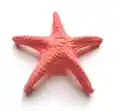
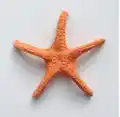
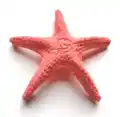
This delightful starfish pattern offers two distinct variations to suit your decorating needs. The thin starfish creates an elegant, delicate appearance perfect for lightweight displays, while the large starfish provides a bold statement piece with more substantial presence. Both versions use the same fundamental technique of creating five pointed arms from a central magic ring, then adding layers of single crochet and slip stitches to build dimension and texture.

Starfish Crochet Pattern crochet pattern - detailed view of completed project

The unique shaping process transforms your flat crochet work into realistic three-dimensional starfish using a simple glue and water mixture. This technique allows you to position and hold the arms in natural, lifelike poses that maintain their shape permanently.

Why You'll Love This Starfish Crochet Pattern

I absolutely love how this pattern bridges the gap between simple crochet techniques and impressive results. You'll find yourself amazed at how basic stitches can create such realistic ocean creatures that look like they were plucked straight from a tide pool. The instant gratification of completing these beautiful pieces in just an hour or two makes them perfect for quick gifts or spontaneous crafting sessions when you need a creative boost.

Starfish Crochet Pattern step 1 - construction progress Starfish Crochet Pattern step 2 - assembly progress Starfish Crochet Pattern step 3 - details and accessories Starfish Crochet Pattern step 4 - final assembly and finishing

Switch Things Up

I love experimenting with different finishing techniques to make each starfish unique and personal. You can add watercolor paints or diluted acrylics to create gradient effects that mimic real starfish coloring, or brush on subtle highlights with metallic paints for an elegant shimmer.

For extra sparkle, I sometimes sprinkle fine glitter over the wet glue mixture before shaping, then seal it with a light coat of varnish once dry. Seed beads hand-stitched onto the surface before the gluing process add beautiful texture and catch the light wonderfully.

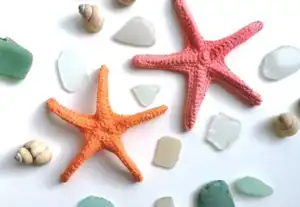
I've also found that using different yarn colors creates stunning effects - try coral, orange, purple, or even variegated yarns for rainbow starfish. Some of my favorite variations include working with metallic threads held together with the cotton yarn for subtle sparkle throughout the entire piece.

Common Mistakes & How to Fix Them

βœ— Forgetting to maintain tight tension throughout - loose stitches will result in floppy starfish that won't hold their shape well βœ— Skipping the stitch markers when working rounds - this leads to uneven arm placement and wonky starfish proportions βœ— Using too much glue mixture during shaping - excess glue creates stiff, unnatural-looking results and takes much longer to dry βœ— Not squeezing out enough excess glue-water mixture before shaping - this causes dripping and uneven stiffening across the starfish

Starfish Crochet Pattern

Create stunning ocean-inspired starfish decorations with this versatile crochet pattern. Perfect for bringing coastal charm to your home decor, these realistic starfish can be made in two sizes - thin and large - and shaped to look authentically three-dimensional. The pattern includes detailed shaping techniques using a simple glue-water mixture that transforms flat crochet work into beautiful, structured starfish that hold their shape perfectly.

Beginner Friendly 1-2 Hours

Materials Needed for Starfish Crochet Pattern

β€” Main Fabric

  • 01
    100% cotton yarn (125m per 50g weight)
  • 02
    Madame Tricote 'Camilla' recommended, or similar brands like Kartopu 'Organica', Anchor 'Creativa Fino', or Schachenmayr 'Catania'

β€” Tools Required

  • 01
    Crochet hook 1.5mm (or smallest comfortable size)
  • 02
    Scissors
  • 03
    Needle for weaving in ends
  • 04
    White glue
  • 05
    Water
  • 06
    Rubber gloves (optional)
  • 07
    Towel for drying
  • 08
    Stitch markers (recommended)

Progress Tracker

0% Complete

β€” Thin Starfish :

Round 1 :

5 sc in a magic ring (5)

Round 2 :

2 sc in each st (10)

Round 3 :

* ch 15, sl st in 2nd ch from hook, sl st in next, sc in next 3 sts, hdc in next 4 sts, dc in last 5 sts; skip next sc of rnd 2 and sl st in next; repeat from * 4 more times

Round 4 :

sc in each st all around skipping only last and first sts of each arm

Round 5 :

sl st in each st all around

Info :

Fasten off and weave in yarn ends

β€” Large Starfish :

Round 1 :

5 sc in a magic ring (5)

Round 2 :

2 sc in each st (10)

Round 3 :

* ch 15, sl st in 2nd ch from hook, sl st in next, sc in next 3 sts, hdc in next 4 sts, dc in last 5 sts; skip next sc of rnd 2 and sl st in next; repeat from *4 more times

Round 4 :

sc in each st all around skipping only last and first sts of each arm

Round 5 :

sc in each st all around

Round 6 :

sl st in each st all around

Info :

Fasten off and weave in yarn ends

β€” Shaping Process :

Step 1 :

In a cup mix 2 parts of water with 1 part of glue

Step 2 :

Immerse the crocheted starfish into the glue and water mixture until it's fully wet

Step 3 :

Carefully squeeze out excess glue-water mix

Step 4 :

Start shaping by gently pulling at legs and pinching them slightly together

Step 5 :

Continue until satisfied with shape, then leave to dry on a towel

Assembly Instructions

  • No assembly required - each starfish is worked as a single piece
  • Shape the starfish while wet with glue mixture for best results
  • For thin starfish, use the 'wrong' side of crochet as the outside for texture variation
  • For large starfish, use the 'right' side of crochet as the outside for smoother appearance

Important Notes

  • πŸ’‘Use a smaller crochet hook than recommended on yarn label for tighter, more structured stitches
  • πŸ’‘Place stitch markers at the beginning of each round to maintain even arm placement
  • πŸ’‘Wear rubber gloves when working with glue mixture if you have sensitive skin
  • πŸ’‘Allow starfish to dry completely on a towel before handling - drying time varies by humidity
  • πŸ’‘For softer results without stiffening, shape with water only and let air dry

These charming starfish bring the magic of ocean treasures into your home with surprisingly simple techniques. Whether you choose the delicate thin version or the bold large starfish, you'll love how quickly these coastal beauties come together. The innovative shaping method transforms basic crochet into realistic three-dimensional art pieces that capture the wonder of seaside discoveries. Perfect for adding nautical charm to any space or creating thoughtful handmade gifts! 🌊✨

You ask,

we answer.

FAQs

Can I make these starfish without the glue shaping process?

Absolutely! You can skip the glue mixture and simply wet the starfish with water, shape it, and let it air dry. This creates a softer, more flexible result while still helping it hold some shape.

What's the difference between the thin and large starfish patterns?

The large starfish has one additional round (Round 5) of single crochet which makes it fuller and more substantial, while the thin starfish goes directly from Round 4 to the slip stitch finish for a more delicate appearance.

Can I use different yarn weights for this pattern?

While the pattern is designed for cotton yarn with 125m per 50g, you can experiment with other weights. Just adjust your hook size accordingly and remember that different yarns will create different finished sizes.

How do I know which side to use as the 'right' side?

The pattern recommends using the 'wrong' side (back) for thin starfish and 'right' side (front) for large starfish. Choose whichever side has the texture and appearance you prefer for your project.