Create your own peaceful meditation companion with this adorable Yogi Girl amigurumi pattern. Perfect for yoga enthusiasts and mindfulness lovers, this serene figure sits in a lotus position with her hands in prayer pose. The calming blue yoga outfit and topknot hairstyle make this a wonderful gift for anyone seeking inner peace. Detailed instructions guide you through every step to create this zen-inspired amigurumi that brings tranquility to any space.
Progress Tracker
0% Complete
— Arms :
Round 2 :
*1 SC, 1 INC* repeat 3 times (9)
Rounds 3-6 :
4 rounds/ 9 SC
Round 7 :
*1 SC, 1 DEC* repeat 3 times (6)
Round 8 :
*1 SC, 1 INC* repeat 3 times (9)
Round 9 :
*2 SC, 1 INC* repeat 3 times (12)
Rounds 10-29 :
20 rounds/ 12 SC
Info :
Fasten off in invisible way. Crochet second arm in the same way. Don't stuff
— Body :
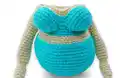
Breast :
Blue yarn. Round 1: 6 SC in MR
Round 3 :
*1 SC, 1 INC* repeat 6 times (18)
Round 4 :
*1 SC, 1 INC, 1 SC* repeat 6 times (24)
Info :
Fasten off in invisible way. Crochet second detail in the same way
Round 3 :
*1 SC, 1 INC* repeat 6 times (18)
Round 4 :
*1 SC, 1 INC, 1 SC* repeat 6 times (24)
Round 5 :
*3 SC, 1 INC* repeat 6 times (30)
Round 6 :
*2 SC, 1 INC, 2 SC* repeat 6 times (36)
Round 7 :
*5 SC, 1 INC* repeat 6 times (42)
Round 8 :
*3 SC, 1 INC, 3 SC* repeat 6 times (48)
Round 9 :
*7 SC, 1 INC* repeat 6 times (54)
Round 10 :
*4 SC, 1 INC, 4 SC* repeat 6 times (60)
Rounds 11-17 :
7 rounds/ 60 SC
Round 18 :
*9 SC, 1 DEC, 9 SC* repeat 3 times (57)
Round 19 :
*17 SC, 1 DEC* repeat 3 times (54)
Round 20 :
*8 SC, 1 DEC, 8 SC* repeat 3 times (51)
Round 21 :
Change color to beige. BLO *15 SC, 1 DEC* repeat 3 times (48)
Round 22 :
*7 SC, 1 DEC, 7 SC* repeat 3 times (45)
Round 23 :
*13 SC, 1 DEC* repeat 3 times (42)
Round 24 :
Change color to blue. BLO *6 SC, 1 DEC, 6 SC* repeat 3 times (39)
Round 25 :
*11 SC, 1 DEC* repeat 3 times (36)
Round 26 :
10 SC, attach breast pieces and crochet together with body for 8 stitches, 2 SC on body, attach second breast and crochet together 8 SC, 8 SC on body (36)
Round 27 :
10 SC, continue crocheting along remaining 16 stitches of breast, 2 SC on body, 16 SC on second breast, 8 SC on body (52)
Round 30 :
14 SC, *1 DEC, 2 SC* repeat 2 times, 1 DEC, 8 SC, *1 DEC, 2 SC* repeat 2 times, 1 DEC, 10 SC (46)
Round 31 :
Change color to beige. BLO 11 SC, 2 DEC, *1 DEC, 1 SC* repeat 3 times, 2 SC, *1 DEC, 1 SC* repeat 3 times, 2 DEC, 7 SC (36)
Round 32 :
6 SC, attach arm in closing stitch, 8 SC on arm, skip 4 stitches on body, 19 SC on body, attach second arm, 8 SC on arm, skip 4 stitches on body, 3 SC on body (44)
Round 35 :
6 SC, 4 DEC, 19 SC, 4 DEC, 3 SC (36)
Info :
Insert wire into arms and stuff body and arms
Round 36 :
*2 SC, 1 DEC, 2 SC* repeat 6 times (30)
Round 37 :
*3 SC, 1 DEC* repeat 6 times (24)
Round 38 :
*1 SC, 1 DEC, 1 SC* repeat 6 times (18)
Round 39 :
*1 SC, 1 DEC* repeat 6 times (12)
Info :
Fasten off invisibly, stuff, bend arms and sew hands together
— Legs :
Knee Round 1 :
Blue yarn. 6 SC in MR
Round 3 :
*1 SC, 1 INC* repeat 6 times (18)
Round 4 :
*1 SC, 1 INC, 1 SC* repeat 6 times (24)
Round 5 :
*3 SC, 1 INC* repeat 6 times (30)
Info :
Fasten off invisibly. Crochet second detail in same way
Leg Round 1 :
Beige yarn. 6 SC in MR
Round 5 :
*1 SC, 1 INC* repeat 3 times (9)
Round 6 :
Change to blue. BLO *1 SC, 1 INC, 1 SC* repeat 3 times (12)
Round 9 :
*3 SC, 1 INC* repeat 3 times (15)
Round 12 :
*2 SC, 1 INC, 2 SC* repeat 3 times (18)
Round 15 :
*5 SC, 1 INC* repeat 3 times (21)
Round 18 :
*3 SC, 1 INC, 3 SC* repeat 3 times (24)
Round 21 :
*7 SC, 1 INC* repeat 3 times (27)
Round 24 :
*4 SC, 1 INC, 4 SC* repeat 3 times (30)
Round 27 :
7 SC, attach knee piece and crochet together 15 stitches, 8 SC on leg (30)
Round 28 :
7 SC, continue crocheting along remaining 15 stitches of knee, 8 SC on leg (30)
Rounds 29-33 :
5 rounds/ 30 SC
Round 34 :
10 SC, fold in half and crochet 14 SC grabbing both parts
Info :
Cut yarn, leave long end for sewing. Crochet second leg same way. Sew legs to body and sew legs together in lotus position
— Head :
Round 1 :
Beige yarn. 6 SC in MR
Round 3 :
BLO *1 SC, 1 INC* repeat 6 times (18)
Round 4 :
*1 SC, 1 INC, 1 SC* repeat 6 times (24)
Round 5 :
*3 SC, 1 INC* repeat 6 times (30)
Round 6 :
*2 SC, 1 INC, 2 SC* repeat 6 times (36)
Rounds 7-13 :
7 rounds/ 36 SC
Round 14 :
*4 SC, 1 DEC* repeat 6 times (30)
Round 15 :
*3 SC, 1 DEC* repeat 6 times (24)
Round 16 :
*2 SC, 1 DEC* repeat 6 times (18)
Round 17 :
*1 SC, 1 DEC* repeat 6 times (12)
Hair Round 1 :
Brown yarn. 6 SC in MR
Round 3 :
*1 SC, 1 INC* repeat 6 times (18)
Round 4 :
BLO *1 SC, 1 INC, 1 SC* repeat 6 times (24)
Round 5 :
*3 SC, 1 INC* repeat 6 times (30)
Round 6 :
*2 SC, 1 INC, 2 SC* repeat 6 times (36)
Rounds 7-11 :
5 rounds/ 36 SC
Round 12 :
10 SC, 2 HDC, 2 INC DC, 1 HDC, 1 SS, 1 HDC, 2 INC DC, 2 HDC, 16 SC (40)
Topknot Round 1 :
Brown yarn. 6 SC in MR
Round 3 :
*1 SC, 1 INC* repeat 6 times (18)
Round 4 :
*1 SC, 1 INC, 1 SC* repeat 6 times (24)
Round 7 :
*1 SC, 1 DEC, 1 SC* repeat 6 times (18)
Info :
Stuff topknot. Sew hair to head, sew topknot to 4th round of hair. Embroider eyes with black thread between 9th and 10th rounds. Sew head to body
This serene Yogi Girl amigurumi pattern brings mindfulness and meditation into your crafting journey. With her peaceful expression and lotus sitting position, she embodies the tranquility of yoga practice while showcasing beautiful crochet techniques. The detailed instructions make this an achievable project that results in a meaningful companion for any meditation space. 🧶 Namaste and happy crocheting! ✨🕯️